Using an AWS AppSync API with the AWS CDK
Tip
Before you use the CDK, we recommend reviewing the CDK's official documentation along with AWS AppSync's CDK reference.
We also recommend ensuring that your AWS CLI
and NPM
In this section, we're going to create a simple CDK application that can add and fetch items from a DynamoDB table. This is meant to be a quickstart example using some of the code from the Designing your schema, Attaching a data source, and Configuring resolvers (JavaScript) sections.
Setting up a CDK project
Warning
These steps may not be completely accurate depending on your environment. We're assuming your system has the necessary utilities installed, a way to interface with AWS services, and proper configurations in place.
The first step is installing the AWS CDK. In your CLI, you can enter the following command:
npm install -g aws-cdk
Next, you need to create a project directory, then navigate to it. An example set of commands to create and navigate to a directory is:
mkdir example-cdk-app
cd example-cdk-app
Next, you need to create an app. Our service primarily uses TypeScript. In your project directory, enter the following command:
cdk init app --language typescript
When you do this, a CDK app along with its initialization files will be installed:

Your project structure may look like this:
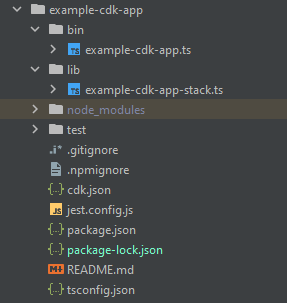
You'll notice we have several important directories:
-
bin: The initial bin file will create the app. We won't touch this in this guide. -
lib: The lib directory contains your stack files. You can think of stack files as individual units of execution. Constructs will be inside our stack files. Basically, these are resources for a service that will be spun up in CloudFormation when the app is deployed. This is where most of our coding will happen. -
node_modules: This directory is created by NPM and contains all package dependencies you installed using thenpmcommand.
Our initial stack file may contain something like this:
import * as cdk from 'aws-cdk-lib';
import { Construct } from 'constructs';
// import * as sqs from 'aws-cdk-lib/aws-sqs';

export class ExampleCdkAppStack extends cdk.Stack {
  constructor(scope: Construct, id: string, props?: cdk.StackProps) {
    super(scope, id, props);

    // The code that defines your stack goes here

    // example resource
    // const queue = new sqs.Queue(this, 'ExampleCdkAppQueue', {
    //   visibilityTimeout: cdk.Duration.seconds(300)
    // });
  }
}
This is the boilerplate code to create a stack in our app. Most of our code in this example will go inside the scope of this class.
To verify that your stack file is in the app, in your app's directory, run the following command in the terminal:
cdk ls
A list of your stacks should appear. If it doesn't, then you may need to run through the steps again or check the official documentation for help.
If you want to build your code changes before deploying, you can always run the following command in the terminal:
npm run build
And, to see the changes before deploying:
cdk diff
Before we add our code to the stack file, we're going to perform a bootstrap. Bootstrapping allows us to provision resources for the CDK before the app deploys. More information about this process can be found here. To create a bootstrap, the command is:
cdk bootstrap aws://ACCOUNT-NUMBER/REGION
Tip
This step requires several IAM permissions in your account. Your bootstrap will be denied if you don't have them. If this happens, you may have to delete incomplete resources caused by the bootstrap such as the S3 bucket it generates.
Bootstrap will spin up several resources. The final message will look like this:

This is done once per account per Region, so you won't have to do this often. The main resources of the bootstrap are the CloudFormation stack and the Amazon S3 bucket.
The Amazon S3 bucket is used to store files and IAM roles that grant permissions needed to perform
deployments. The required resources are defined in an CloudFormation stack, called the bootstrap stack, which is
usually named CDKToolkit. Like any CloudFormation stack, it appears in the CloudFormation console once it has
been deployed:

The same can be said for the bucket:

To import the services we need in our stack file, we can use the following command:
npm install aws-cdk-lib # V2 command
Tip
If you're having trouble with V2, you could install the individual libraries using V1 commands:
npm install @aws-cdk/aws-appsync @aws-cdk/aws-dynamodb
We don't recommend this because V1 has been deprecated.
Implementing a CDK project - Schema
We can now start implementing our code. First, we must create our schema. You can simply create a
.graphql file in your app:
mkdir schema
touch schema.graphql
In our example, we included a top-level directory called schema containing our
schema.graphql:

Inside our schema, let's include a simple example:
input CreatePostInput {
    title: String
    content: String
}

type Post {
    id: ID!
    title: String
    content: String
}

type Mutation {
    createPost(input: CreatePostInput!): Post
}

type Query {
    getPost: [Post]
}
Back in our stack file, we need to make sure the following import directives are defined:
import * as cdk from 'aws-cdk-lib';
import * as appsync from 'aws-cdk-lib/aws-appsync';
import * as dynamodb from 'aws-cdk-lib/aws-dynamodb';
import { Construct } from 'constructs';
Inside the class, we'll add code to make our GraphQL API and connect it to our schema.graphql
file:
export class ExampleCdkAppStack extends cdk.Stack {
  constructor(scope: Construct, id: string, props?: cdk.StackProps) {
    super(scope, id, props);

    // makes a GraphQL API
    const api = new appsync.GraphqlApi(this, 'post-apis', {
      name: 'api-to-process-posts',
      schema: appsync.SchemaFile.fromAsset('schema/schema.graphql'),
    });
  }
}
We'll also add some code to print out the GraphQL URL, API key, and Region:
export class ExampleCdkAppStack extends cdk.Stack {
  constructor(scope: Construct, id: string, props?: cdk.StackProps) {
    super(scope, id, props);

    // Makes a GraphQL API construct
    const api = new appsync.GraphqlApi(this, 'post-apis', {
      name: 'api-to-process-posts',
      schema: appsync.SchemaFile.fromAsset('schema/schema.graphql'),
    });

    // Prints out URL
    new cdk.CfnOutput(this, "GraphQLAPIURL", {
      value: api.graphqlUrl
    });

    // Prints out the AppSync GraphQL API key to the terminal
    new cdk.CfnOutput(this, "GraphQLAPIKey", {
      value: api.apiKey || ''
    });

    // Prints out the stack region to the terminal
    new cdk.CfnOutput(this, "Stack Region", {
      value: this.region
    });
  }
}
At this point, we'll use deploy our app again:
cdk deploy
This is the result:

It appears our example was successful, but let's check the AWS AppSync console just to confirm:

It appears our API was created. Now, we'll check the schema attached to the API:

This appears to match up with our schema code, so it was successful. Another way to confirm this from a metadata viewpoint is to look at the CloudFormation stack:

When we deploy our CDK app, it goes through CloudFormation to spin up resources like the bootstrap. Each stack
within our app maps 1:1 with an CloudFormation stack. If you go back to the stack code, the stack name was grabbed
from the class name ExampleCdkAppStack. You can see the resources it created, which also match
our naming conventions in our GraphQL API construct:

Implementing a CDK project - Data source
Next, we need to add our data source. Our example will use a DynamoDB table. Inside the stack class, we'll add some code to create a new table:
export class ExampleCdkAppStack extends cdk.Stack {
  constructor(scope: Construct, id: string, props?: cdk.StackProps) {
    super(scope, id, props);

    // Makes a GraphQL API construct
    const api = new appsync.GraphqlApi(this, 'post-apis', {
      name: 'api-to-process-posts',
      schema: appsync.SchemaFile.fromAsset('schema/schema.graphql'),
    });

    //creates a DDB table
    const add_ddb_table = new dynamodb.Table(this, 'posts-table', {
      partitionKey: {
        name: 'id',
        type: dynamodb.AttributeType.STRING,
      },
    });

    // Prints out URL
    new cdk.CfnOutput(this, "GraphQLAPIURL", {
      value: api.graphqlUrl
    });

    // Prints out the AppSync GraphQL API key to the terminal
    new cdk.CfnOutput(this, "GraphQLAPIKey", {
      value: api.apiKey || ''
    });

    // Prints out the stack region to the terminal
    new cdk.CfnOutput(this, "Stack Region", {
      value: this.region
    });
  }
}
At this point, let's deploy again:
cdk deploy
We should check the DynamoDB console for our new table:

Our stack name is correct, and the table name matches our code. If we check our CloudFormation stack again, we'll now see the new table:

Implementing a CDK project - Resolver
This example will use two resolvers: one to query the table and one to add to it. Since we're using pipeline resolvers, we'll need to declare two pipeline resolvers with one function in each. In the query, we'll add the following code:
export class ExampleCdkAppStack extends cdk.Stack {
  constructor(scope: Construct, id: string, props?: cdk.StackProps) {
    super(scope, id, props);

    // Makes a GraphQL API construct
    const api = new appsync.GraphqlApi(this, 'post-apis', {
      name: 'api-to-process-posts',
      schema: appsync.SchemaFile.fromAsset('schema/schema.graphql'),
    });

    //creates a DDB table
    const add_ddb_table = new dynamodb.Table(this, 'posts-table', {
      partitionKey: {
        name: 'id',
        type: dynamodb.AttributeType.STRING,
      },
    });

    // Creates a function for query
    const add_func = new appsync.AppsyncFunction(this, 'func-get-post', {
      name: 'get_posts_func_1',
      api,
      dataSource: api.addDynamoDbDataSource('table-for-posts', add_ddb_table),
      code: appsync.Code.fromInline(`
          export function request(ctx) {
          return { operation: 'Scan' };
          }

          export function response(ctx) {
          return ctx.result.items;
          }
  `),
      runtime: appsync.FunctionRuntime.JS_1_0_0,
    });

    // Creates a function for mutation
    const add_func_2 = new appsync.AppsyncFunction(this, 'func-add-post', {
      name: 'add_posts_func_1',
      api,
      dataSource: api.addDynamoDbDataSource('table-for-posts-2', add_ddb_table),
      code: appsync.Code.fromInline(`
          export function request(ctx) {
            return {
            operation: 'PutItem',
            key: util.dynamodb.toMapValues({id: util.autoId()}),
            attributeValues: util.dynamodb.toMapValues(ctx.args.input),
            };
          }

          export function response(ctx) {
            return ctx.result;
          }
      `),
      runtime: appsync.FunctionRuntime.JS_1_0_0,
    });

    // Adds a pipeline resolver with the get function
    new appsync.Resolver(this, 'pipeline-resolver-get-posts', {
      api,
      typeName: 'Query',
      fieldName: 'getPost',
      code: appsync.Code.fromInline(`
          export function request(ctx) {
          return {};
          }

          export function response(ctx) {
          return ctx.prev.result;
          }
  `),
      runtime: appsync.FunctionRuntime.JS_1_0_0,
      pipelineConfig: [add_func],
    });

    // Adds a pipeline resolver with the create function
    new appsync.Resolver(this, 'pipeline-resolver-create-posts', {
      api,
      typeName: 'Mutation',
      fieldName: 'createPost',
      code: appsync.Code.fromInline(`
          export function request(ctx) {
          return {};
          }

          export function response(ctx) {
          return ctx.prev.result;
          }
  `),
      runtime: appsync.FunctionRuntime.JS_1_0_0,
      pipelineConfig: [add_func_2],
    });

    // Prints out URL
    new cdk.CfnOutput(this, "GraphQLAPIURL", {
      value: api.graphqlUrl
    });

    // Prints out the AppSync GraphQL API key to the terminal
    new cdk.CfnOutput(this, "GraphQLAPIKey", {
      value: api.apiKey || ''
    });

    // Prints out the stack region to the terminal
    new cdk.CfnOutput(this, "Stack Region", {
      value: this.region
    });
  }
}
In this snippet, we added a pipeline resolver called pipeline-resolver-create-posts with a
function called func-add-post attached to it. This is the code that will add Posts
to the table. The other pipeline resolver was called pipeline-resolver-get-posts with a
function called func-get-post that retrieves Posts added to the table.
We'll deploy this to add it to the AWS AppSync service:
cdk deploy
Let's check the AWS AppSync console to see if they were attached to our GraphQL API:

It appears to be correct. In the code, both of these resolvers were attached to the GraphQL API we made
(denoted by the api props value present in both the resolvers and functions). In the GraphQL
API, the fields we attached our resolvers to were also specified in the props (defined by the
typename and fieldname props in each resolver).
Let's see if the content of the resolvers is correct starting with the
pipeline-resolver-get-posts:

The before and after handlers match our code props value. We can also see that a function
called add_posts_func_1, which matches the name of the function we attached in the
resolver.
Let's look at the code content of that function:

This matches up with the code props of the add_posts_func_1 function. Our query
was successfully uploaded, so let's check on the query:

These also match the code. If we look at get_posts_func_1:

Everything appears to be in place. To confirm this from a metadata perspective, we can check our stack in CloudFormation again:

Now, we need to test this code by performing some requests.
Implementing a CDK project - Requests
To test our app in the AWS AppSync console, we made one query and one mutation:

MyMutation contains a createPost operation with the arguments
1970-01-01T12:30:00.000Z and first post. It returns the date and
title that we passed in as well as the automatically generated id value.
Running the mutation yields the result:
{
  "data": {
    "createPost": {
      "date": "1970-01-01T12:30:00.000Z",
      "id": "4dc1c2dd-0aa3-4055-9eca-7c140062ada2",
      "title": "first post"
    }
  }
}
If we check the DynamoDB table quickly, we can see our entry in the table when we scan it:

Back in the AWS AppSync console, if we run the query to retrieve this Post, we get the following
result:
{
  "data": {
    "getPost": [
      {
        "id": "9f62c4dd-49d5-48d5-b835-143284c72fe0",
        "date": "1970-01-01T12:30:00.000Z",
        "title": "first post"
      }
    ]
  }
}
