Uploading files for the first time
You can use the AWS Supply Chain Auto-association feature to upload your raw data and automatically associate your raw data with AWS Supply Chain data model. You can also view the required columns and tables for each AWS Supply Chain module within the AWS Supply Chain web application.
For a brief demonstration of how auto-association works, watch the following video:
Note
You can only upload CSV files to Amazon S3 when you are using Auto-association.
After the source columns from your dataset are associated with the destination columns, AWS Supply Chain will automatically generate the SQL recipe.
Note
AWS Supply Chain uses Amazon Bedrock for Auto-association, which it's not supported in all the &AWS Regions that AWS Supply Chain is available in. Hence, AWS Supply Chain will call Amazon Bedrock endpoint from the closest available region, Europe (Ireland) Region – Europe (Frankfurt) and Asia Pacific (Sydney) Region – US West (Oregon).
Note
Auto-association using the Large Language Models (LLM) is only supported when data is ingested through Amazon S3.
-
On the AWS Supply Chain dashboard, on the left navigation pane, choose Data Lake and then choose the Data Ingestion tab.
The Data Ingestion page appears.
Choose Add New Source.
The Select your data source page appears.
On the Select your data source page, choose Upload files.
Choose Continue.

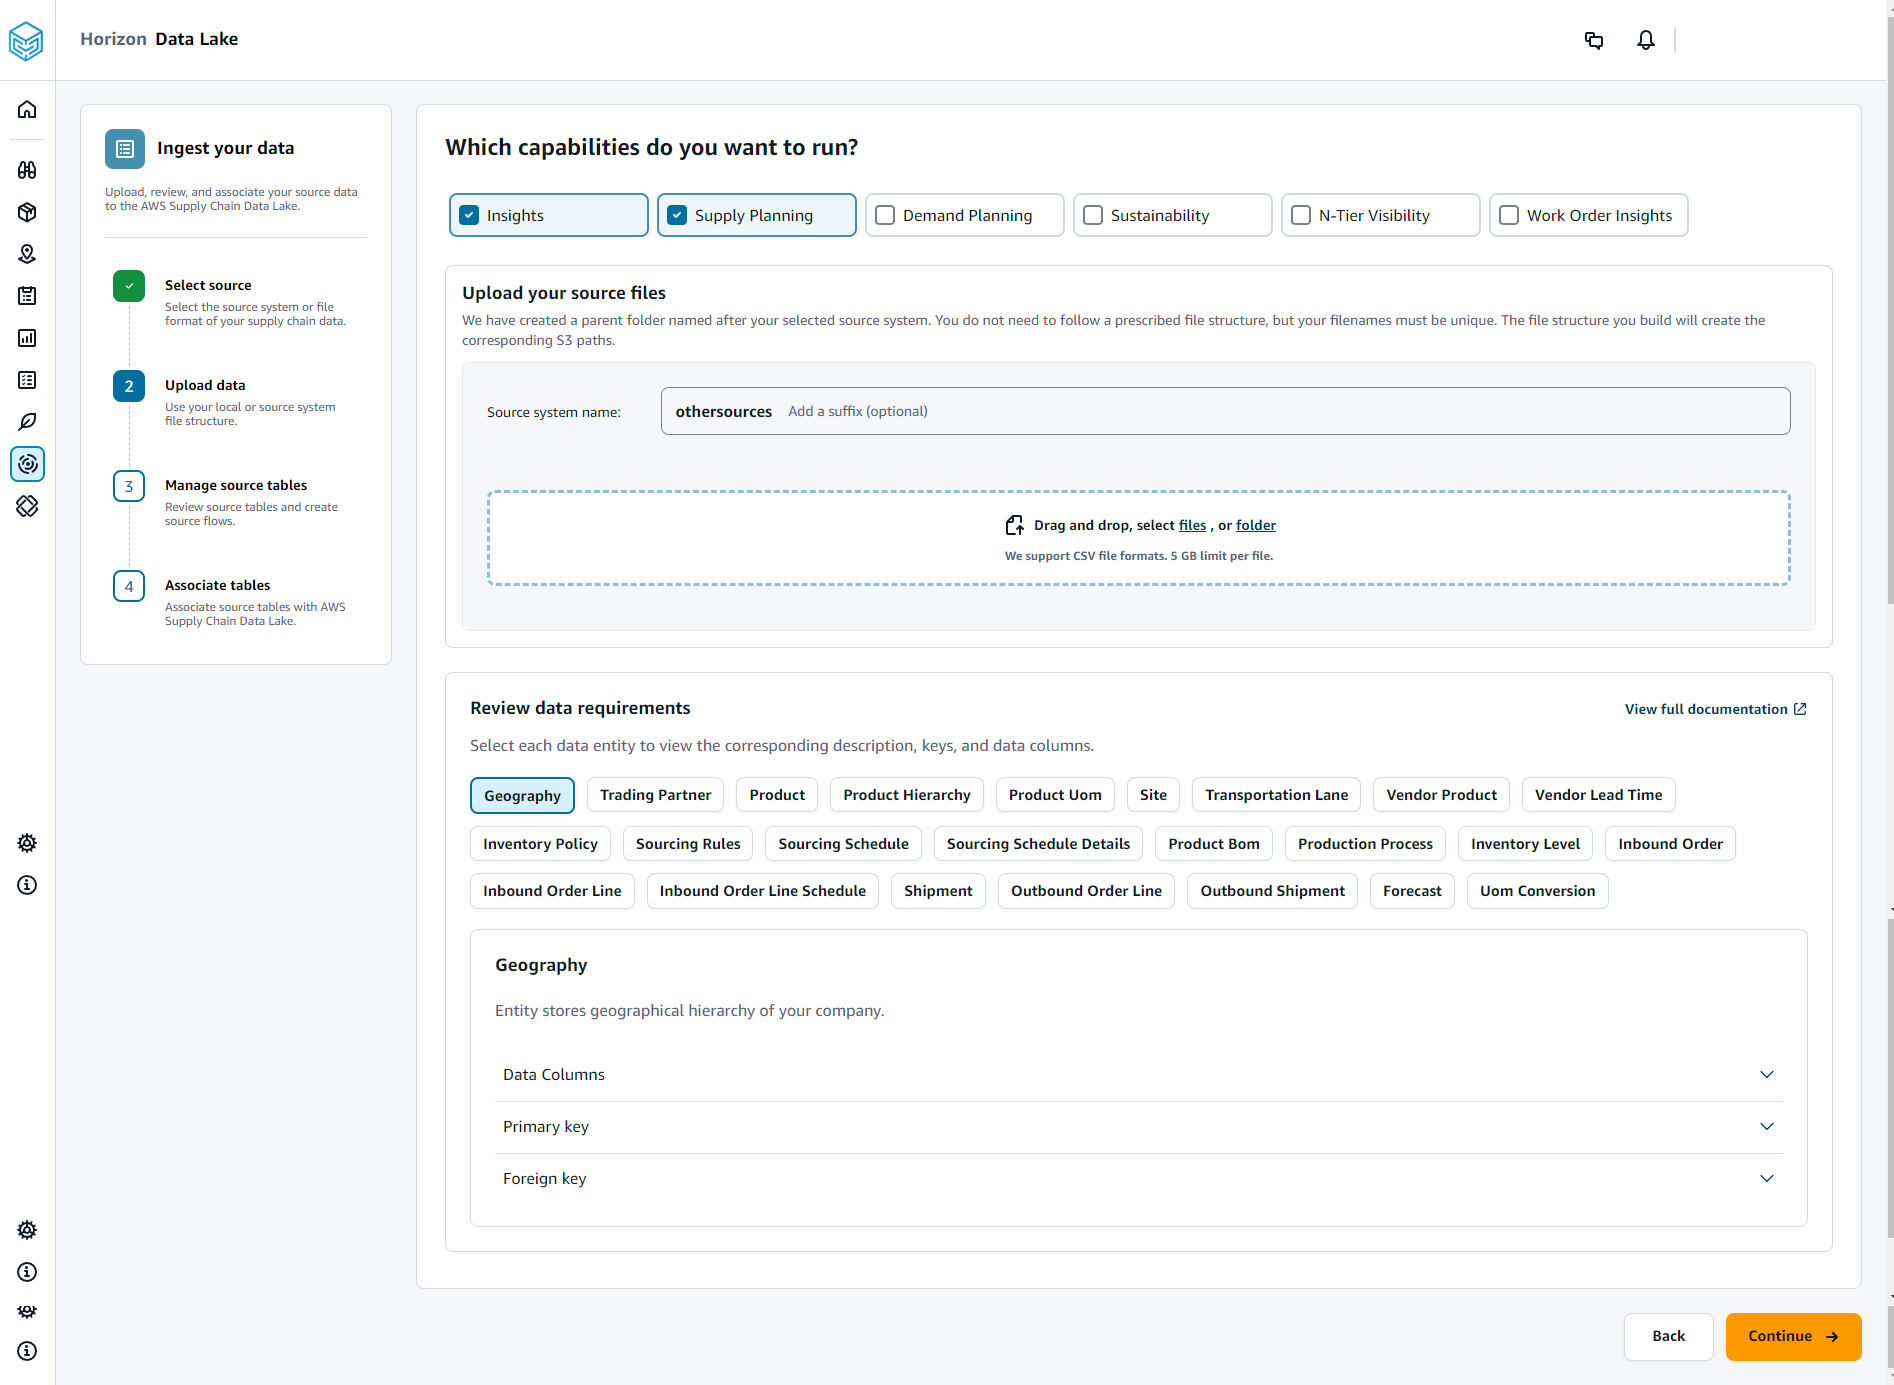
On the Which capabilities do you want to run page, choose the AWS Supply Chain modules that you want to use. You can choose more than one module.
Under Upload your source files section, add a suffix to the Source system name. For example, oracle_test.
To upload your source dataset, choose files or drag and drop files.
The source tables with the name and status are displayed.
Choose Upload to S3. The upload status will change to display the status.
Under Review data requirements, review all the required data entities and columns for the selected AWS Supply Chain feature. All of the required primary and foreign keys are displayed.
Choose Continue.
Under Manage your source tables, the following source tables and the columns listed will be auto associated and imported into data lake.
Choose Delete table to delete any of the source tables before importing into data lake.

Choose Accept all and Continue.
A message on auto-associating your tables to AWS Supply Chain data lake is displayed.

Under Manage Destination Flows, you can review each auto-associated table.
By default, Auto-Association is enabled and the source columns are auto-associated with the destination columns. To update the auto-associated columns, you can update the SQL recipe to create your custom recipe.
Under Source Columns, all of the unassociated source columns are listed. Drag and drop the unassociated columns to the Destination Columns on the right.
Follow the preceding step for each auto-associated table.
Choose Submit.
Choose Exit and Review Destination Flows.