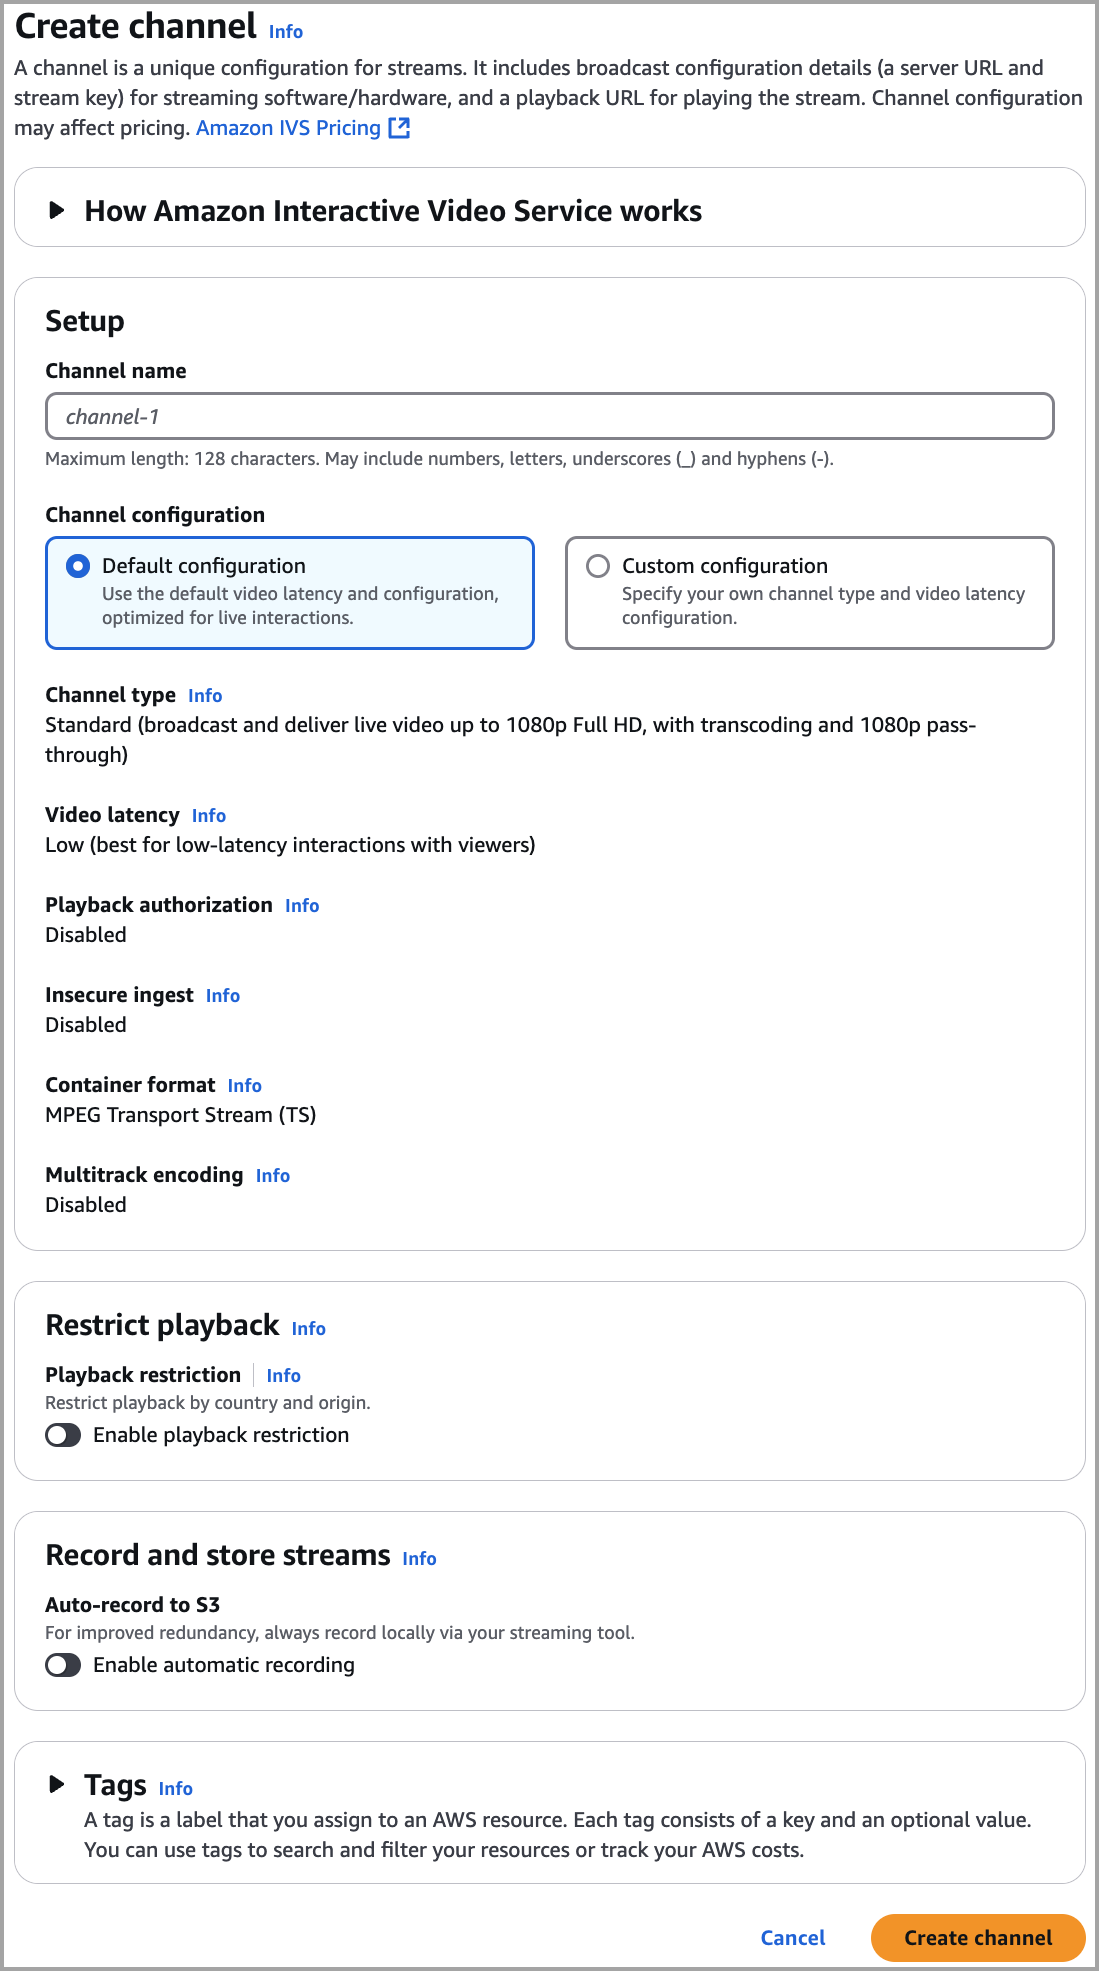
Console Instructions for Creating an IVS Channel
These steps are divided into three phases: initial channel setup, set up to auto-record to Amazon S3 (optional), and final channel creation.
Initial Channel Setup
-
Open the Amazon IVS console
. (You can also access the Amazon IVS console through the AWS Management Console
.) -
From the navigation bar, use the Select a Region drop-down to choose a region. Your new channel will be created in this region.
-
In the Get started box (top right), choose Create Channel.
-
Under Channel configuration, accept the Default configuration. Optionally, specify a Channel name. Channel names are not unique, but they provide a way for you to distinguish channels other than the channel ARN (Amazon Resource Name).
Note: Custom configuration can be used for specifying certain non-default values, such as channel type or RTMP (instead of RTMPS) ingest. Custom specifications are not documented here.

-
If you want to auto-record to Amazon S3, continue with Set Up to Auto-Record to Amazon S3 (Optional) below. Otherwise, skip that and proceed directly to Final Channel Creation.
Set Up to Auto-Record to Amazon S3 (Optional)
Follow these steps to enable recording while creating a new channel:
-
On the Create channel page, under Record and store streams, turn on Enable automatic recording. Additional fields display, to choose an existing Recording configuration or create a new one.

-
Choose Create recording configuration. A new window opens, with options for creating an Amazon S3 bucket and attaching it to the new recording configuration.

-
Fill out the fields:
-
Optionally enter a Recording configuration name.
-
Under Recording configuration accept the Default configuration. Note: Custom configuration can be used for specifying certain non-default values such as recorded renditions or merge fragmented streams. Custom specifications are not documented here.
-
Enter a Bucket name.
-
-
Choose Create recording configuration, to create a new recording-configuration resource with a unique ARN. Typically, creation of the recording configuration takes a few seconds, but it can be up to 20 seconds. When the recording configuration is created, you are returned to the Create channel window. There, the Record and store streams area shows your new Recording configuration, with its State as Active and the S3 bucket (Storage) that you created.

Final Channel Creation
-
At the bottom of the Create channel window, choose Create channel, to create a new channel with a unique ARN. To see channel details, expand Details. (Note: if you did not enable recording, Auto-record to S3 is set to Disabled and there is no Recording configuration section on the screen.)

-
Important:
-
In the Stream configuration area, note the Ingest server and Stream key. You will use these in the next step, to set up streaming.
-
In the Playback configuration area, note the Playback URL. You will use it later, to play back your stream.
-
Note: To see SRT values (endpoint and passphrase), expand Other ingest options in the Stream configuration area.