Add blogs as subdomains to your WordPress Multisite on Lightsail
A WordPress Multisite instance in Amazon Lightsail is designed to use multiple domains, or
subdomains, for each blog site that you create within that instance. In this guide, we’ll show
you how to add a blog site as a subdomain of your WordPress Multisite instance. For example, if
your main blog’s primary domain is example.com, you can create new blog sites that
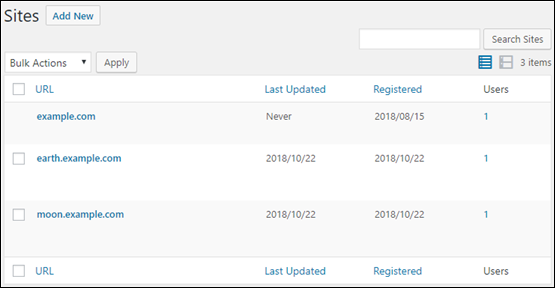
use the earth.example.com and moon.example.com subdomains on the same
instance.
Note
You can also add sites using domains to your WordPress Multisite instance. For more information, see Add blogs as domains to your WordPress Multisite instance .
Prerequisites
Complete the following prerequisites in the order shown:
-
Create a WordPress Multisite instance. For more information, see Create an instance.
-
Create a static IP and attach it to your WordPress Multisite instance. For more information, see Create a static IP and attach it to an instance.
-
Add your domain to Lightsail by creating a DNS zone, then point it to the static IP that you attached to your WordPress Multisite instance. For more information, see Create a DNS zone to manage your domain’s DNS records.
-
Define the primary domain for your WordPress Multisite instance. For more information, see Define the primary domain for your WordPress Multisite instance.
Add a blog as a subdomain to your WordPress Multisite instance
Complete these steps to create new blogs on your WordPress Multisite instance that use a subdomain of your main blog’s primary domain.
Important
You must complete step 4 listed in the prerequisites section of this guide before following these steps.
-
Sign in to the administration dashboard of your WordPress Multisite instance.
Note
For more information, see Get the application user name and password for your Bitnami instance.
-
Choose My Sites, then Network Admin, and Sites in the top navigation pane.

-
Choose Add New to add a new blog site.
-
Enter a site address, which is the subdomain that will be used for the new blog site.

-
Enter a site title, select a site language, and enter an admin email.
-
Choose Add Site.
At this point, the new blog site has been created in your WordPress Multisite instance, but the subdomain is not yet configured to route to the new blog site. Continue to the next step to add an address record (A record) to your domain’s DNS zone.

Add an address record (A record) to your domain’s DNS zone
Complete these steps to point the subdomain for your new blog site to your WordPress Multisite instance. You must perform these steps for every blog site that you create on your WordPress Multisite instance.
For demonstration purposes, we’ll use the Lightsail DNS zone. However, the steps may be similar for other DNS zones typically hosted by domain registrars.
-
Sign in to the Lightsail console
. -
In the left navigation pane, choose Domains & DNS.
-
Under the DNS zones section of the page, choose the DNS zone for the domain that you defined as the primary domain for your WordPress Multisite instance.
-
In the DNS zone editor, choose the DNS records tab. Then, choose Add record.

-
Choose A record in the record type drop-down menu.
-
In the Record name text box, enter the subdomain specified as the site address when creating the new blog site on your WordPress Multisite instance.
-
In the Resolves to text box, choose the static IP address attached to your WordPress Multisite instance.

-
Choose the Save icon.
That is all you need to do. After the change propagates through the internet’s DNS, the domain will redirect to the new blog site on your WordPress Multisite instance.
Next steps
After you add blogs as subdomains to your WordPress Multisite instance, we recommend that
you get familiar with WordPress Multisite administration. For more information see Multisite
Network Administration