Forecasting and creating what-if scenarios with Amazon QuickSight
Using ML-powered forecasting, you can forecast your key business metrics with point-and-click simplicity. No machine learning expertise is required. The built-in ML algorithm in Amazon QuickSight is designed to handle complex real-world scenarios. Amazon QuickSight uses machine learning to help provide more reliable forecasts than available by traditional means.
For example, suppose that you are a business manager. Suppose that you want to forecast sales to see if you are going to meet your goal by the end of the year. Or, suppose that you expect a large deal to come through in two weeks and you want to know how it's going to affect your overall forecast.
You can forecast your business revenue with multiple levels of seasonality (for example, sales with both weekly and quarterly trends). Amazon QuickSight automatically excludes anomalies in the data (for example, a spike in sales due to price drop or promotion) from influencing the forecast. You also don't have to clean and reprep the data with missing values because Amazon QuickSight automatically handles that. In addition, with ML-powered forecasting, you can perform interactive what-if analyses to determine the growth trajectory you need to meet business goals.
Using forecasts and what-if scenarios
You can add a forecasting widget to your existing analysis, and publish it as a dashboard. To analyze what-if scenarios, use an analysis, not a dashboard. With ML-powered forecasting, Amazon QuickSight enables you to forecast complex, real-world scenarios such as data with multiple seasonality. It automatically excludes outliers that it identifies and imputes missing values.
Use the following procedure to add a graphical forecast to your analysis, and explore what-if scenarios.
Although the following procedure is for graphical forecasting, you can also add a forecast as a narrative in an insight widget. To learn more, see Creating autonarratives with Amazon QuickSight.
To add a graphical forecast to your analysis
-
Create a visual that uses a single date field and up to three metrics (measures).
-
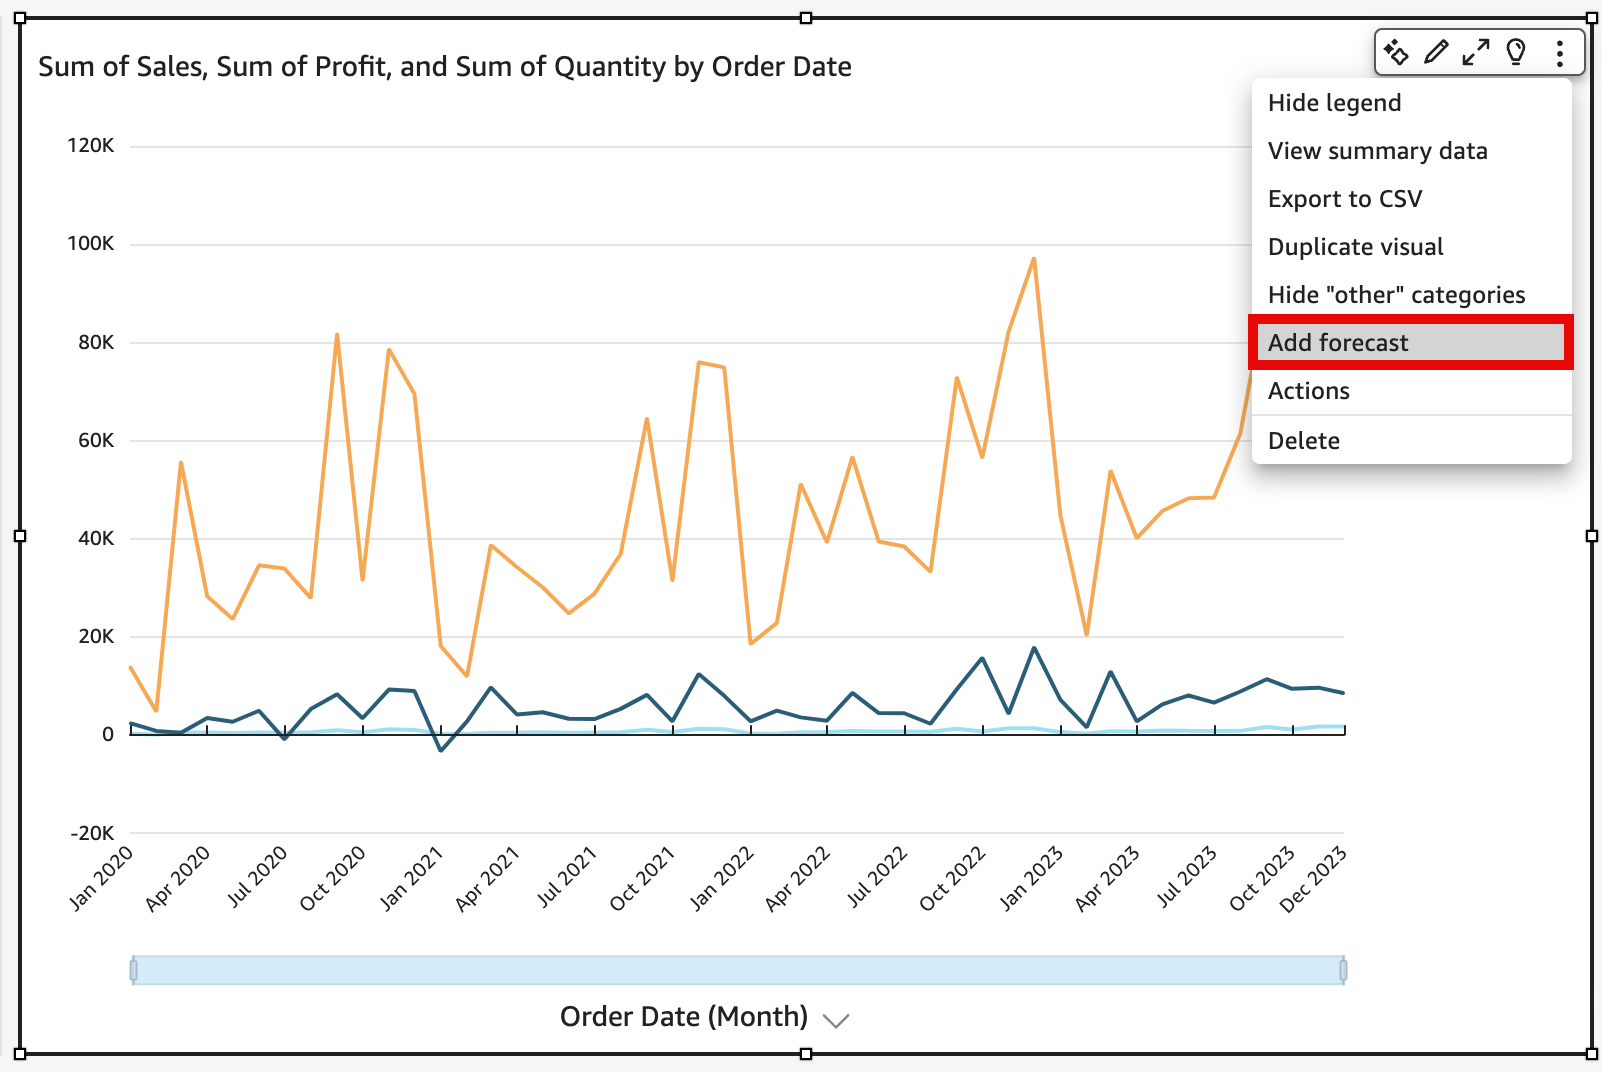
On the menu in the upper-right corner of the visual, choose the Menu options icon (the three dots), and then choose Add forecast.

QuickSight automatically analyzes the historical data using ML, and displays a graphical forecast for the next 14 periods. Forecast properties apply to all metrics in your visual. If you want individual forecasts for each metric, consider creating a separate visual for each metric and adding a forecast to each.

-
On the Forecast properties panel at left, customize one or more of the following settings:
-
Forecast length – Set Periods forward to forecast, or set Periods backward to look for patterns to base the forecast on.
-
Prediction interval – Set the estimated range for the forecast. Doing this changes how wide the band of possibility is around the predicted line.
-
Seasonality – Set the number of time periods involved in the predictable seasonal pattern of data. The range is 1–180, and the default setting is Automatic.
-
Forecast boundaries – Set a minimum and/or maximum forecast value to prevent forecast values from going above or below a specified value. For example, if your forecasting predicts the number of new hires the company will make in the next month to be in the negative numbers, you can set a forecast boundary minimum to zero. This stops the forecasted values from ever going below zero.
To save your changes, choose Apply.
If your forecast contains multiple metrics, you can isolate one of the forecasts by selecting anywhere inside the orange band. When you do this, the other forecasts disappear. Select the isolated forecast band again to have them reappear.
-
-
Analyze what-if scenarios by choosing a forecasted data point (in the orange band) on the chart, and then choosing What-if analysis from the context menu.
The What-if analysis panel opens at left. Set the following options:
-
Scenario – Set a target for a date, or set a target for a time range.
-
Dates – If you are setting a target for a specific date, enter that date here. If you are using a time range, set the start and end dates.
-
Target – Set a target value for the metric.
Amazon QuickSight adjusts the forecast to meet the target.
Note
The What-if analysis option isn't available for multiple-metric forecasts. If you want to perform a what-if scenario on your forecast, your visual should contain only one metric.
-
-
Keep your changes by choosing Apply. To discard them, close the What-if analysis panel.
If you keep your changes, you see the new forecast adjusted for the target, alongside the original forecast without the what-if.
The what-if analysis is represented on the visual as a dot on the metric line. You can hover over the data points on the forecasting line to see the details.
Here are other things you can do:
-
To interact with or remove a what-if analysis, choose the dot on the metric line.
-
To create additional what-if scenarios, close the what-if analysis before choosing a new point on the line.
Note
What-if analyses can exist inside an analysis only, not inside a dashboard.