Download the Debugger XGBoost training report
Download the Debugger XGBoost training report while your training job is running or
after the job has finished using the Amazon SageMaker Python SDK
- Download using the SageMaker Python SDK and AWS CLI
-
-
Check the current job's default S3 output base URI.
estimator.output_path -
Check the current job name.
estimator.latest_training_job.job_name -
The Debugger XGBoost report is stored under
<default-s3-output-base-uri>/<training-job-name>/rule-output. Configure the rule output path as follows:rule_output_path = estimator.output_path + "/" + estimator.latest_training_job.job_name + "/rule-output" -
To check if the report is generated, list directories and files recursively under the
rule_output_pathusingaws s3 lswith the--recursiveoption.! aws s3 ls {rule_output_path} --recursiveThis should return a complete list of files under autogenerated folders that are named
CreateXgboostReportandProfilerReport-1234567890. The XGBoost training report is stored in theCreateXgboostReport, and the profiling report is stored in theProfilerReport-1234567890folder. To learn more about the profiling report generated by default with the XGBoost training job, see SageMaker Debugger interactive report.
The
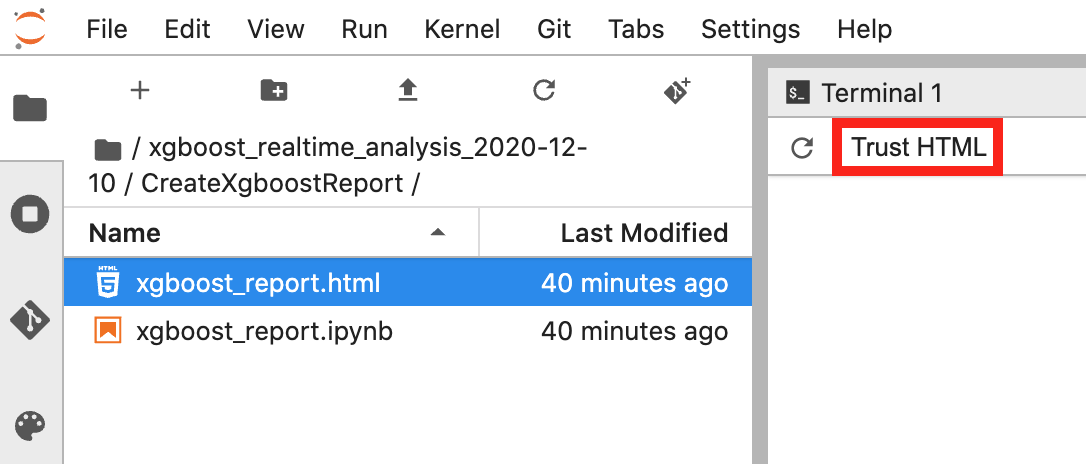
xgboost_report.htmlis an autogenerated XGBoost training report by Debugger. Thexgboost_report.ipynbis a Jupyter notebook that's used to aggregate training results into the report. You can download all of the files, browse the HTML report file, and modify the report using the notebook. -
Download the files recursively using
aws s3 cp. The following command saves all of the rule output files to theProfilerReport-1234567890folder under the current working directory.! aws s3 cp {rule_output_path}./--recursiveTip
If you are using a Jupyter notebook server, run
!pwdto verify the current working directory. -
Under the
/CreateXgboostReportdirectory, openxgboost_report.html. If you are using JupyterLab, choose Trust HTML to see the autogenerated Debugger training report.
-
Open the
xgboost_report.ipynbfile to explore how the report is generated. You can customize and extend the training report using the Jupyter notebook file.
-
- Download using the Amazon S3 console
-
Sign in to the AWS Management Console and open the Amazon S3 console at https://console.aws.amazon.com/s3/
. -
Search for the base S3 bucket. For example, if you haven't specified any base job name, the base S3 bucket name should be in the following format:
sagemaker-. Look up the base S3 bucket through the Find bucket by name field.<region>-111122223333
-
In the base S3 bucket, look up the training job name by entering your job name prefix in Find objects by prefix and then choosing the training job name.

-
In the training job's S3 bucket, choose rule-output/ subfolder. There must be three subfolders for training data collected by Debugger: debug-output/, profiler-output/, and rule-output/.

-
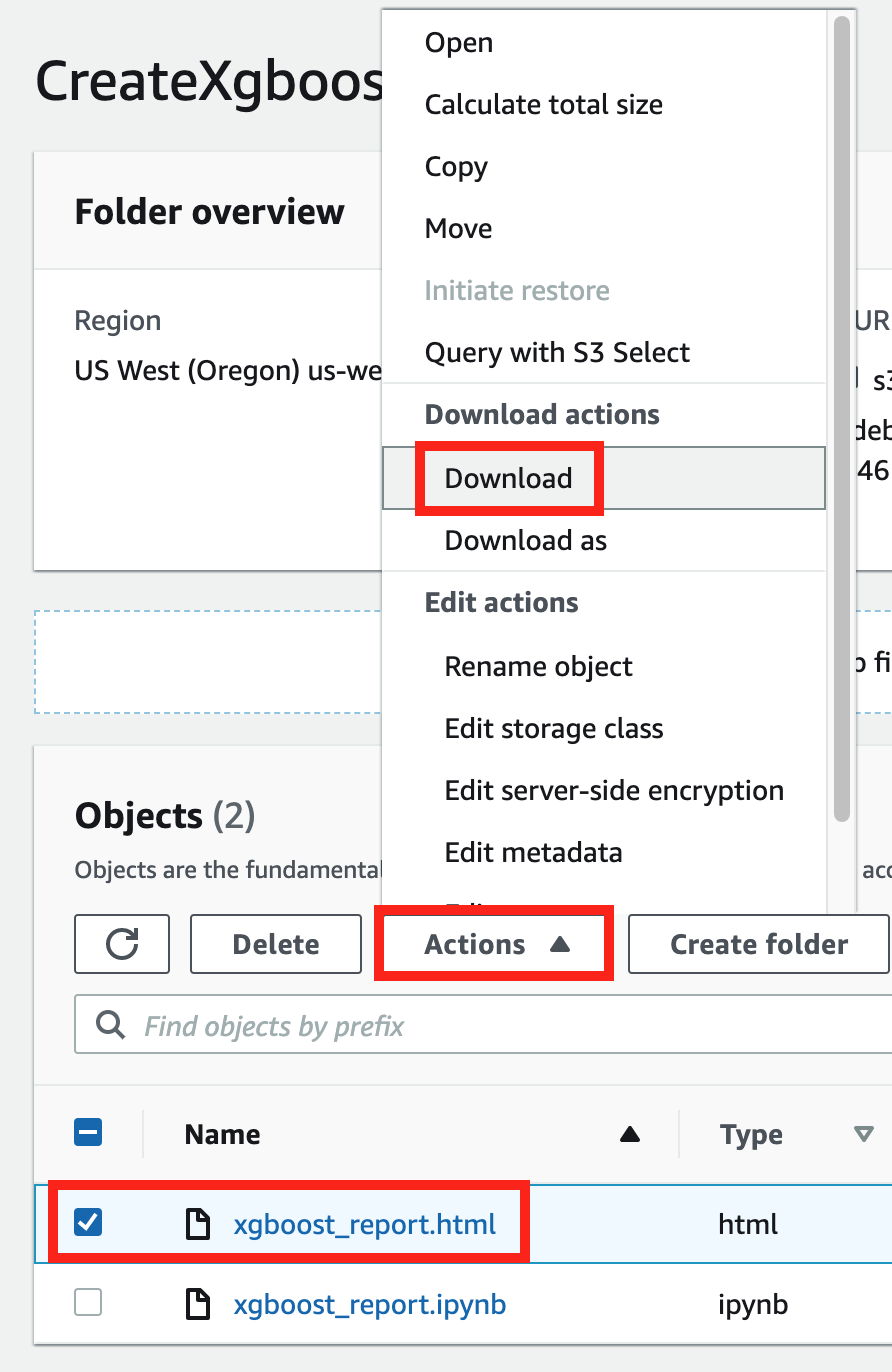
In the rule-output/ folder, choose the CreateXgboostReport/ folder. The folder contains xbgoost_report.html (the autogenerated report in html) and xbgoost_report.ipynb (a Jupyter notebook with scripts that are used for generating the report).
-
Choose the xbgoost_report.html file, choose Download actions, and then choose Download.

-
Open the downloaded xbgoost_report.html file in a web browser.