Enabling the microphone and webcam
Your WorkSpaces Thin Client device can connect to your audio and visual devices. To use your microphone and webcam within a virtual desktop session, you will need to enable permissions in your Windows Settings, on the virtual desktop toolbar, and your browser settings.
WorkSpaces Thin Client is compatible with the webcams and headsets listed in the Peripherals section.
Confirm your webcam and microphone are properly connected to your WorkSpaces Thin Client.
Go to Settings.
Select Peripheral Devices.
Verify that your webcam and microphone are listed.

Verify that your microphone and webcam are enabled on your VDI. Depending on what VDI you are using, do one of the following:
For Windows, use Enabling permissions in Windows.
For Amazon WorkSpaces, use Enabling permissions in Amazon WorkSpaces.
For AppStream 2.0 or Amazon WorkSpaces Secure Browser, use Enabling permissions in AppStream 2.0 and Amazon WorkSpaces Secure Browser.
Enabling permissions for microphone and webcam in the VDI
Enabling permissions in Windows
Select the Settings icon.
Select the Privacy icon from the Settings menu.

Do one of the following:
Select Camera from the list on the left, and change Allow apps to access your camera to On.
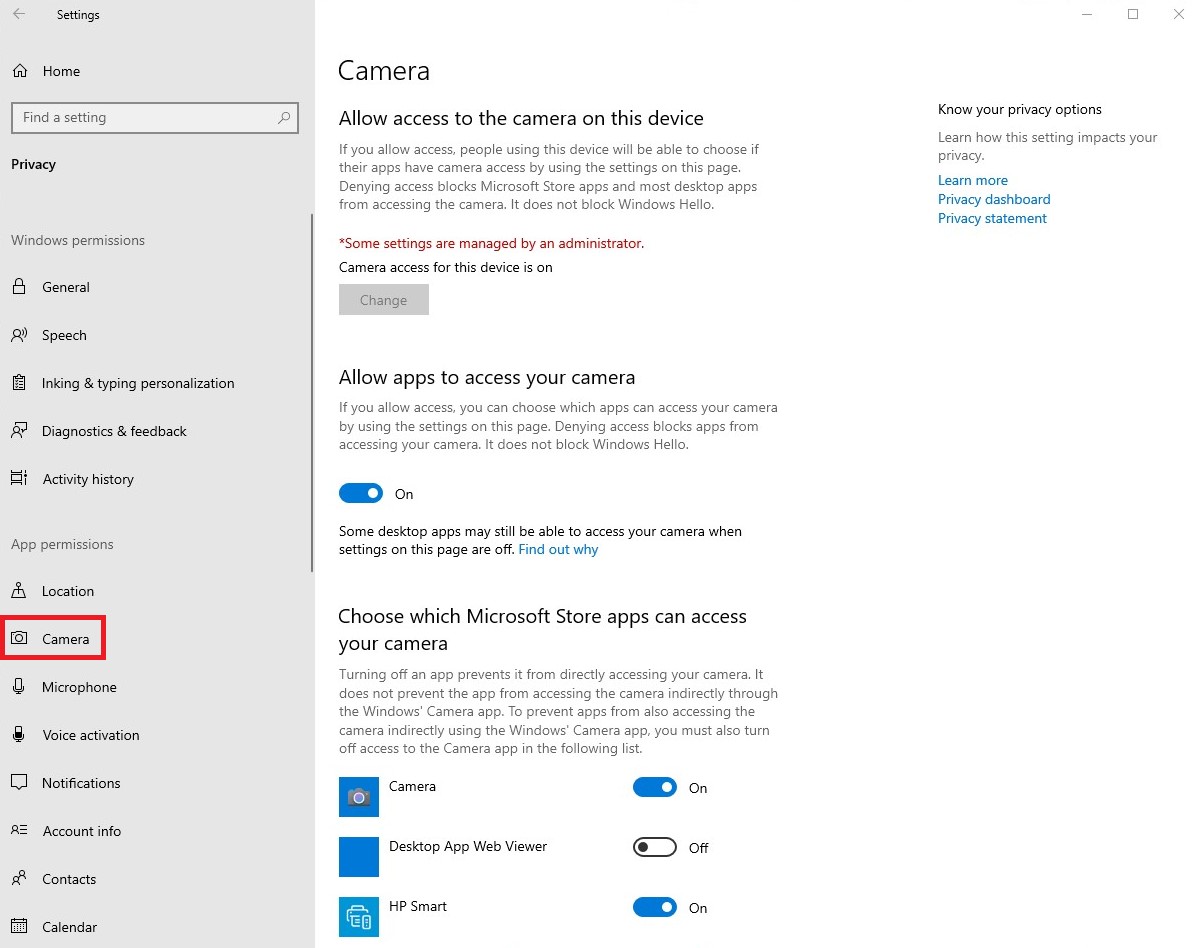
Select Microphone from the list on the left, and change Allow apps to access your camera to On.

After you have enabled permissions in Windows, you will need to enable them from your web browser. See Enabling permissions in the web browser.
Enabling permissions in Amazon WorkSpaces
Permissions for webcam and microphone are automatically enabled for use with WorkSpaces Thin Client.
The virtual desktop toolbar will display the status of you microphone and webcam.
WorkSpaces Thin Client is compatible with the webcams and headsets listed in the Peripherals section.
Confirm your webcam and microphone are properly connected to your WorkSpaces Thin Client.

The icons for Microphone and Webcam will indicate their status.
| Icon | Status |
|---|---|

|
Camera is not on. |

|
Camera is on but not streaming. |

|
Camera is on and streaming. |

|
Microphone is not on. |

|
Microphone is on. |
After you have confirmed that your peripheral is enabled in Amazon WorkSpaces, you will need to enable them from your web browser. See Enabling permissions in the web browser
Enabling permissions in AppStream 2.0 and Amazon WorkSpaces Secure Browser
Your WorkSpaces Thin Client device can connect to your audio and visual devices. To use your microphone and webcam within a virtual desktop session, you will need to enable permissions in your Windows Settings, on the virtual desktop toolbar, and your browser settings.
Confirm your webcam and microphone are properly connected to your WorkSpaces Thin Client.
Go to Settings.
Select Peripheral Devices.
Verify that your webcam and microphone are listed.
After you have confirmed that your peripheral is enabled in either AppStream 2.0 or Amazon WorkSpaces Secure Browser, you will need to enable them from your web browser. See Enabling permissions in the web browser.
Enabling permissions in the web browser
A pop-up window will appear asking for Microphone and Webcam permissions. If you do not see the pop-up, you can select the icon next to the address bar.
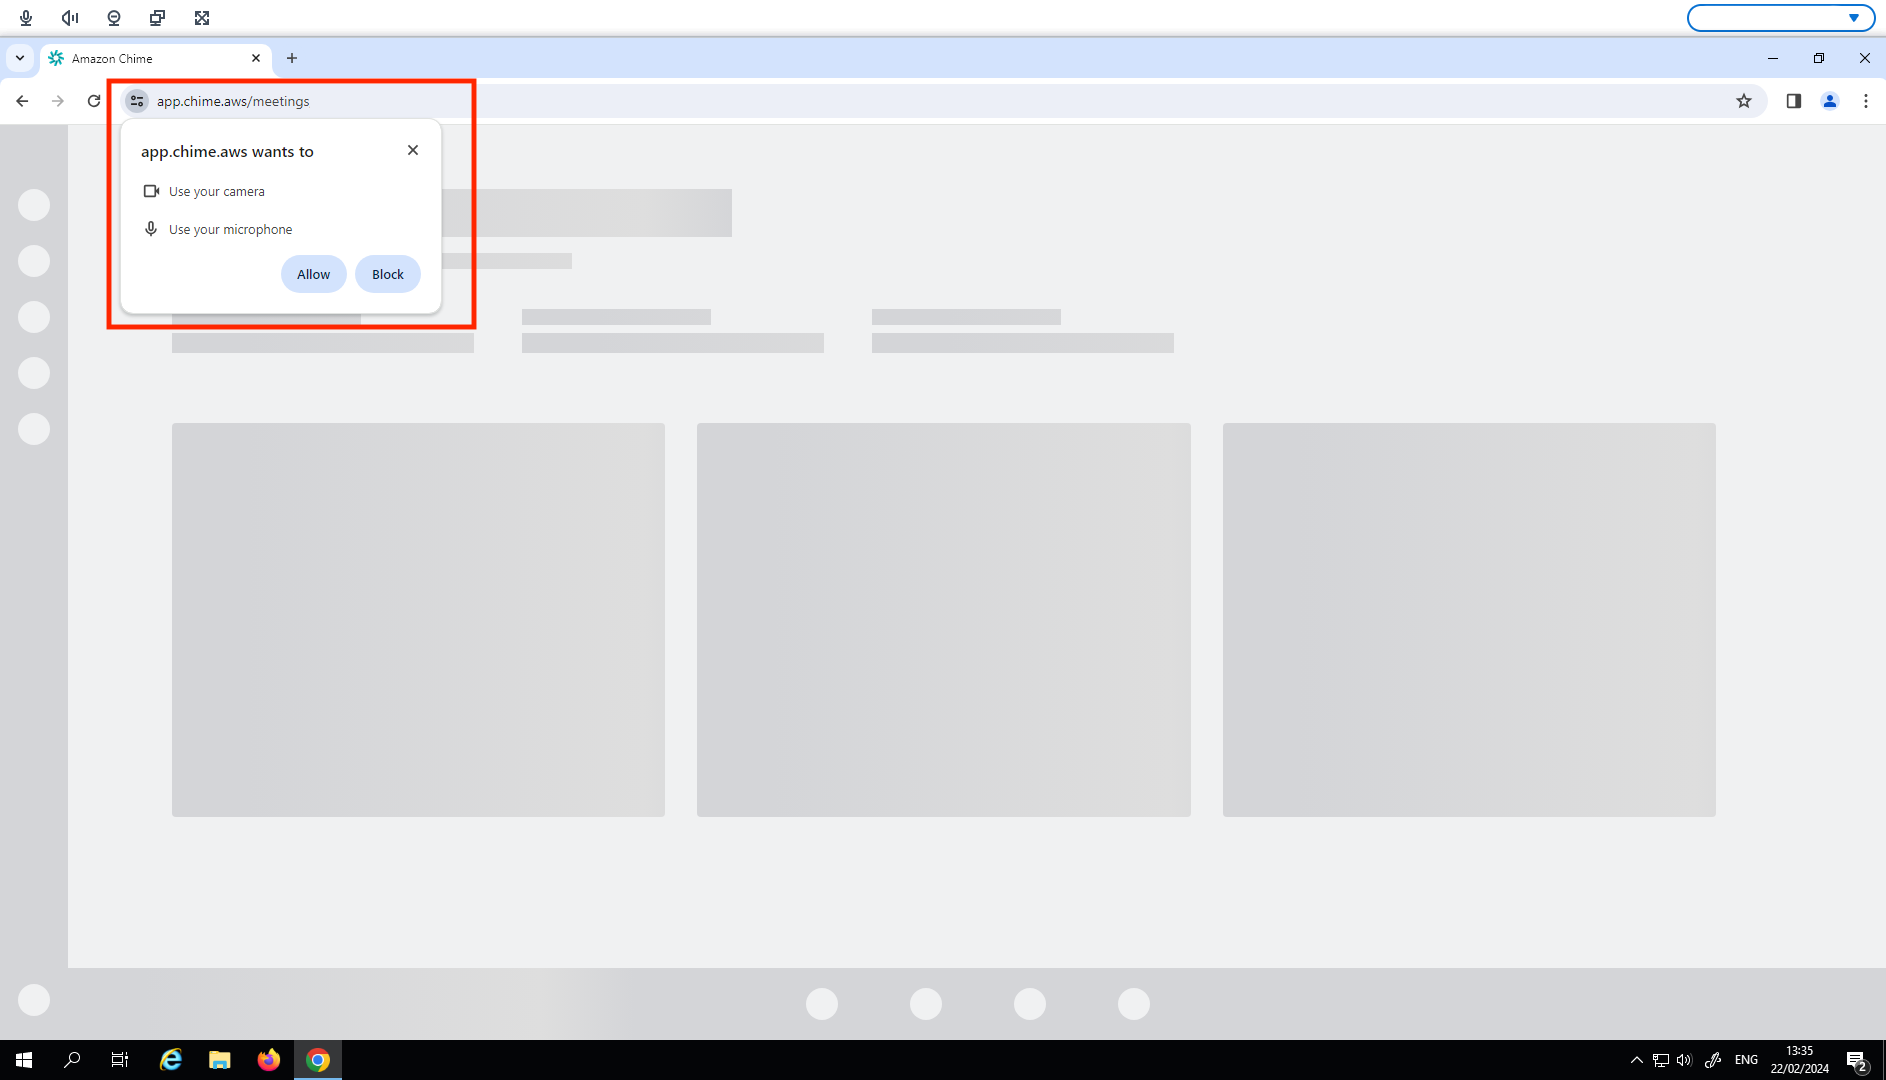
Select Allow in the pop up window.
Select the Settings icon on the browser search bar and make sure Microphone and Webcam are enabled.

Note
You may need to repeat the above step every time you want to use your webcam and microphone in a website.
