本文属于机器翻译版本。若本译文内容与英语原文存在差异,则一律以英文原文为准。
将 AWS AppSync API 与 AWS CDK 配合使用
在本节中,我们将创建一个简单的 CDK 应用程序,该应用程序可以在 DynamoDB 表中添加和获取项目。这是一个快速入门示例,使用了 “设计架构”、“附加数据源” 和 “配置解析器” () JavaScript 部分中的一些代码。
设置 CDK 项目
警告
根据您的环境,这些步骤可能不完全准确。我们假设您的系统已安装必要的实用程序、与 AWS 服务接口的方法以及适当的配置。
第一步是安装 AWS CDK。在 CLI 中,您可以输入以下命令:
npm install -g aws-cdk
接下来,您需要创建一个项目目录,然后导航到该目录。用于创建和导航到目录的一组示例命令是:
mkdir example-cdk-app
cd example-cdk-app
接下来,您需要创建一个应用程序。我们的服务主要使用 TypeScript. 在您的项目目录中,输入以下命令:
cdk init app --language typescript
在您执行该操作时,将安装 CDK 应用程序及其初始化文件:
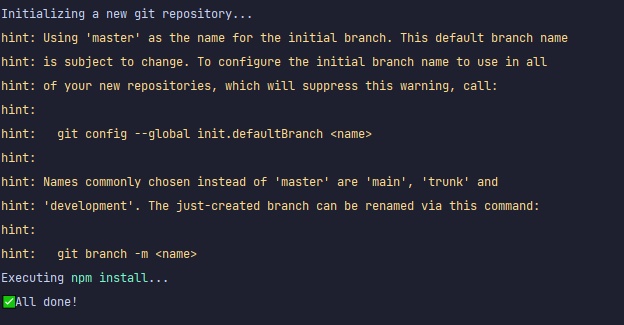
您的项目结构可能如下所示:

您会注意到我们具有几个重要目录:
-
bin:初始 bin 文件将创建应用程序。我们在本指南中不会对其进行修改。 -
lib:lib 目录包含您的堆栈文件。您可以将堆栈文件视为单独的执行单元。构造将位于我们的堆栈文件中。基本上,这些是部署应用程序 CloudFormation 时将启动的服务的资源。这是我们完成大部分编码的位置。 -
node_modules:该目录由 NPM 创建,并包含您使用npm命令安装的所有包依赖项。
我们的初始堆栈文件可能包含如下内容:
import * as cdk from 'aws-cdk-lib';
import { Construct } from 'constructs';
// import * as sqs from 'aws-cdk-lib/aws-sqs';

export class ExampleCdkAppStack extends cdk.Stack {
  constructor(scope: Construct, id: string, props?: cdk.StackProps) {
    super(scope, id, props);

    // The code that defines your stack goes here

    // example resource
    // const queue = new sqs.Queue(this, 'ExampleCdkAppQueue', {
    //   visibilityTimeout: cdk.Duration.seconds(300)
    // });
  }
}
这是在我们的应用程序中创建堆栈的样板代码。该示例中的大部分代码都位于该类的范围内。
要验证您的堆栈文件是否位于应用程序的目录中,请在终端中运行以下命令:
cdk ls
应该会显示您的堆栈列表。如果没有显示,您可能需要再次执行这些步骤,或者查看官方文档以获得帮助。
如果要在部署之前构建代码更改,您始终可以在终端中运行以下命令:
npm run build
要在部署之前查看更改,请运行以下命令:
cdk diff
在将代码添加到堆栈文件之前,我们将执行引导。通过进行引导,我们可以在部署应用程序之前为 CDK 预置资源。可以在此处找到有关该过程的更多信息。要创建引导,请运行以下命令:
cdk bootstrap aws://ACCOUNT-NUMBER/REGION
提示
该步骤要求在您的账户中具有多个 IAM 权限。如果您没有这些权限,将拒绝您的引导。如果发生这种情况,您可能必须删除引导导致的不完整资源,例如,引导生成的 S3 存储桶。
引导将启动多个资源。最终消息将如下所示:

该操作对每个账户的每个区域执行一次,因此,您无需经常这样做。引导程序的主要资源是 CloudFormation 堆栈和 Amazon S3 存储桶。
Amazon S3 存储桶用于存储文件和 IAM 角色,这些角色授予执行部署所需的权限。所需的资源是在一个名为引导 CloudFormation 堆栈的堆栈中定义的,该堆栈通常被命名为CDKToolkit。与任何 CloudFormation 堆栈一样,它在部署后会显示在 CloudFormation 控制台中:

存储桶也是如此:

要在堆栈文件中导入所需的服务,我们可以使用以下命令:
npm install aws-cdk-lib # V2 command
提示
如果您在使用 V2 时遇到问题,您可以使用 V1 命令安装各个库:
npm install @aws-cdk/aws-appsync @aws-cdk/aws-dynamodb
我们不建议这样做,因为 V1 已被弃用。
实施 CDK 项目 - 架构
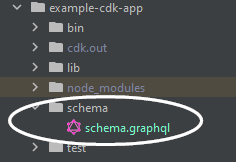
我们现在可以开始实施代码了。首先,我们必须创建架构。您只需在应用程序中创建一个 .graphql 文件即可:
mkdir schema
touch schema.graphql
在我们的示例中,我们包含一个名为 schema 的顶级目录,其中包含 schema.graphql:
在我们的架构中,让我们包含一个简单的示例:
input CreatePostInput {
    title: String
    content: String
}

type Post {
    id: ID!
    title: String
    content: String
}

type Mutation {
    createPost(input: CreatePostInput!): Post
}

type Query {
    getPost: [Post]
}
回到我们的堆栈文件,我们需要确保定义了以下 import 指令:
import * as cdk from 'aws-cdk-lib';
import * as appsync from 'aws-cdk-lib/aws-appsync';
import * as dynamodb from 'aws-cdk-lib/aws-dynamodb';
import { Construct } from 'constructs';
在类中,我们将添加代码以创建 GraphQL API 并将其连接到 schema.graphql 文件:
export class ExampleCdkAppStack extends cdk.Stack {
  constructor(scope: Construct, id: string, props?: cdk.StackProps) {
    super(scope, id, props);

    // makes a GraphQL API
    const api = new appsync.GraphqlApi(this, 'post-apis', {
      name: 'api-to-process-posts',
      schema: appsync.SchemaFile.fromAsset('schema/schema.graphql'),
    });
  }
}
我们还会添加一些代码以输出 GraphQL URL、API 密钥和区域:
export class ExampleCdkAppStack extends cdk.Stack {
  constructor(scope: Construct, id: string, props?: cdk.StackProps) {
    super(scope, id, props);

    // Makes a GraphQL API construct
    const api = new appsync.GraphqlApi(this, 'post-apis', {
      name: 'api-to-process-posts',
      schema: appsync.SchemaFile.fromAsset('schema/schema.graphql'),
    });

    // Prints out URL
    new cdk.CfnOutput(this, "GraphQLAPIURL", {
      value: api.graphqlUrl
    });

    // Prints out the AppSync GraphQL API key to the terminal
    new cdk.CfnOutput(this, "GraphQLAPIKey", {
      value: api.apiKey || ''
    });

    // Prints out the stack region to the terminal
    new cdk.CfnOutput(this, "Stack Region", {
      value: this.region
    });
  }
}
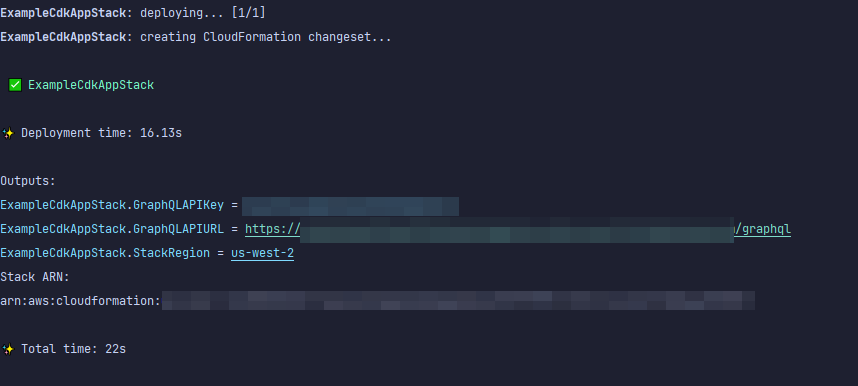
此时,再次部署我们的应用程序:
cdk deploy
结果如下所示:
看来我们的示例成功了,但让我们检查一下 AWS AppSync 控制台以确认:

看来已创建了我们的 API。现在,我们将检查附加到 API 的架构:
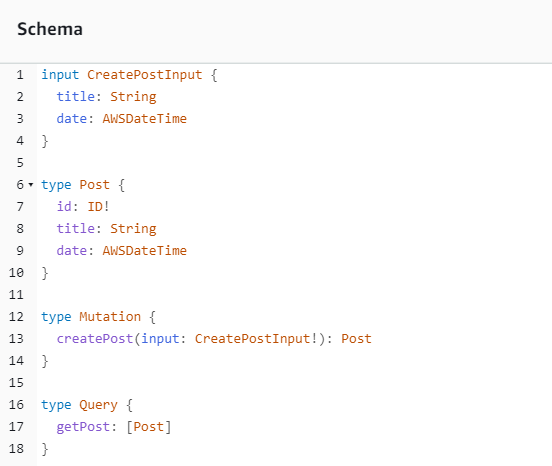
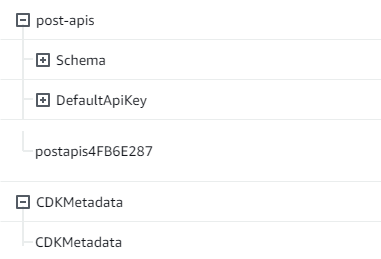
这似乎与我们的架构代码匹配,因此,它是成功的。从元数据角度确认这一点的另一种方法是查看 CloudFormation 堆栈:

当我们部署 CDK 应用程序时,它会启动引导程序等资源。 CloudFormation 我们的应用程序中的每个堆栈都与一个堆 CloudFormation 栈以 1:1 的比分映射。如果您回到堆栈代码,就会发现堆栈名称是从类名称 ExampleCdkAppStack 中获取的。您可以看到它创建的资源,这些资源也符合 GraphQL API 构造中的命名约定:
实施 CDK 项目 - 数据来源
接下来,我们需要添加数据来源。我们的示例使用 DynamoDB 表。在堆栈类中,我们添加一些代码以创建新的表:
export class ExampleCdkAppStack extends cdk.Stack {
  constructor(scope: Construct, id: string, props?: cdk.StackProps) {
    super(scope, id, props);

    // Makes a GraphQL API construct
    const api = new appsync.GraphqlApi(this, 'post-apis', {
      name: 'api-to-process-posts',
      schema: appsync.SchemaFile.fromAsset('schema/schema.graphql'),
    });

    //creates a DDB table
    const add_ddb_table = new dynamodb.Table(this, 'posts-table', {
      partitionKey: {
        name: 'id',
        type: dynamodb.AttributeType.STRING,
      },
    });

    // Prints out URL
    new cdk.CfnOutput(this, "GraphQLAPIURL", {
      value: api.graphqlUrl
    });

    // Prints out the AppSync GraphQL API key to the terminal
    new cdk.CfnOutput(this, "GraphQLAPIKey", {
      value: api.apiKey || ''
    });

    // Prints out the stack region to the terminal
    new cdk.CfnOutput(this, "Stack Region", {
      value: this.region
    });
  }
}
此时,让我们再次部署:
cdk deploy
我们应该检查 DynamoDB 控制台是否有新的表:

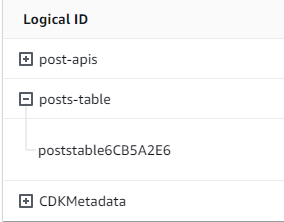
我们的堆栈名称是正确的,并且表名称与代码匹配。如果我们再次检查 CloudFormation 堆栈,我们现在将看到新表:
实施 CDK 项目 - 解析器
该示例将使用两个解析器:一个用于查询表,另一个用于在表中添加数据。由于我们使用管道解析器,因此,我们需要声明两个管道解析器,在每个解析器中具有一个函数。在查询中,我们添加以下代码:
export class ExampleCdkAppStack extends cdk.Stack {
  constructor(scope: Construct, id: string, props?: cdk.StackProps) {
    super(scope, id, props);

    // Makes a GraphQL API construct
    const api = new appsync.GraphqlApi(this, 'post-apis', {
      name: 'api-to-process-posts',
      schema: appsync.SchemaFile.fromAsset('schema/schema.graphql'),
    });

    //creates a DDB table
    const add_ddb_table = new dynamodb.Table(this, 'posts-table', {
      partitionKey: {
        name: 'id',
        type: dynamodb.AttributeType.STRING,
      },
    });

    // Creates a function for query
    const add_func = new appsync.AppsyncFunction(this, 'func-get-post', {
      name: 'get_posts_func_1',
      api,
      dataSource: api.addDynamoDbDataSource('table-for-posts', add_ddb_table),
      code: appsync.Code.fromInline(`
          export function request(ctx) {
          return { operation: 'Scan' };
          }

          export function response(ctx) {
          return ctx.result.items;
          }
  `),
      runtime: appsync.FunctionRuntime.JS_1_0_0,
    });

    // Creates a function for mutation
    const add_func_2 = new appsync.AppsyncFunction(this, 'func-add-post', {
      name: 'add_posts_func_1',
      api,
      dataSource: api.addDynamoDbDataSource('table-for-posts-2', add_ddb_table),
      code: appsync.Code.fromInline(`
          export function request(ctx) {
            return {
            operation: 'PutItem',
            key: util.dynamodb.toMapValues({id: util.autoId()}),
            attributeValues: util.dynamodb.toMapValues(ctx.args.input),
            };
          }

          export function response(ctx) {
            return ctx.result;
          }
      `),
      runtime: appsync.FunctionRuntime.JS_1_0_0,
    });

    // Adds a pipeline resolver with the get function
    new appsync.Resolver(this, 'pipeline-resolver-get-posts', {
      api,
      typeName: 'Query',
      fieldName: 'getPost',
      code: appsync.Code.fromInline(`
          export function request(ctx) {
          return {};
          }

          export function response(ctx) {
          return ctx.prev.result;
          }
  `),
      runtime: appsync.FunctionRuntime.JS_1_0_0,
      pipelineConfig: [add_func],
    });

    // Adds a pipeline resolver with the create function
    new appsync.Resolver(this, 'pipeline-resolver-create-posts', {
      api,
      typeName: 'Mutation',
      fieldName: 'createPost',
      code: appsync.Code.fromInline(`
          export function request(ctx) {
          return {};
          }

          export function response(ctx) {
          return ctx.prev.result;
          }
  `),
      runtime: appsync.FunctionRuntime.JS_1_0_0,
      pipelineConfig: [add_func_2],
    });

    // Prints out URL
    new cdk.CfnOutput(this, "GraphQLAPIURL", {
      value: api.graphqlUrl
    });

    // Prints out the AppSync GraphQL API key to the terminal
    new cdk.CfnOutput(this, "GraphQLAPIKey", {
      value: api.apiKey || ''
    });

    // Prints out the stack region to the terminal
    new cdk.CfnOutput(this, "Stack Region", {
      value: this.region
    });
  }
}
在该代码片段中,我们添加一个名为 pipeline-resolver-create-posts 的管道解析器,并将一个名为 func-add-post 的函数附加到该解析器。这是将 Posts 添加到表中的代码。另一个管道解析器命名为 pipeline-resolver-get-posts,并具有一个名为 func-get-post 的函数,该函数检索添加到表中的 Posts。
我们将部署它以将其添加到 AWS AppSync 服务中:
cdk deploy
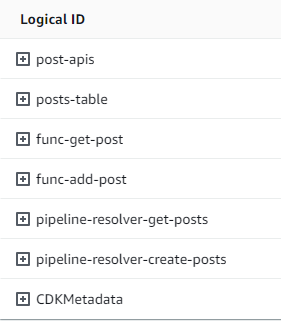
让我们检查一下 AWS AppSync 控制台,看看它们是否已连接到我们的 GraphQL API:
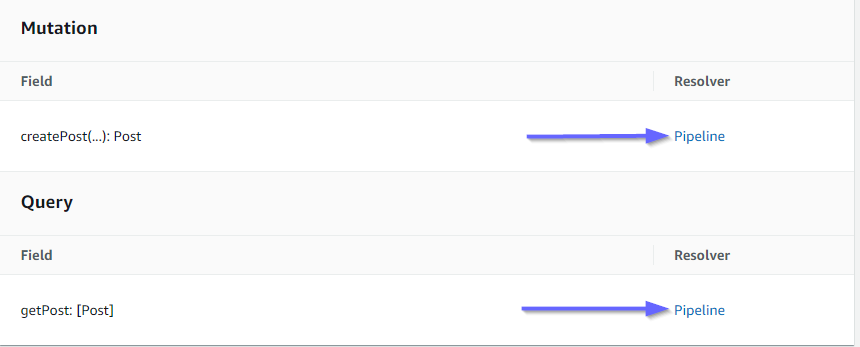
看来是正确的。在代码中,这两个解析器都附加到我们创建的 GraphQL API(由解析器和函数中存在的 api 属性值表示)。在 GraphQL API 中,我们将解析器附加到的字段也是在属性中指定的(由每个解析器中的 typename 和 fieldname 属性定义)。
让我们看看解析器内容是否正确,从 pipeline-resolver-get-posts 开始:
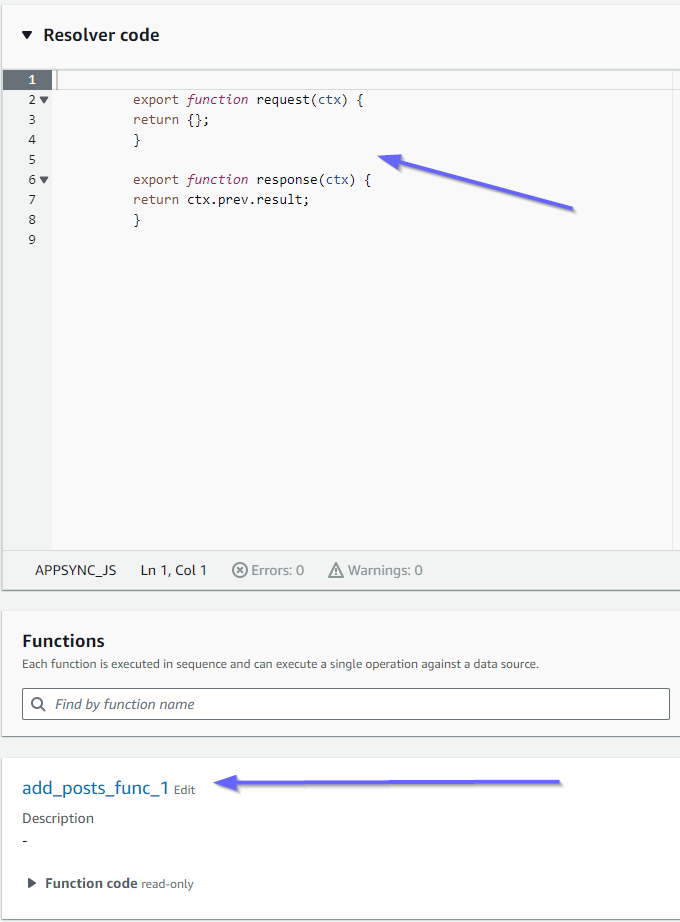
之前和之后处理程序与 code 属性值匹配。我们还可以看到一个名为 add_posts_func_1 的函数,它与我们在解析器中附加的函数的名称匹配。
我们看一下该函数的代码内容:
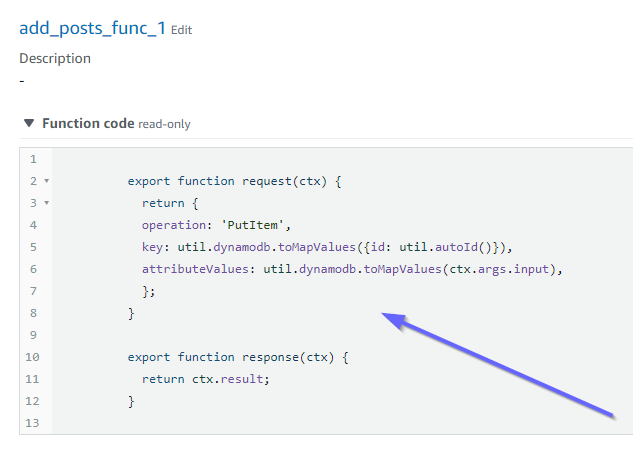
这与 add_posts_func_1 函数的 code 属性匹配。已成功上传我们的查询,因此,让我们检查一下该查询:

这些也与代码匹配。如果我们看一下 get_posts_func_1:
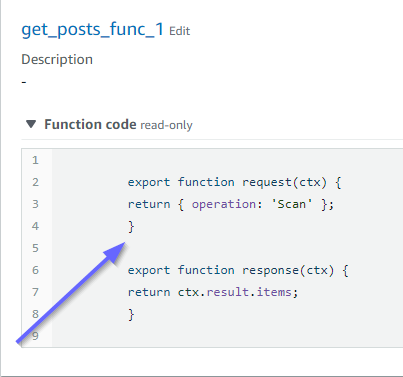
一切似乎准备就绪。要从元数据角度确认这一点,我们可以再次在 CloudFormation 中检查堆栈:
现在,我们需要执行一些请求以测试该代码。
实施 CDK 项目 - 请求
为了在 AWS AppSync 控制台中测试我们的应用程序,我们做了一个查询和一个变更:
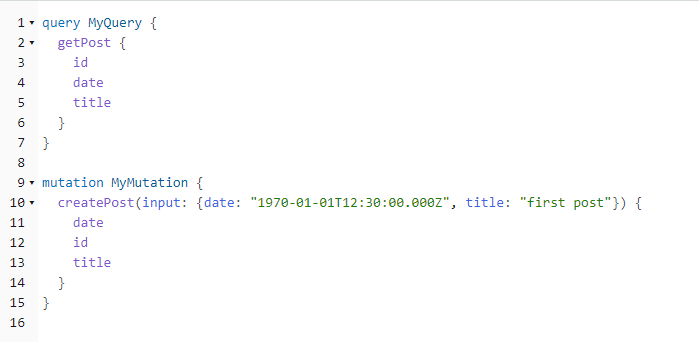
MyMutation 包含具有 createPost 和 1970-01-01T12:30:00.000Z 参数的 first post 操作。它返回我们传入的 date 和 title 以及自动生成的 id 值。运行该变更将产生以下结果:
{
  "data": {
    "createPost": {
      "date": "1970-01-01T12:30:00.000Z",
      "id": "4dc1c2dd-0aa3-4055-9eca-7c140062ada2",
      "title": "first post"
    }
  }
}
如果快速检查 DynamoDB 表,我们可以在扫描时在该表中看到我们的条目:

回到 AWS AppSync 控制台,如果我们运行查询来检索这个Post,我们会得到以下结果:
{
  "data": {
    "getPost": [
      {
        "id": "9f62c4dd-49d5-48d5-b835-143284c72fe0",
        "date": "1970-01-01T12:30:00.000Z",
        "title": "first post"
      }
    ]
  }
}
