本文属于机器翻译版本。若本译文内容与英语原文存在差异,则一律以英文原文为准。
使用软件包管理器自定义环境
使用 pip 或 conda 自定义环境。我们建议使用软件包管理器,而不是生命周期配置脚本。
创建并激活自定义环境
本节提供了在中配置环境的不同方法的示例 JupyterLab。
基本的 conda 环境拥有 SageMaker AI 工作流程所需的最少软件包数量。使用以下模板创建基本的 conda 环境:
# initialize conda for shell interaction
conda init

# create a new fresh environment
conda create --name test-env

# check if your new environment is created successfully
conda info --envs

# activate the new environment
conda activate test-env

# install packages in your new conda environment
conda install pip boto3 pandas ipykernel

# list all packages install in your new environment
conda list

# parse env name information from your new environment
export CURRENT_ENV_NAME=$(conda info | grep "active environment" | cut -d : -f 2 | tr -d ' ')

# register your new environment as Jupyter Kernel for execution
python3 -m ipykernel install --user --name $CURRENT_ENV_NAME --display-name "user-env:($CURRENT_ENV_NAME)"

# to exit your new environment
conda deactivate
下图显示了您创建的环境的位置。
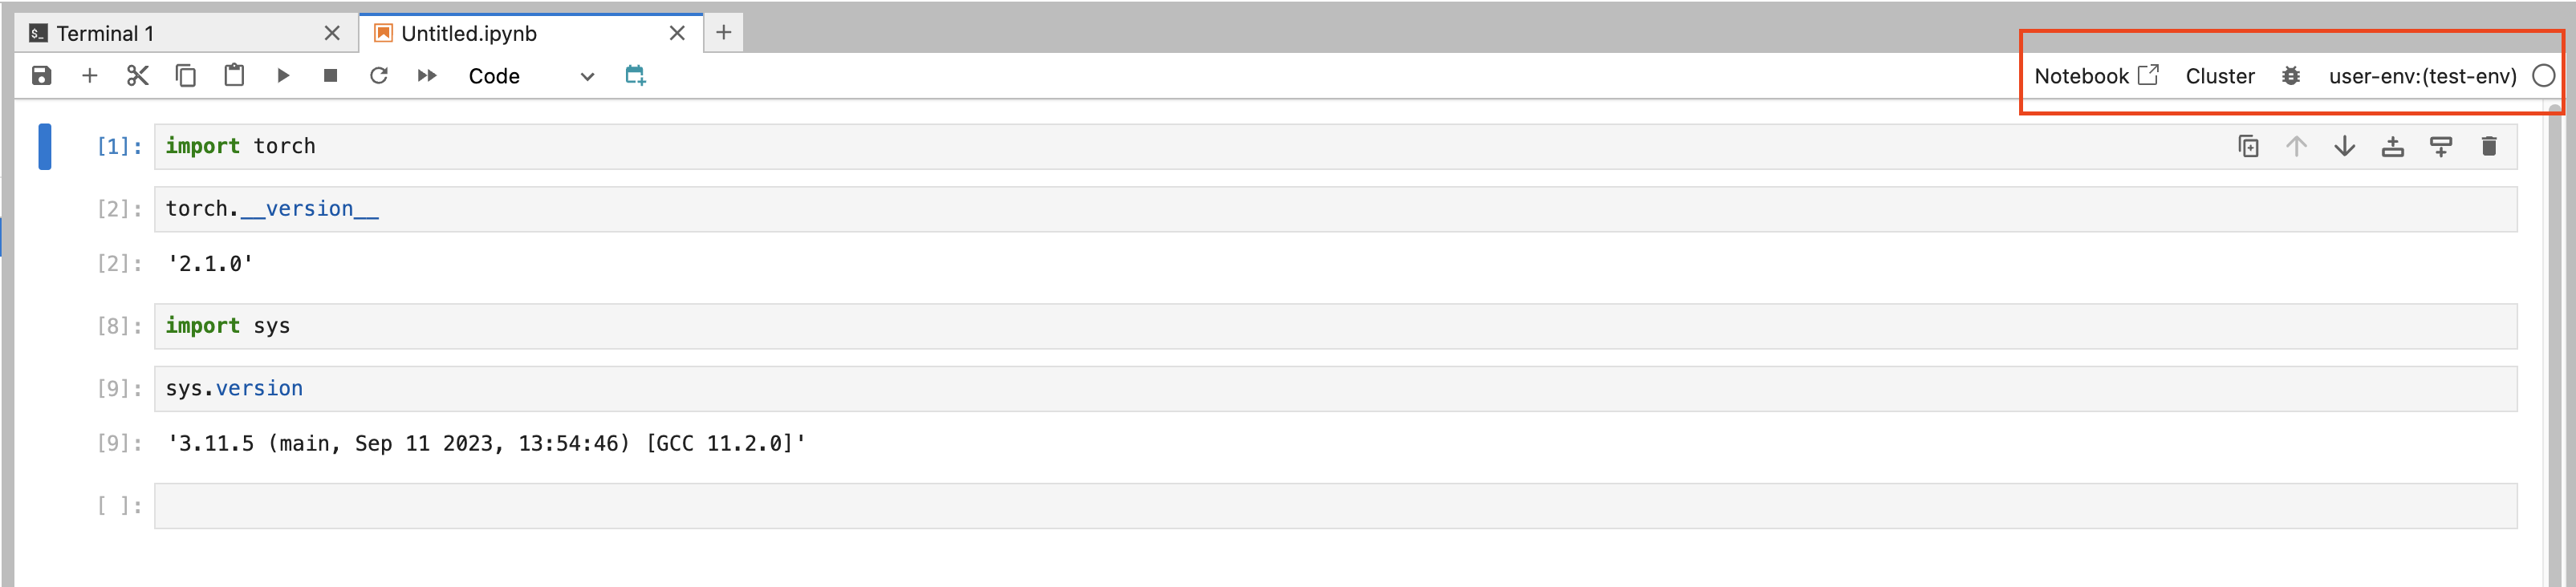
要更改环境,请选择它,然后从下拉菜单中选择一个选项。
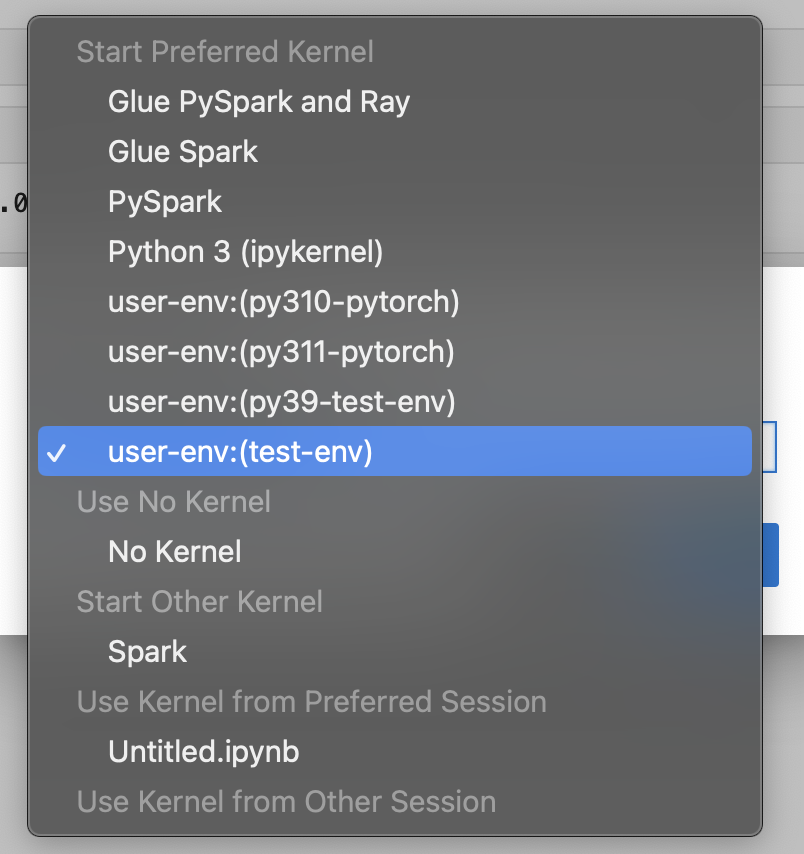
选择选择为环境选择内核。
使用特定 Python 版本创建 conda 环境
清理不使用的 conda 环境有助于释放磁盘空间并提高性能。使用以下模板清理 conda 环境:
# create a conda environment with a specific python version
conda create --name py38-test-env python=3.8.10

# activate and test your new python version
conda activate py38-test-env & python3 --version

# Install ipykernel to facilicate env registration
conda install ipykernel

# parse env name information from your new environment
export CURRENT_ENV_NAME=$(conda info | grep "active environment" | cut -d : -f 2 | tr -d ' ')

# register your new environment as Jupyter Kernel for execution
python3 -m ipykernel install --user --name $CURRENT_ENV_NAME --display-name "user-env:($CURRENT_ENV_NAME)"

# deactivate your py38 test environment
conda deactivate
创建带有特定软件包的 conda 环境
使用下面的模板创建带有特定 Python 版本和软件包集的 conda 环境:
# prefill your conda environment with a set of packages,
conda create --name py38-test-env python=3.8.10 pandas matplotlib=3.7 scipy ipykernel

# activate your conda environment and ensure these packages exist
conda activate py38-test-env

# check if these packages exist
conda list | grep -E 'pandas|matplotlib|scipy'

# parse env name information from your new environment
export CURRENT_ENV_NAME=$(conda info | grep "active environment" | cut -d : -f 2 | tr -d ' ')

# register your new environment as Jupyter Kernel for execution
python3 -m ipykernel install --user --name $CURRENT_ENV_NAME --display-name "user-env:($CURRENT_ENV_NAME)"

# deactivate your conda environment
conda deactivate
从现有环境克隆 conda
克隆您的 conda 环境,以保留其工作状态。您可以在克隆环境中进行实验,而不必担心在测试环境中引入破坏性更改。
使用以下命令克隆一个环境。
# create a fresh env from a base environment
conda create --name py310-base-ext --clone base # replace 'base' with another env

# activate your conda environment and ensure these packages exist
conda activate py310-base-ext

# install ipykernel to register your env
conda install ipykernel

# parse env name information from your new environment
export CURRENT_ENV_NAME=$(conda info | grep "active environment" | cut -d : -f 2 | tr -d ' ')

# register your new environment as Jupyter Kernel for execution
python3 -m ipykernel install --user --name $CURRENT_ENV_NAME --display-name "user-env:($CURRENT_ENV_NAME)"

# deactivate your conda environment
conda deactivate
从参考 YAML 文件克隆 conda
根据参考 YAML 文件创建 conda 环境。下面是一个可以使用的 YAML 文件示例。
# anatomy of a reference environment.yml
name: py311-new-env
channels:
  - conda-forge
dependencies:
  - python=3.11
  - numpy
  - pandas
  - scipy
  - matplotlib
  - pip
  - ipykernel
  - pip:
      - git+https://github.com/huggingface/transformers
在 pip 下,我们建议只指定 conda 不可用的依赖关系。
使用以下命令从 YAML 文件创建 conda 环境。
# create your conda environment
conda env create -f environment.yml

# activate your env
conda activate py311-new-env
