本文為英文版的機器翻譯版本,如內容有任何歧義或不一致之處,概以英文版為準。
在 中追蹤 TypeScript 程式碼 AWS Lambda
Lambda 與 整合 AWS X-Ray ,可協助您追蹤、偵錯和最佳化 Lambda 應用程式。您可以使用 X-Ray 來追蹤請求,因為它會周遊您應用程式中的資源,其中可能包含 Lambda 函數和其他 AWS 服務。
若要將追蹤資料傳送至 X-Ray,您可以使用以下三個 SDK 庫之一:
-
AWS Distro for OpenTelemetry (ADOT)
– OpenTelemetry (OTel) SDK 的安全、生產就緒、 AWS支援的分佈。 -
AWS X-Ray 適用於 Node.js 的 SDK – 用於產生追蹤資料並將其傳送至 X-Ray 的 SDK。
-
Powertools for AWS Lambda (TypeScript)
– 開發人員工具組,用於實作無伺服器最佳實務並提高開發人員速度。
每個 SDK 均提供將遙測資料傳送至 X-Ray 服務的方法。然後,您可以使用 X-Ray 來檢視、篩選應用程式的效能指標並獲得洞察,從而識別問題和進行最佳化的機會。
重要
X-Ray 和 Powertools AWS Lambda SDKs是 提供的緊密整合檢測解決方案的一部分 AWS。ADOT Lambda Layers 是用於追蹤檢測之業界通用標準的一部分,這類檢測一般會收集更多資料,但可能不適用於所有使用案例。您可以使用任一解決方案在 X-Ray 中實作端對端追蹤。若要深入了解如何在兩者之間做選擇,請參閱在 AWS Distro for OpenTelemetry 和 X-Ray SDK 之間進行選擇。
章節
使用 Powertools for AWS Lambda (TypeScript) 和 AWS SAM 進行追蹤
請依照下列步驟,使用 下載、建置和部署範例 Hello World TypeScript 應用程式,搭配整合式 Powertools for AWS Lambda (TypeScript)hello world 訊息。
先決條件
若要完成本節中的步驟,您必須執行下列各項:
-
Node.js 18.x 或更新版本
-
AWS SAM CLI 1.75 版或更新版本。如果您有較舊版本的 AWS SAM CLI,請參閱升級 AWS SAM CLI。
部署範例 AWS SAM 應用程式
-
使用 Hello World TypeScript 範本來初始化應用程式。
sam init --app-template hello-world-powertools-typescript --name sam-app --package-type Zip --runtime nodejs18.x --no-tracing -
建置應用程式。
cd sam-app && sam build -
部署應用程式。
sam deploy --guided -
依照螢幕上的提示操作。若要接受互動體驗中提供的預設選項,請按下
Enter。注意
對於 HelloWorldFunction may not have authorization defined, Is this okay?,確保輸入
y。 -
取得已部署應用程式的 URL:
aws cloudformation describe-stacks --stack-name sam-app --query 'Stacks[0].Outputs[?OutputKey==`HelloWorldApi`].OutputValue' --output text -
調用 API 端點:
curl<URL_FROM_PREVIOUS_STEP>成功的話,您將會看到以下回應:
{"message":"hello world"} -
若要取得函數的追蹤,請執行 sam 追蹤。
sam traces追蹤輸出如下:
XRay Event [revision 1] at (2023-01-31T11:29:40.527000) with id (1-11a2222-111a222222cb33de3b95daf9) and duration (0.483s) - 0.425s - sam-app/Prod [HTTP: 200] - 0.422s - Lambda [HTTP: 200] - 0.406s - sam-app-HelloWorldFunction-Xyzv11a1bcde [HTTP: 200] - 0.172s - sam-app-HelloWorldFunction-Xyzv11a1bcde - 0.179s - Initialization - 0.112s - Invocation - 0.052s - ## app.lambdaHandler - 0.001s - ### MySubSegment - 0.059s - Overhead -
這是可透過網際網路存取的公有 API 端點。建議您在測試後刪除端點。
sam delete
X-Ray 無法追蹤應用程式的所有請求。X-Ray 會套用取樣演算法以確保追蹤的效率,同時仍提供所有請求的代表範本。取樣率為每秒 1 次請求和 5% 的額外請求。不能針對函數設定 X-Ray 取樣率。
使用 Powertools for AWS Lambda (TypeScript) 和 AWS CDK 進行追蹤
請依照下列步驟,使用 下載、建置和部署範例 Hello World TypeScript 應用程式,搭配整合式 Powertools for AWS Lambda (TypeScript)hello world 訊息。
先決條件
若要完成本節中的步驟,您必須執行下列各項:
-
Node.js 18.x 或更新版本
-
AWS SAM CLI 1.75 版或更新版本。如果您有較舊版本的 AWS SAM CLI,請參閱升級 AWS SAM CLI。
部署範例 AWS Cloud Development Kit (AWS CDK) 應用程式
-
為您的新應用程式建立專案目錄。
mkdir hello-world cd hello-world -
初始化應用程式。
cdk init app --language typescript -
新增 @types/aws-lambda
套件作為開發相依項。 npm install -D @types/aws-lambda -
安裝 Powertools Tracer 公用程式
。 npm install @aws-lambda-powertools/tracer -
開啟 lib 目錄。您應看到名稱為 hello-world-stack.ts 的檔案。在此目錄中建立兩個新檔案:hello-world.function.ts 和 hello-world.ts。
-
開啟 hello-world.function.ts,並將下列程式碼新增至檔案。這是 Lambda 函數的程式碼。
import { APIGatewayEvent, APIGatewayProxyResult, Context } from 'aws-lambda'; import { Tracer } from '@aws-lambda-powertools/tracer'; const tracer = new Tracer(); export const handler = async (event: APIGatewayEvent, context: Context): Promise<APIGatewayProxyResult> => { // Get facade segment created by Lambda const segment = tracer.getSegment(); // Create subsegment for the function and set it as active const handlerSegment = segment.addNewSubsegment(`## ${process.env._HANDLER}`); tracer.setSegment(handlerSegment); // Annotate the subsegment with the cold start and serviceName tracer.annotateColdStart(); tracer.addServiceNameAnnotation(); // Add annotation for the awsRequestId tracer.putAnnotation('awsRequestId', context.awsRequestId); // Create another subsegment and set it as active const subsegment = handlerSegment.addNewSubsegment('### MySubSegment'); tracer.setSegment(subsegment); let response: APIGatewayProxyResult = { statusCode: 200, body: JSON.stringify({ message: 'hello world', }), }; // Close subsegments (the Lambda one is closed automatically) subsegment.close(); // (### MySubSegment) handlerSegment.close(); // (## index.handler) // Set the facade segment as active again (the one created by Lambda) tracer.setSegment(segment); return response; }; -
開啟 hello-world.ts,然後將下列程式碼新增至檔案。其中包含 NodejsFunction 建構模組,它會建立 Lambda 函數、設定 Powertools 的環境變數,並將日誌保留設定為一週。另外也包括負責建立 REST API 的 LambdaRestApi 建構模組。
import { Construct } from 'constructs'; import { NodejsFunction } from 'aws-cdk-lib/aws-lambda-nodejs'; import { LambdaRestApi } from 'aws-cdk-lib/aws-apigateway'; import { CfnOutput } from 'aws-cdk-lib'; import { Tracing } from 'aws-cdk-lib/aws-lambda'; export class HelloWorld extends Construct { constructor(scope: Construct, id: string) { super(scope, id); const helloFunction = new NodejsFunction(this, 'function', { environment: { POWERTOOLS_SERVICE_NAME: 'helloWorld', }, tracing: Tracing.ACTIVE, }); const api = new LambdaRestApi(this, 'apigw', { handler: helloFunction, }); new CfnOutput(this, 'apiUrl', { exportName: 'apiUrl', value: api.url, }); } } -
開啟 hello-world-stack.ts。這是定義 AWS CDK 堆疊的程式碼。將程式碼取代為以下內容:
import { Stack, StackProps } from 'aws-cdk-lib'; import { Construct } from 'constructs'; import { HelloWorld } from './hello-world'; export class HelloWorldStack extends Stack { constructor(scope: Construct, id: string, props?: StackProps) { super(scope, id, props); new HelloWorld(this, 'hello-world'); } } -
部署您的應用程式。
cd .. cdk deploy -
取得已部署應用程式的 URL:
aws cloudformation describe-stacks --stack-name HelloWorldStack --query 'Stacks[0].Outputs[?ExportName==`apiUrl`].OutputValue' --output text -
調用 API 端點:
curl<URL_FROM_PREVIOUS_STEP>成功的話,您將會看到以下回應:
{"message":"hello world"} -
若要取得函數的追蹤,請執行 sam 追蹤。
sam traces追蹤輸出如下:
XRay Event [revision 1] at (2023-01-31T11:50:06.997000) with id (1-11a2222-111a222222cb33de3b95daf9) and duration (0.449s) - 0.350s - HelloWorldStack-helloworldfunction111A2BCD-Xyzv11a1bcde [HTTP: 200] - 0.157s - HelloWorldStack-helloworldfunction111A2BCD-Xyzv11a1bcde - 0.169s - Initialization - 0.058s - Invocation - 0.055s - ## index.handler - 0.000s - ### MySubSegment - 0.099s - Overhead -
這是可透過網際網路存取的公有 API 端點。建議您在測試後刪除端點。
cdk destroy
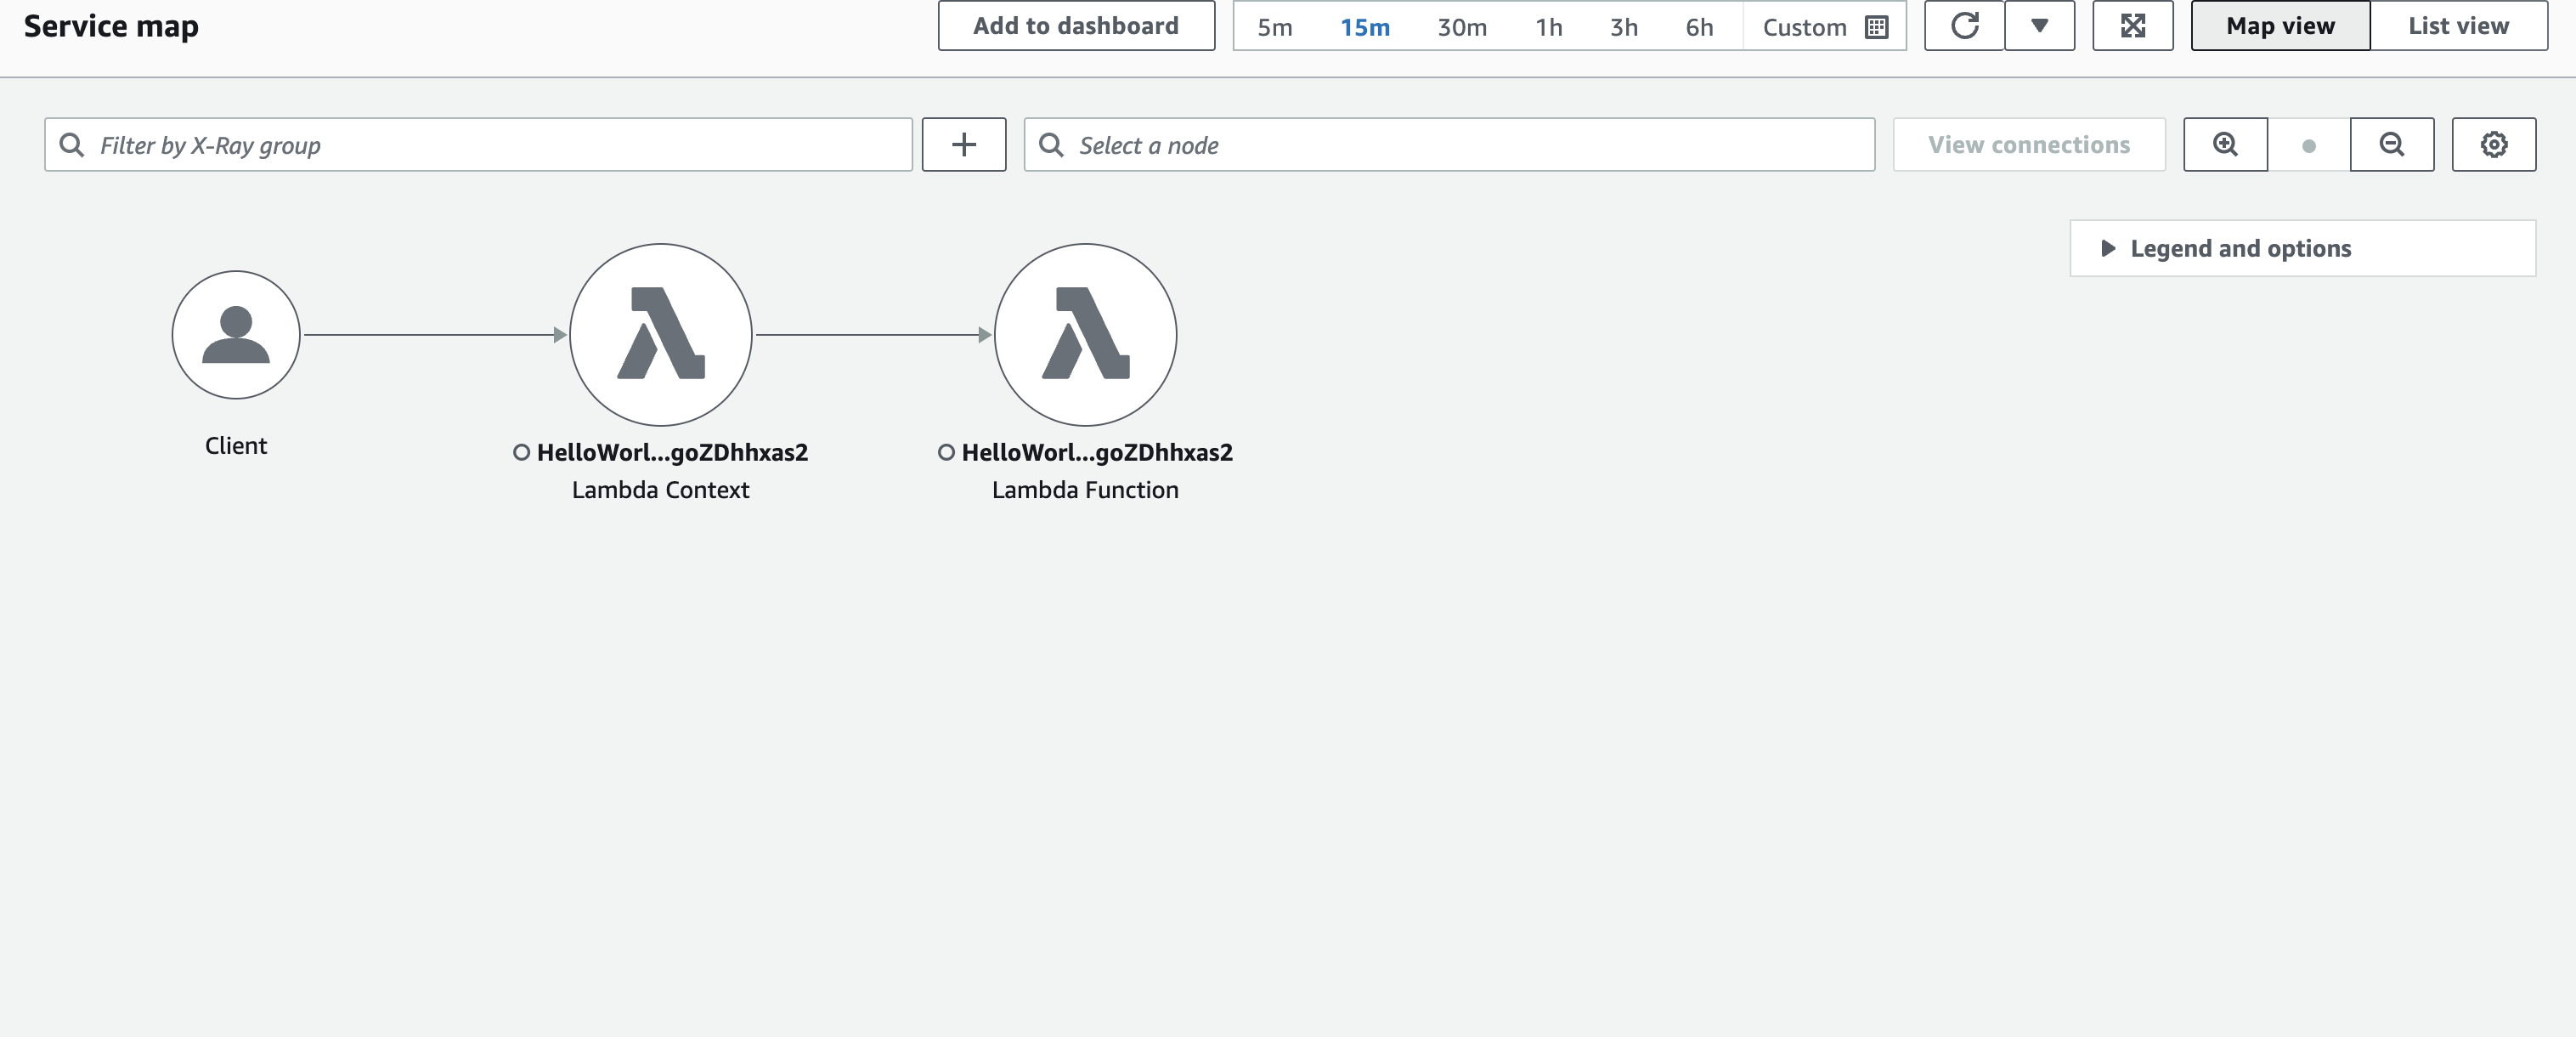
解讀 X-Ray 追蹤
設定主動追蹤之後,您可以透過應用程式來觀察特定請求。X-Ray 追蹤地圖提供了有關應用程式及其所有元件的資訊。下列範例顯示範例應用程式的追蹤:
