Für ähnliche Funktionen wie Amazon Timestream für sollten Sie Amazon Timestream for LiveAnalytics InfluxDB in Betracht ziehen. Es bietet eine vereinfachte Datenaufnahme und Antwortzeiten im einstelligen Millisekundenbereich für Analysen in Echtzeit. Erfahren Sie hier mehr.
Die vorliegende Übersetzung wurde maschinell erstellt. Im Falle eines Konflikts oder eines Widerspruchs zwischen dieser übersetzten Fassung und der englischen Fassung (einschließlich infolge von Verzögerungen bei der Übersetzung) ist die englische Fassung maßgeblich.
Überblick über die Migration
Nach Erfüllung der Voraussetzungen:
Migrationsskript ausführen: Führen Sie mit einer Terminal-App Ihrer Wahl das Python-Skript aus, um Daten von der InfluxDB-Quellinstanz zur InfluxDB-Zielinstanz zu übertragen.
Anmeldeinformationen angeben: Geben Sie Hostadressen und Ports als CLI-Optionen an.
Daten überprüfen: Stellen Sie sicher, dass die Daten korrekt übertragen werden, indem Sie:
Verwenden der InfluxDB-Benutzeroberfläche und Überprüfen von Buckets.
Buckets auflisten mit.
influx bucket list -t <destination token> --host <destination host address> --skip-verifyWird verwendet
influx v1 shell -t <destination token> --host <destination host address> --skip-verifyund ausgeführtSELECT * FROM <migrated bucket>.<retention period>.<measurement name> LIMIT 100 to view contents of a bucket or SELECT COUNT(*) FROM <migrated bucket>.<retention period>.<measurment name>, um zu überprüfen, ob die korrekte Anzahl von Datensätzen migriert wurde.
Beispiel Beispiel für einen Lauf
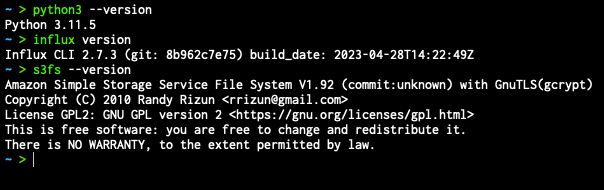
Öffnen Sie eine Terminal-App Ihrer Wahl und stellen Sie sicher, dass die erforderlichen Voraussetzungen ordnungsgemäß installiert sind:
Navigieren Sie zum Migrationsskript:

Bereiten Sie die folgenden Informationen vor:
Name des Quell-Buckets, der migriert werden soll.
(Optional) Wählen Sie einen neuen Bucket-Namen für den migrierten Bucket auf dem Zielserver.
Root-Token für Quell- und Ziel-Influx-Instances.
Hostadresse der Quell- und Ziel-Influx-Instances.
(Optional) Name und Anmeldeinformationen für den S3-Bucket; die AWS Command Line Interface Anmeldeinformationen sollten in den Umgebungsvariablen des Betriebssystems festgelegt werden.
# AWS credentials (for timestream testing)
    export AWS_ACCESS_KEY_ID="xxx"
    export AWS_SECRET_ACCESS_KEY="xxx"
Konstruieren Sie den Befehl wie folgt:
python3 influx_migration.py --src-bucket [amzn-s3-demo-source-bucket] --dest-bucket [amzn-s3-demo-destination-bucket] --src-host [source host] --dest-host [dest host] --s3-bucket [amzn-s3-demo-bucket2](optional) --log-level debugFühren Sie das Skript aus:

Warten Sie, bis die Ausführung des Skripts abgeschlossen ist.
Überprüfen Sie den neu migrierten Bucket auf Datenintegrität,
performance.txt. Diese Datei befindet sich in demselben Verzeichnis, in dem das Skript ausgeführt wurde, und enthält einige grundlegende Informationen darüber, wie lange die einzelnen Schritte gedauert haben.
Migrationszenarien
Beispiel Beispiel 1: Einfache Migration mit lokalem Speicher
Sie möchten einen einzelnen Bucket, amzn-s3-demo-primary-bucket, vom Quellserver auf einen Zielserver (http://localhost:8086) migrieren. (http://dest-server-address:8086)
Nachdem Sie sichergestellt haben, dass Sie TCP-Zugriff (für HTTP-Zugriff) auf beide Computer haben, die die InfluxDB-Instanzen auf Port 8086 hosten, und Sie haben sowohl Quell- als auch Ziel-Token und haben diese als Umgebungsvariablen bzw. zur zusätzlichen INFLUX_SRC_TOKEN Sicherheit INFLUX_DEST_TOKEN gespeichert:
python3 influx_migration.py --src-bucket amzn-s3-demo-primary-bucket --src-host http://localhost:8086 --dest-host http://dest-server-address:8086
Die Ausgabe sollte folgendermaßen oder ähnlich aussehen:
INFO: influx_migration.py: Backing up bucket data and metadata using the InfluxDB CLI
2023/10/26 10:47:15 INFO: Downloading metadata snapshot
2023/10/26 10:47:15 INFO: Backing up TSM for shard 1
2023/10/26 10:47:15 INFO: Backing up TSM for shard 8245
2023/10/26 10:47:15 INFO: Backing up TSM for shard 8263
[More shard backups . . .]
2023/10/26 10:47:20 INFO: Backing up TSM for shard 8240
2023/10/26 10:47:20 INFO: Backing up TSM for shard 8268
2023/10/26 10:47:20 INFO: Backing up TSM for shard 2
INFO: influx_migration.py: Restoring bucket data and metadata using the InfluxDB CLI
2023/10/26 10:47:20 INFO: Restoring bucket "96c11c8876b3c016" as "amzn-s3-demo-primary-bucket"
2023/10/26 10:47:21 INFO: Restoring TSM snapshot for shard 12772
2023/10/26 10:47:22 INFO: Restoring TSM snapshot for shard 12773
[More shard restores . . .]
2023/10/26 10:47:28 INFO: Restoring TSM snapshot for shard 12825
2023/10/26 10:47:28 INFO: Restoring TSM snapshot for shard 12826
INFO: influx_migration.py: Migration complete
Das Verzeichnis influxdb-backup-<timestamp> wird erstellt und in dem Verzeichnis gespeichert, von dem aus das Skript ausgeführt wurde. Es enthält Sicherungsdateien.
Beispiel Beispiel 2: Vollständige Migration mit lokalem Speicher und Debug-Protokollierung
Wie oben, außer dass Sie mit der Option alle Buckets, Token, Benutzer und Dashboards migrieren, die Buckets auf dem Zielserver löschen und ohne Benutzerbestätigung einer vollständigen Datenbankmigration fortfahren möchten. --confirm-full Sie möchten auch sehen, was die Leistungsmesswerte sind, damit Sie die Debug-Protokollierung aktivieren können.
python3 influx_migration.py --full --confirm-full --src-host http://localhost:8086 --dest-host http://dest-server-address:8086 --log-level debug
Die Ausgabe sollte folgendermaßen oder ähnlich aussehen:
INFO: influx_migration.py: Backing up bucket data and metadata using the InfluxDB CLI
2023/10/26 10:55:27 INFO: Downloading metadata snapshot
2023/10/26 10:55:27 INFO: Backing up TSM for shard 6952
2023/10/26 10:55:27 INFO: Backing up TSM for shard 6953
[More shard backups . . .]
2023/10/26 10:55:36 INFO: Backing up TSM for shard 8268
2023/10/26 10:55:36 INFO: Backing up TSM for shard 2
DEBUG: influx_migration.py: backup started at 2023-10-26 10:55:27 and took 9.41 seconds to run.
INFO: influx_migration.py: Restoring bucket data and metadata using the InfluxDB CLI
2023/10/26 10:55:36 INFO: Restoring KV snapshot
2023/10/26 10:55:38 WARN: Restoring KV snapshot overwrote the operator token, ensure following commands use the correct token
2023/10/26 10:55:38 INFO: Restoring SQL snapshot
2023/10/26 10:55:39 INFO: Restoring TSM snapshot for shard 6952
2023/10/26 10:55:39 INFO: Restoring TSM snapshot for shard 6953
[More shard restores . . .]
2023/10/26 10:55:49 INFO: Restoring TSM snapshot for shard 8268
2023/10/26 10:55:49 INFO: Restoring TSM snapshot for shard 2
DEBUG: influx_migration.py: restore started at 2023-10-26 10:55:36 and took 13.51 seconds to run.
INFO: influx_migration.py: Migration complete
Beispiel Beispiel 3: Vollständige Migration mit CSV, Zielorganisation und S3-Bucket
Wie im vorherigen Beispiel, aber mit Linux oder Mac und Speichern der Dateien im S3-Bucketamzn-s3-demo-bucket. Dadurch wird vermieden, dass Backup-Dateien die lokale Speicherkapazität überlasten.
python3 influx_migration.py --full --src-host http://localhost:8086 --dest-host http://dest-server-address:8086 --csv --dest-org MyOrg --s3-bucket amzn-s3-demo-bucket
Die Ausgabe sollte folgendermaßen oder ähnlich aussehen:
INFO: influx_migration.py: Creating directory influxdb-backups
INFO: influx_migration.py: Mounting amzn-s3-demo-influxdb-migration-bucket
INFO: influx_migration.py: Creating directory influxdb-backups/amzn-s3-demo-bucket/influxdb-backup-1698352128323
INFO: influx_migration.py: Backing up bucket data and metadata using the InfluxDB v2 API
INFO: influx_migration.py: Restoring bucket data and metadata from csv
INFO: influx_migration.py: Restoring bucket amzn-s3-demo-some-bucket
INFO: influx_migration.py: Restoring bucket amzn-s3-demo-another-bucket
INFO: influx_migration.py: Restoring bucket amzn-s3-demo-primary-bucket
INFO: influx_migration.py: Migration complete
INFO: influx_migration.py: Unmounting influxdb-backups
INFO: influx_migration.py: Removing temporary mount directory
