기계 번역으로 제공되는 번역입니다. 제공된 번역과 원본 영어의 내용이 상충하는 경우에는 영어 버전이 우선합니다.
훈련 중 지표, 파라미터 및 MLflow 모델 로깅
MLflow 추적 서버에 연결한 후를 사용하여 지표, 파라미터 및 MLflow 모델을 로깅MLflowSDK할 수 있습니다.
훈련 지표 로깅
MLflow 훈련 실행 mlflow.log_metric 내에서를 사용하여 지표를 추적합니다. 를 사용하여 지표를 로깅하는 방법에 대한 자세한 내용은 섹션을 MLflow참조하세요mlflow.log_metric.
with mlflow.start_run(): mlflow.log_metric("foo",1) print(mlflow.search_runs())
이 스크립트는 실험 실행을 생성하고 다음과 유사한 출력을 인쇄해야 합니다.
run_id experiment_id status artifact_uri ... tags.mlflow.source.name tags.mlflow.user tags.mlflow.source.type tags.mlflow.runName
0 607eb5c558c148dea176d8929bd44869 0 FINISHED s3://dddd/0/607eb5c558c148dea176d8929bd44869/a... ... file.py user-id LOCAL experiment-code-name
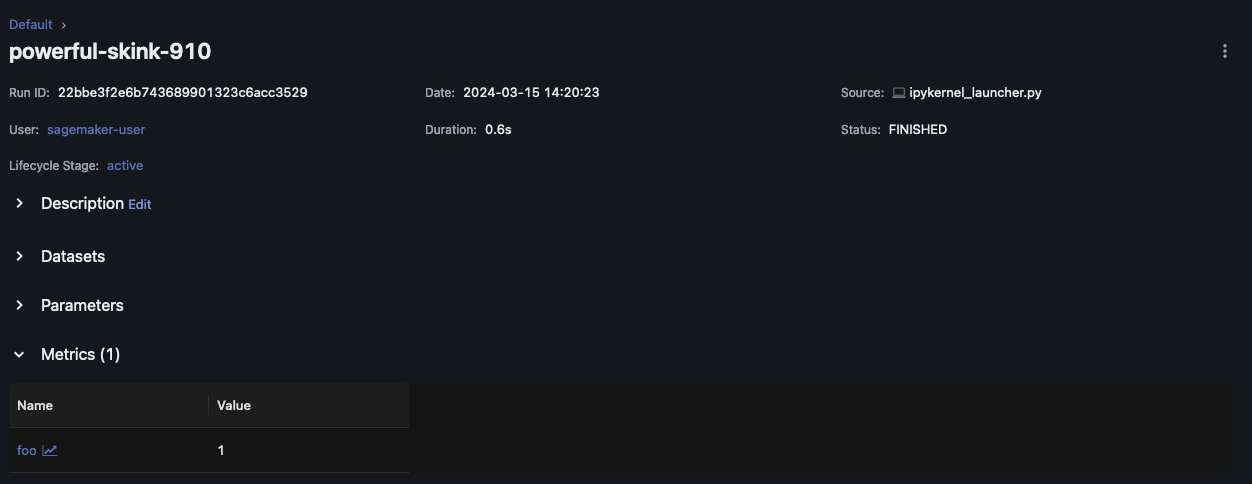
MLflow UI 내에서이 예제는 다음과 비슷해야 합니다.

실행 세부 정보를 보려면 실행 이름을 선택합니다.

로그 파라미터 및 모델
참고
다음 예제에서는 환경에 s3:PutObject 권한이 있어야 합니다. 이 권한은 MLflow SDK 사용자가 AWS 계정에 로그인하거나 연동할 때 수임하는 IAM 역할과 연결되어야 합니다. 자세한 내용은 사용자 및 역할 정책 예제 섹션을 참조하세요.
다음 예제에서는를 사용하여 기본 모델 훈련 워크플로를 안내SKLearn하고 MLflow 실험 실행에서 해당 모델을 추적하는 방법을 보여줍니다. 이 예제에서는 파라미터, 지표 및 모델 아티팩트를 기록합니다.
import mlflow from mlflow.models import infer_signature import pandas as pd from sklearn import datasets from sklearn.model_selection import train_test_split from sklearn.linear_model import LogisticRegression from sklearn.metrics import accuracy_score, precision_score, recall_score, f1_score # This is the ARN of the MLflow Tracking Server you created mlflow.set_tracking_uri(your-tracking-server-arn) mlflow.set_experiment("some-experiment") # Load the Iris dataset X, y = datasets.load_iris(return_X_y=True) # Split the data into training and test sets X_train, X_test, y_train, y_test = train_test_split(X, y, test_size=0.2, random_state=42) # Define the model hyperparameters params = {"solver": "lbfgs", "max_iter": 1000, "multi_class": "auto", "random_state": 8888} # Train the model lr = LogisticRegression(**params) lr.fit(X_train, y_train) # Predict on the test set y_pred = lr.predict(X_test) # Calculate accuracy as a target loss metric accuracy = accuracy_score(y_test, y_pred) # Start an MLflow run and log parameters, metrics, and model artifacts with mlflow.start_run(): # Log the hyperparameters mlflow.log_params(params) # Log the loss metric mlflow.log_metric("accuracy",accuracy) # Set a tag that we can use to remind ourselves what this run was for mlflow.set_tag("Training Info","Basic LR model for iris data") # Infer the model signature signature = infer_signature(X_train, lr.predict(X_train)) # Log the model model_info = mlflow.sklearn.log_model( sk_model=lr, artifact_path="iris_model", signature=signature, input_example=X_train, registered_model_name="tracking-quickstart", )
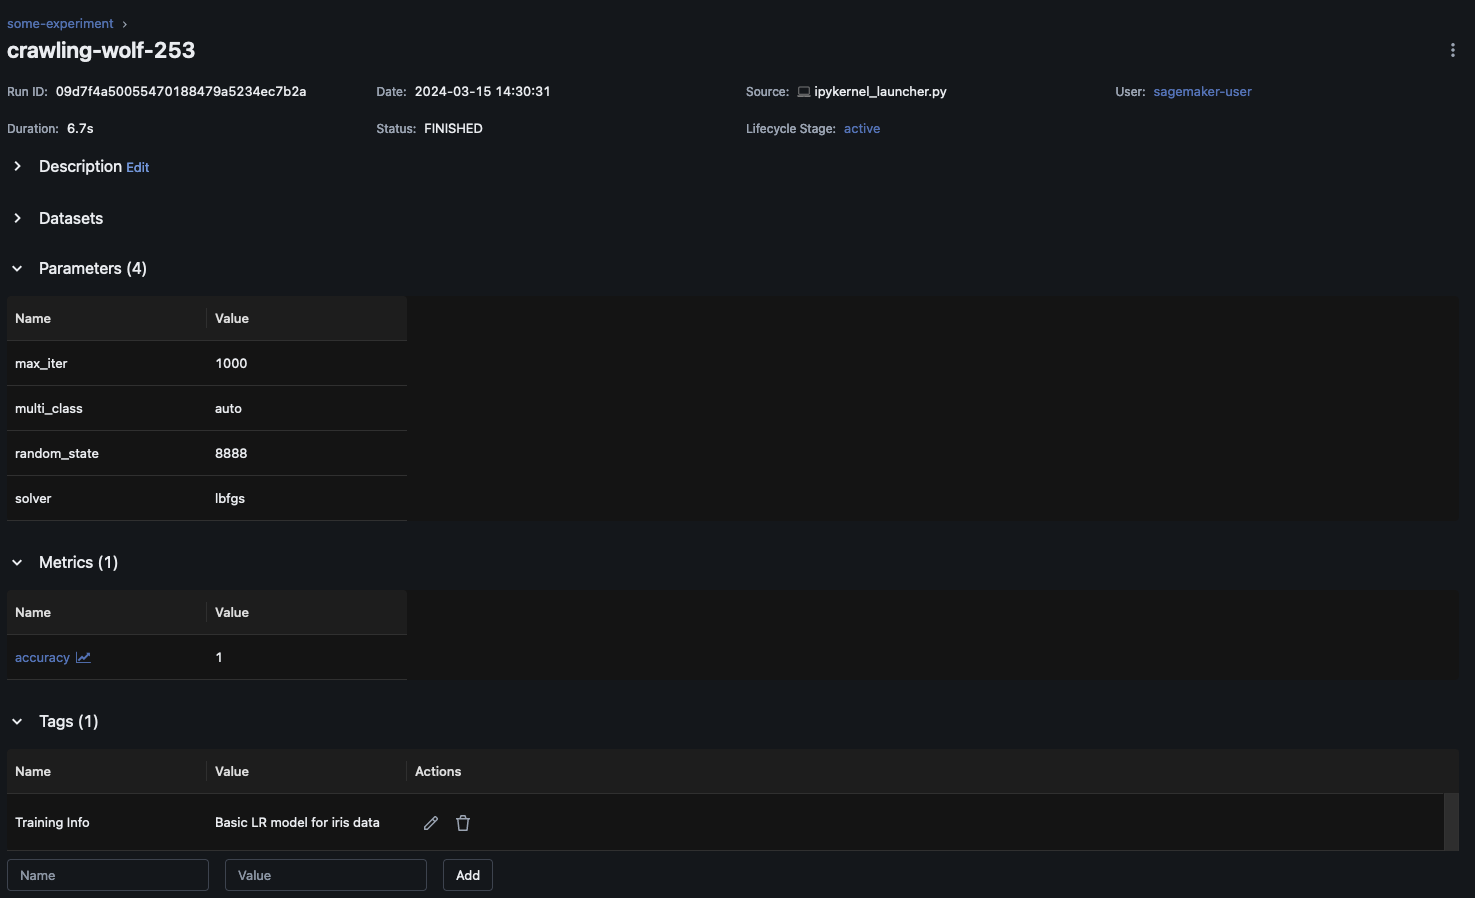
MLflow UI 내에서 왼쪽 탐색 창에서 실험 이름을 선택하여 연결된 모든 실행을 탐색합니다. 각 실행에 대한 자세한 내용을 보려면 실행 이름을 선택합니다. 이 예제에서는 이 실행에 대한 실험 실행 페이지가 다음과 비슷해야 합니다.

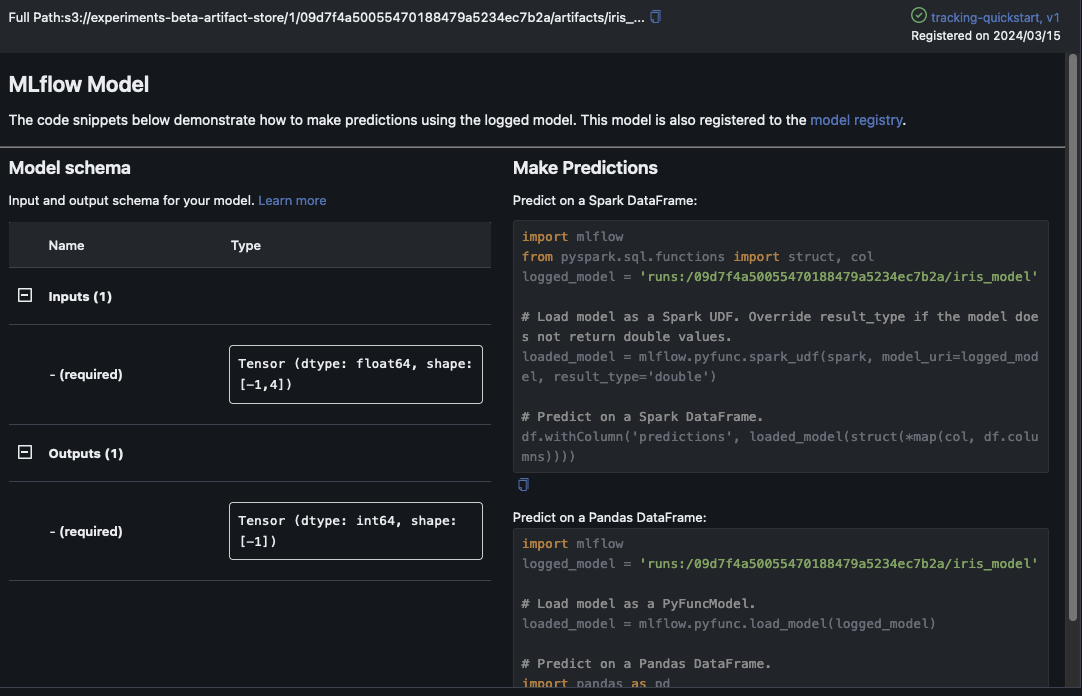
이 예제에서는 로지스틱 회귀 모델을 기록합니다. MLflow UI 내에는 로깅된 모델 아티팩트도 표시됩니다.
