本文為英文版的機器翻譯版本,如內容有任何歧義或不一致之處,概以英文版為準。
使用 Infrastructure Composer 參考OpenAPI規格外部檔案
此範例使用來自 主控台的 Infrastructure Composer 來參考定義 API Gateway 的外部OpenAPI規格檔案REST API。
首先,從 Infrastructure Composer 首頁建立新的專案。
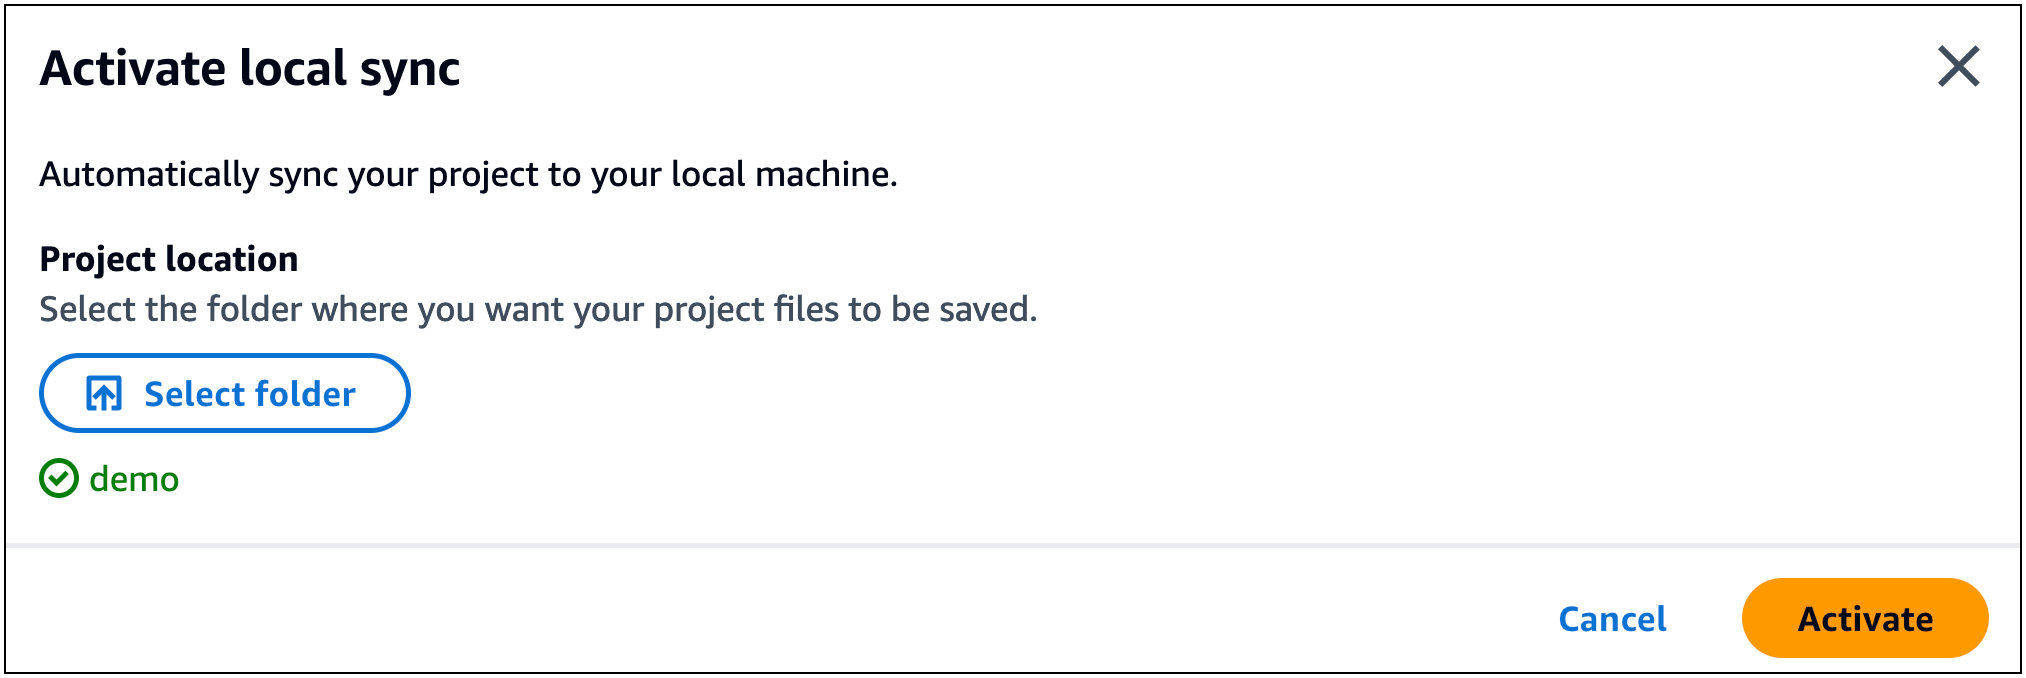
接著,從選單中選取啟用本機同步來啟用本機同步。建立名為 的新資料夾demo,允許提示檢視檔案,然後選取啟用。出現提示時,選取儲存變更。
接著,將 Amazon API Gateway 卡拖曳到畫布上。選取詳細資訊以顯示資源屬性面板。
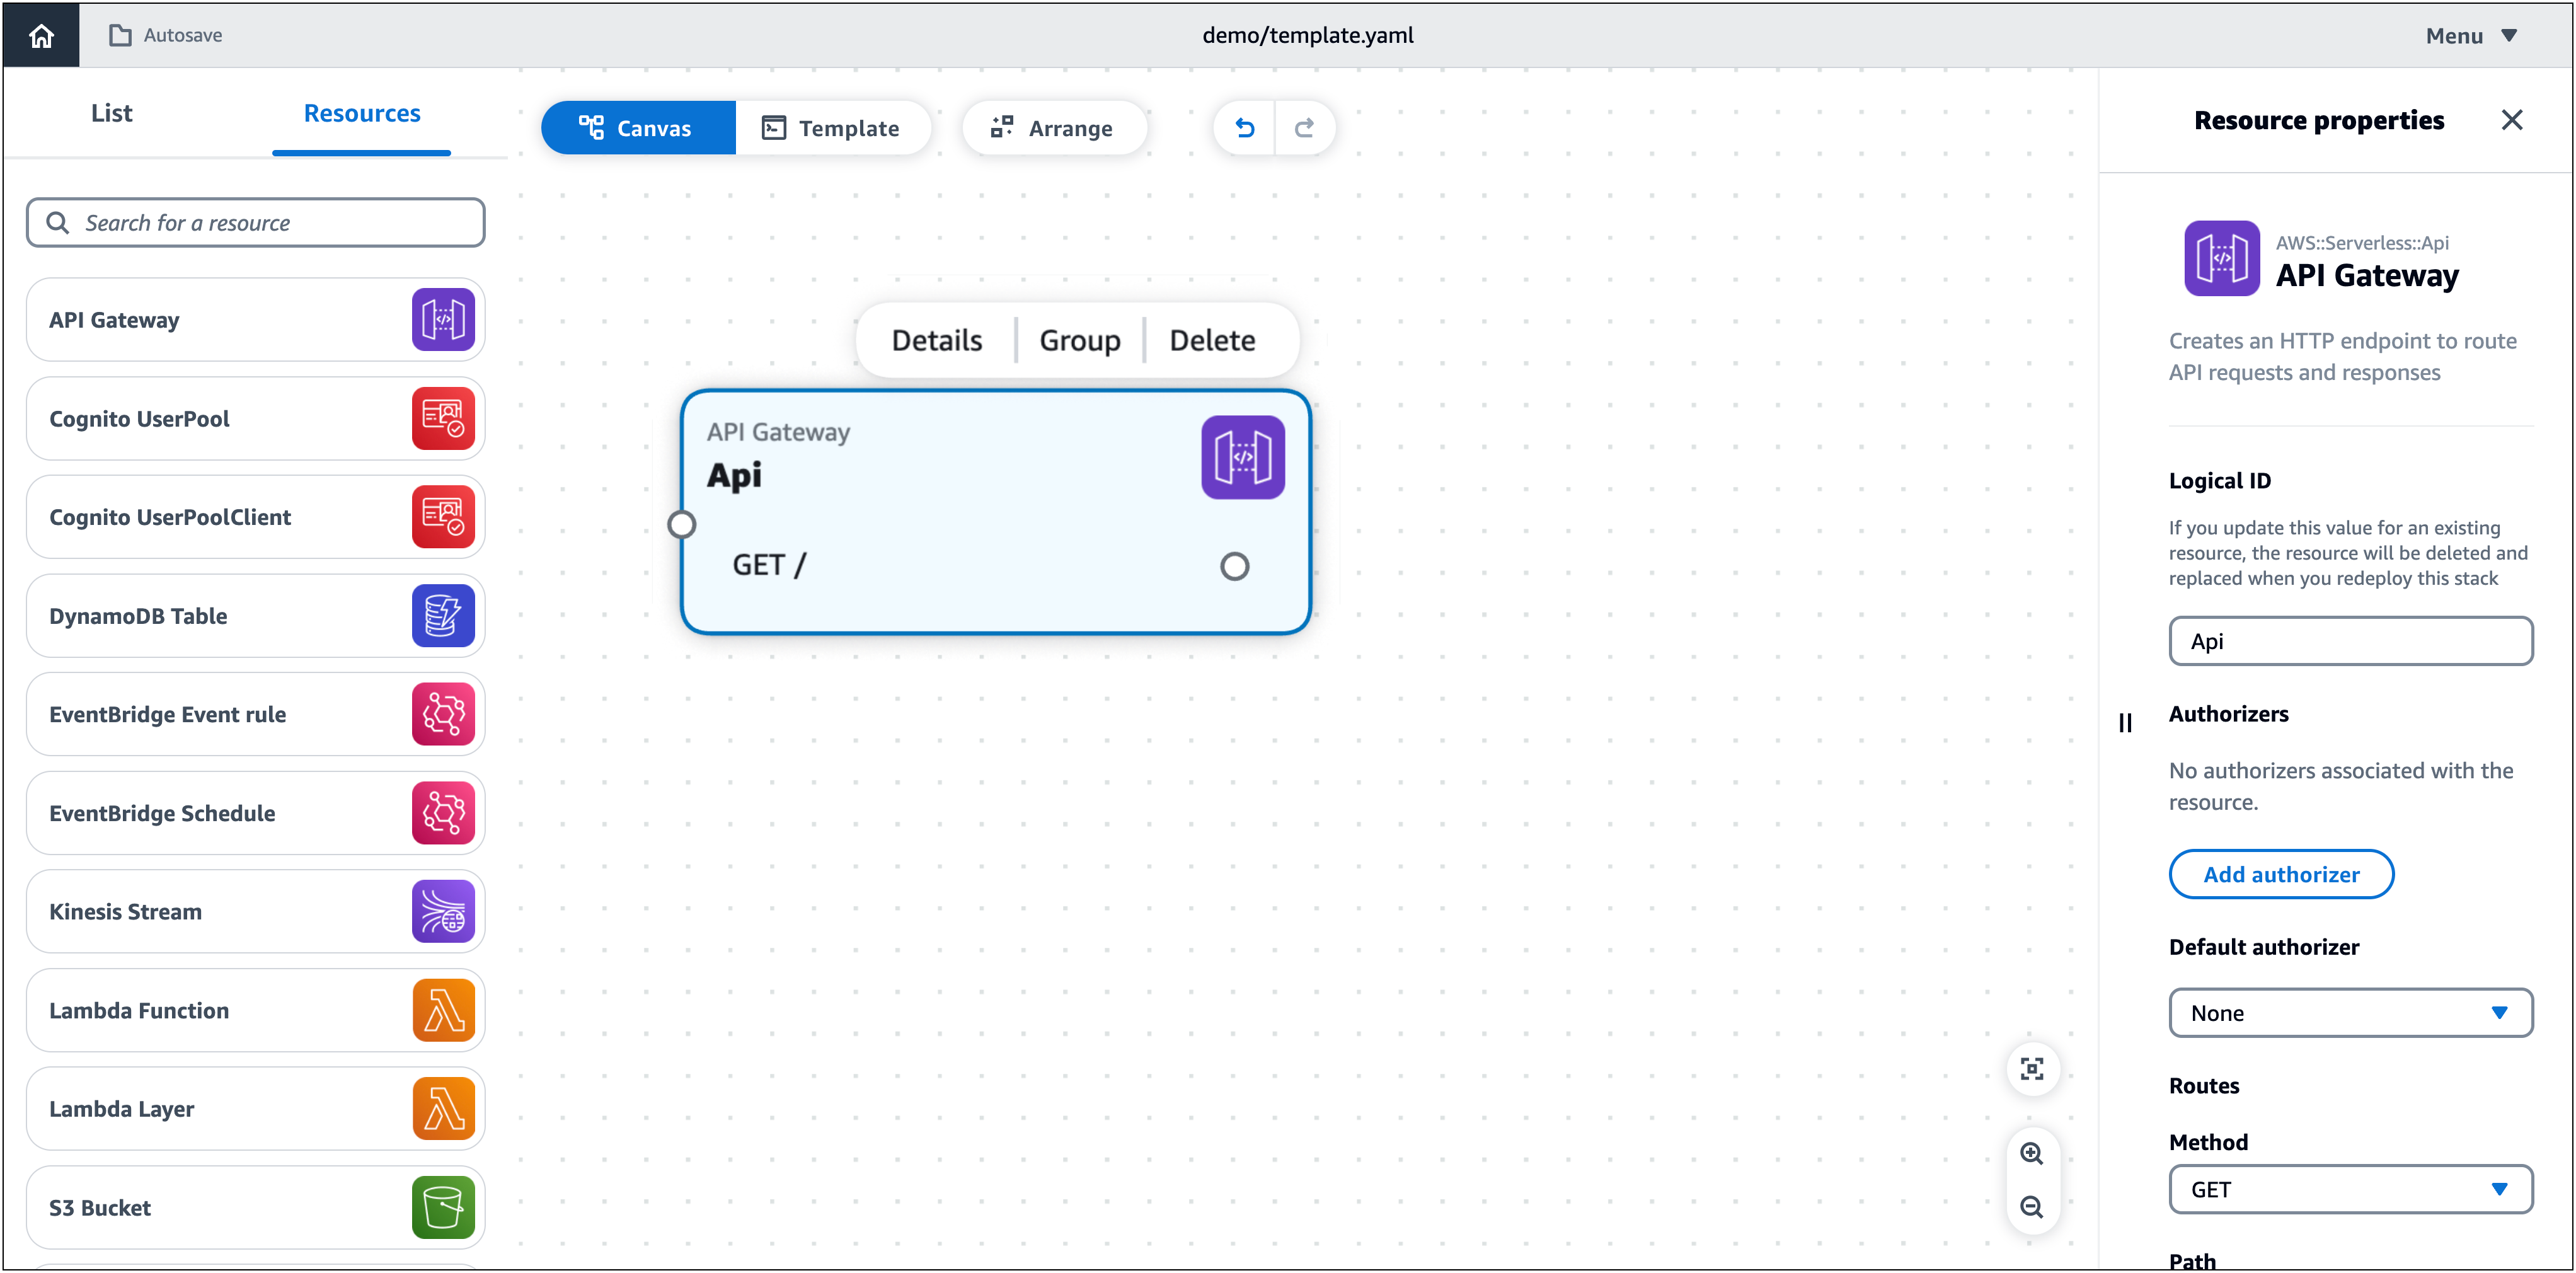
從資源屬性面板中,設定下列項目並儲存。
-
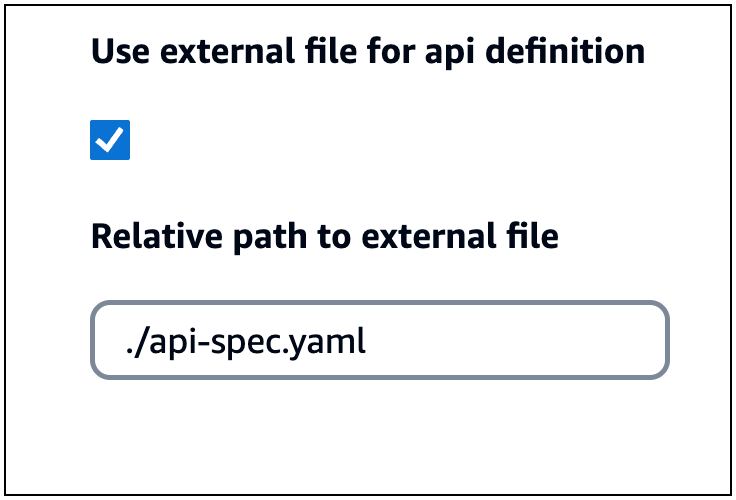
選取使用外部檔案進行 api 定義選項。
-
輸入
./api-spec.yaml做為外部檔案的相對路徑
這會在我們的本機電腦上建立下列目錄:
demo
└── api-spec.yaml
現在,您可以在我們的本機電腦上設定外部檔案。使用我們的 IDE,開啟api-spec.yaml您專案資料夾中的 。將其內容取代為下列項目:
openapi: '3.0'
info: {}
paths:
  /:
    get:
      responses: {}
    post:
      x-amazon-apigateway-integration:
        credentials:
          Fn::GetAtt:
            - ApiQueuesendmessageRole
            - Arn
        httpMethod: POST
        type: aws
        uri:
          Fn::Sub: arn:${AWS::Partition}:apigateway:${AWS::Region}:sqs:path/${AWS::AccountId}/${Queue.QueueName}
        requestParameters:
          integration.request.header.Content-Type: '''application/x-www-form-urlencoded'''
        requestTemplates:
          application/json: Action=SendMessage&MessageBody={"data":$input.body}
        responses:
          default:
            statusCode: 200
      responses:
        '200':
          description: 200 response
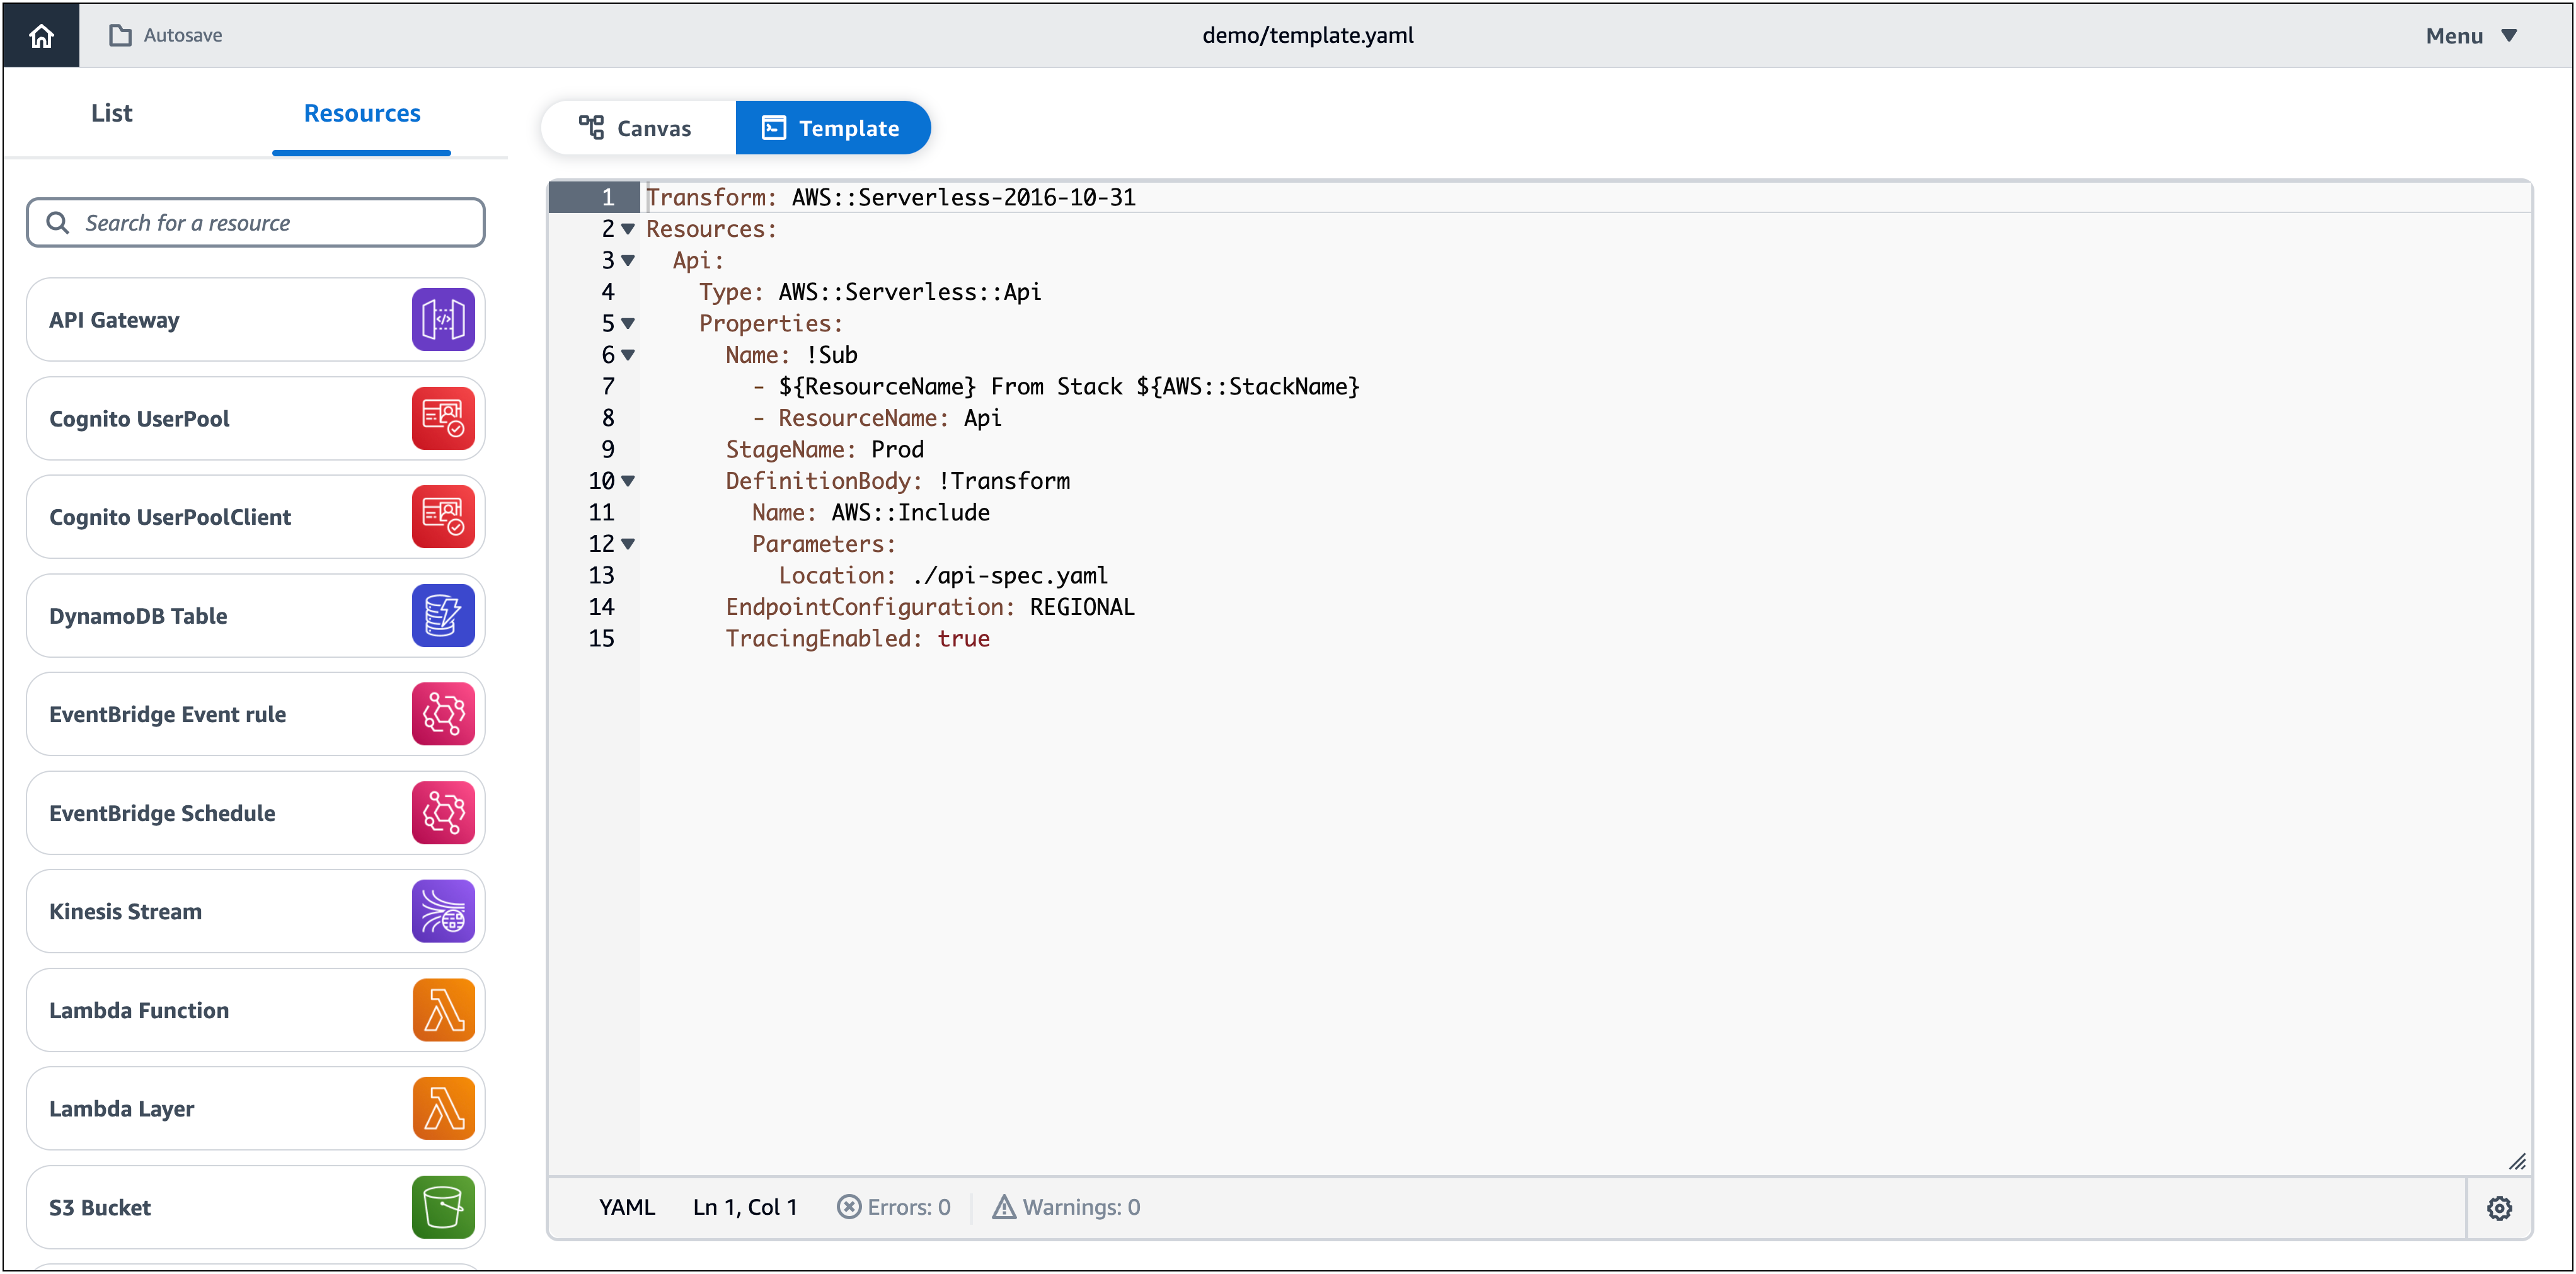
在 Infrastructure Composer 範本檢視中,您可以看到 Infrastructure Composer 已自動更新您的範本以參考外部檔案。