本文為英文版的機器翻譯版本,如內容有任何歧義或不一致之處,概以英文版為準。
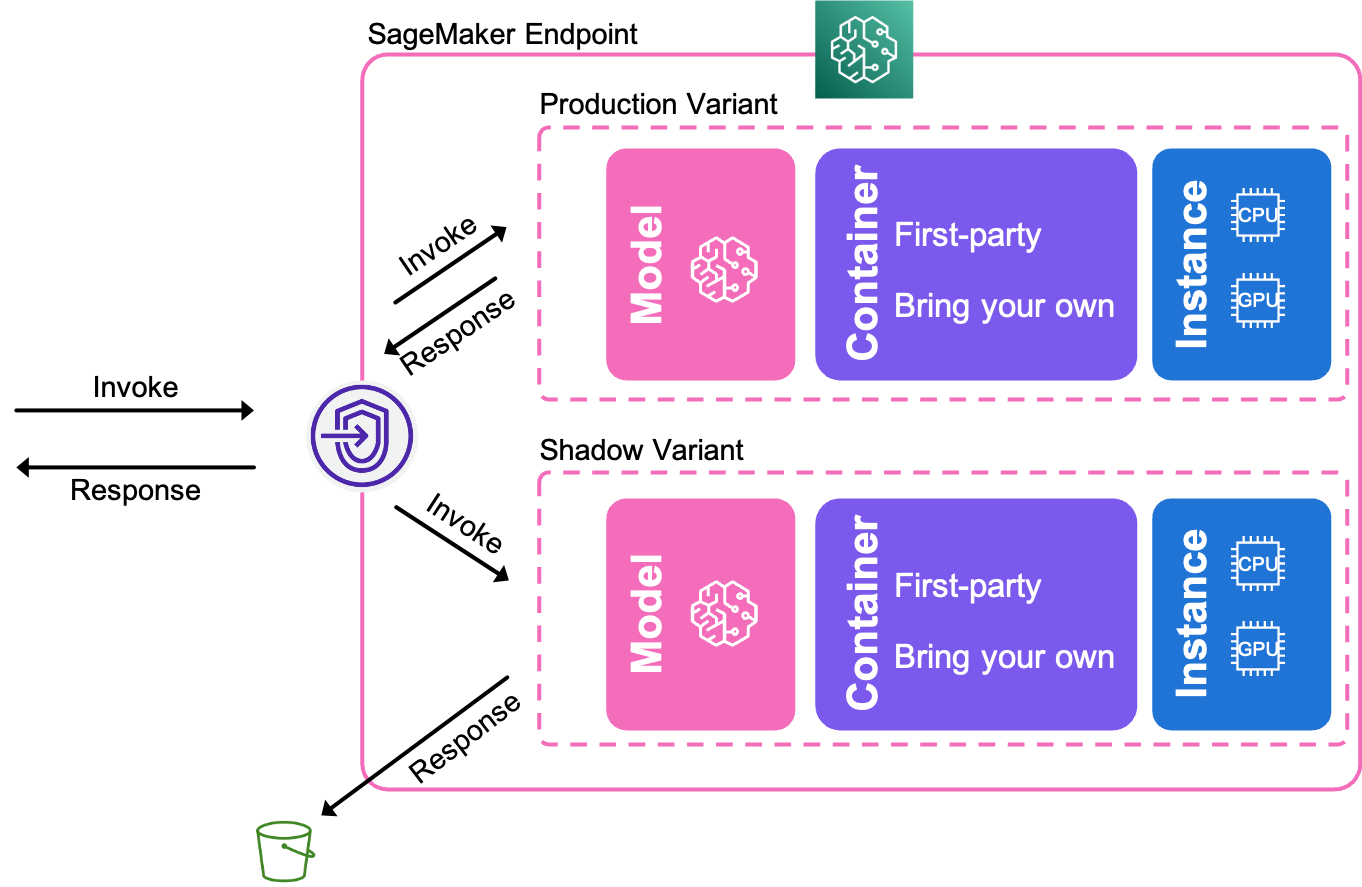
您可以使用 SageMaker AI Model Shadow Deployments 來建立長時間執行的陰影變體,在將模型服務堆疊的任何新候選元件提升至生產環境之前,驗證其內容。下圖顯示更詳細的陰影收體運作情形。

部署陰影變體
下列程式碼範例示範如何以程式設計方式部署陰影變體。請將範例中的使用者預留位置文字取代為您自己的資訊。
-
建立兩個 SageMaker AI 模型:一個用於生產變體,另一個用於陰影變體。
import boto3 from sagemaker import get_execution_role, Session aws_region = "aws-region" boto_session = boto3.Session(region_name=aws_region) sagemaker_client = boto_session.client("sagemaker") role = get_execution_role() bucket = Session(boto_session).default_bucket() model_name1 = "name-of-your-first-model" model_name2 = "name-of-your-second-model" sagemaker_client.create_model( ModelName = model_name1, ExecutionRoleArn = role, Containers=[ { "Image": "ecr-image-uri-for-first-model", "ModelDataUrl": "s3-location-of-trained-first-model" } ] ) sagemaker_client.create_model( ModelName = model_name2, ExecutionRoleArn = role, Containers=[ { "Image": "ecr-image-uri-for-second-model", "ModelDataUrl": "s3-location-of-trained-second-model" } ] ) -
建立端點組態。在組態中指定生產和陰影變體。
endpoint_config_name =name-of-your-endpoint-configcreate_endpoint_config_response = sagemaker_client.create_endpoint_config( EndpointConfigName=endpoint_config_name, ProductionVariants=[ { "VariantName":name-of-your-production-variant, "ModelName": model_name1, "InstanceType":"ml.m5.xlarge", "InitialInstanceCount":1, "InitialVariantWeight":1, } ], ShadowProductionVariants=[ { "VariantName":name-of-your-shadow-variant, "ModelName": model_name2, "InstanceType":"ml.m5.xlarge", "InitialInstanceCount":1, "InitialVariantWeight":1, } ] ) -
建立端點。
create_endpoint_response = sm.create_endpoint(
    EndpointName=name-of-your-endpoint,
    EndpointConfigName=endpoint_config_name,
)