Using AWS Directory Service for Entra ID Domain Services
For customers that need SFTP Transfer only, and do not want to manage a domain, there is Simple Active Directory. Alternatively, customers who want the benefits of Active Directory and high availability in a fully managed service can use AWS Managed Microsoft AD. Finally, for customers who want to take advantage of their existing Active Directory forest for their SFTP Transfer, there is Active Directory Connector.
Note the following:
-
To take advantage of your existing Active Directory forest for your SFTP Transfer needs, you can use Active Directory Connector.
-
If you want the benefits of Active Directory and high availability in a fully managed service, you can use AWS Directory Service for Microsoft Active Directory. For details, see Using AWS Directory Service for Microsoft Active Directory.
This topic describes how to use an Active Directory Connector and Entra ID (formerly
Azure AD) Domain Services
Topics
Before you start using AWS Directory Service for Entra ID Domain Services
Note
AWS Transfer Family has a default limit of 100 Active Directory groups per server. If your
use case requires more than 100 groups, consider using a custom identity provider
solution as described in Simplify Active Directory authentication with a custom identity provider for
AWS Transfer Family
For AWS, you need the following:
-
A virtual private cloud (VPC) in an AWS region where you are using your Transfer Family servers
-
At least two private subnets in your VPC
-
The VPC must have internet connectivity
-
A customer gateway and Virtual private gateway for site-to-site VPN connection with Microsoft Entra
For Microsoft Entra, you need the following:
-
An Entra ID and Active directory domain service
-
An Entra resource group
-
An Entra virtual network
-
VPN connectivity between your Amazon VPC and your Entra resource group
Note
This can be through native IPSEC tunnels or using VPN appliances. In this topic, we use IPSEC tunnels between an Entra Virtual network gateway and local network gateway. The tunnels must be configured to allow traffic between your Entra Domain Service endpoints and the subnets that house your AWS VPC.
-
A customer gateway and Virtual private gateway for site-to-site VPN connection with Microsoft Entra
The following diagram shows the configuration needed before you begin.

Step 1: Adding Entra ID Domain Services
Entra ID does not support Domain joining instances by default. To perform actions like Domain Join, and to use tools such as Group Policy, administrators must enable Entra ID Domain Services. If you have not already added Entra DS, or your existing implementation is not associated with the domain that you want your SFTP Transfer server to use, you must add a new instance.
For information about enabling Entra ID Domain Services, see Tutorial: Create and configure a Microsoft Entra Domain Services managed
domain
Note
When you enable Entra DS, make sure it is configured for the resource group and the Entra domain to which you are connecting your SFTP Transfer server.

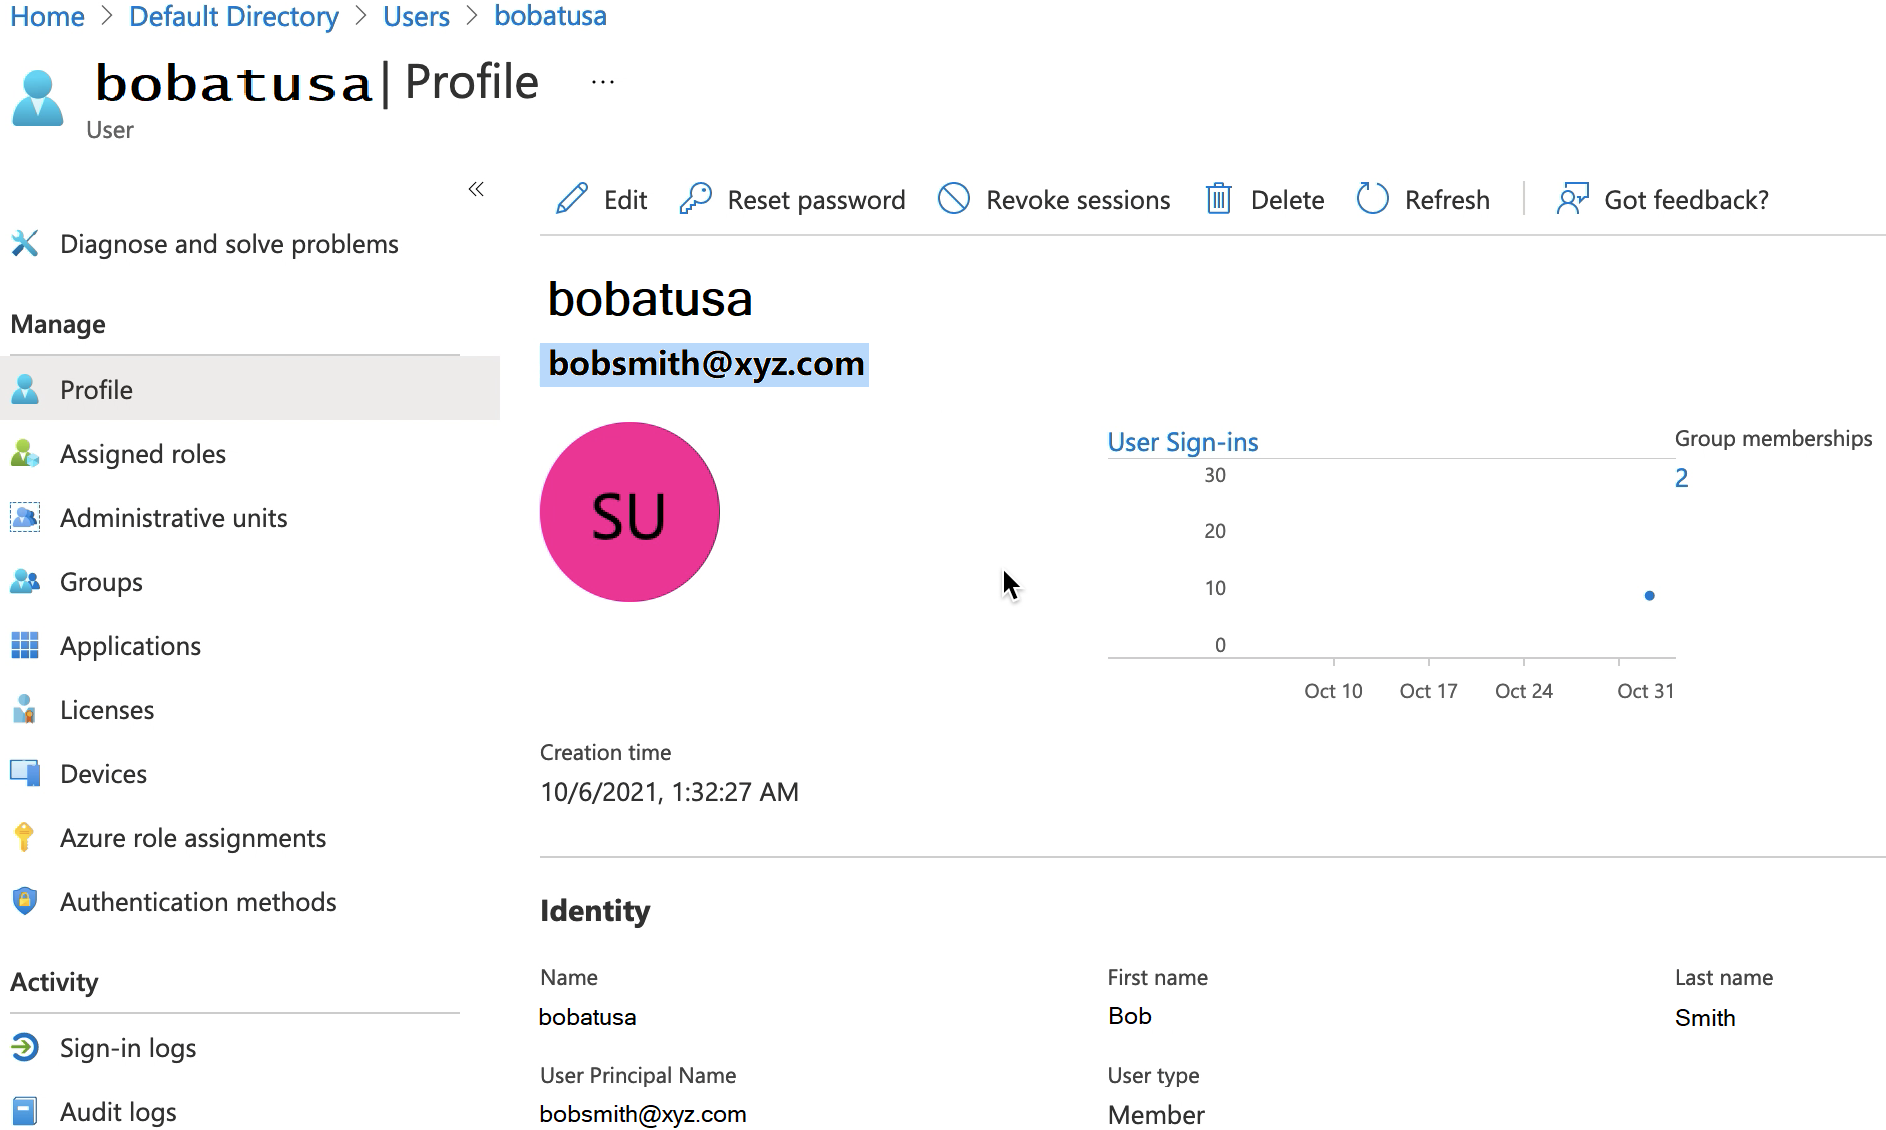
Step 2: Creating a service account
Entra must have one service account that is part of an Admin group in Entra DS. This account is used with the AWS Active Directory connector. Make sure this account is in sync with Entra DS.
Tip
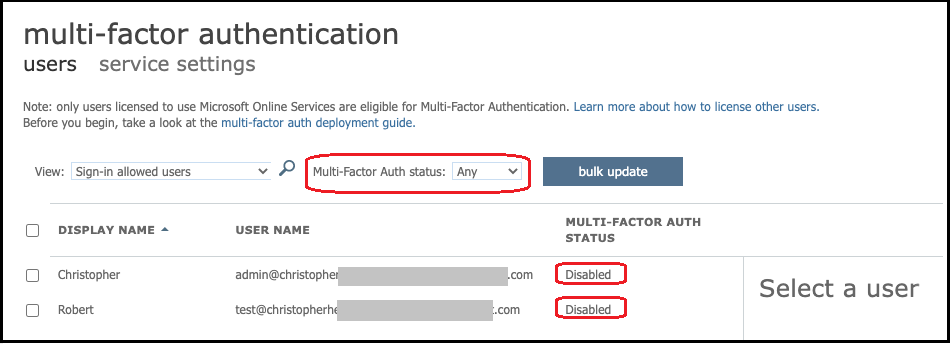
Multi-factor authentication for Entra ID is not supported for Transfer Family servers that use the SFTP protocol. The Transfer Family server cannot provide the MFA token after a user authenticates to SFTP. Make sure to disable MFA before you attempt to connect.
Step 3: Setting up AWS Directory using AD Connector
After you have configured Entra DS, and created a service account with IPSEC VPN tunnels between your AWS VPC and Entra Virtual network, you can test the connectivity by pinging the Entra DS DNS IP address from any AWS EC2 instance.
After you verify the connection is active, you can continue below.
To set up your AWS Directory using AD Connector
-
Open the Directory Service
console and select Directories. -
Select Set up directory.
-
For directory type, choose AD Connector.
-
Select a directory size, select Next, then select your VPC and Subnets.
-
Select Next, then fill in the fields as follows:
-
Directory DNS name: enter the domain name you are using for your Entra DS.
-
DNS IP addresses: enter your Entra DS IP addresses.
-
Server account username and password: enter the details for the service account you created in Step 2: Create a service account.
-
-
Complete the screens to create the directory service.
Now the directory status should be Active, and it is ready to be used with an SFTP Transfer server.

Step 4: Setting up AWS Transfer Family server
Create a Transfer Family server with the SFTP protocol, and the identity provider type of AWS Directory Service. From Directory drop down list, select the directory you added in Step 3: Setup AWS Directory using AD Connector.
Note
You can't delete a Microsoft AD directory in AWS Directory Service if you used it in a Transfer Family server. You must delete the server first, and then you can delete the directory.
Step 5: Granting access to groups
After you create the server, you must choose which groups in the directory should have access to upload and download files over the enabled protocols using AWS Transfer Family. You do this by creating an access.
Note
Users must belong directly to the group to which you are granting access. For example, assume that Bob is a user and belongs to groupA, and groupA itself is included in groupB.
-
If you grant access to groupA, Bob is granted access.
-
If you grant access to groupB (and not to groupA), Bob does not have access.
In order to grant access you need to retrieve the SID for the group.
Use the following Windows PowerShell command to retrieve the SID for a group,
replacing YourGroupName with the name of the group.
Get-ADGroup -Filter {samAccountName -like "YourGroupName*"} -Properties * | Select SamAccountName,ObjectSid

Grant access to groups
-
Open https://console.aws.amazon.com/transfer/
. -
Navigate to your server details page and in the Accesses section, choose Add access.
-
Enter the SID you received from the output of the previous procedure.
-
For Access, choose an AWS Identity and Access Management role for the group.
-
In the Policy section, choose a policy. The default value is None.
-
For Home directory, choose an Amazon S3 bucket that corresponds to the group's home directory.
-
Choose Add to create the association.
The details from your Transfer server should look similar to the following:


Step 6: Testing users
You can test (Testing users) whether a user has access to the AWS Managed Microsoft AD directory for your server. A user must be in exactly one group (an external ID) that is listed in the Access section of the Endpoint configuration page. If the user is in no groups, or is in more than a single group, that user is not granted access.
