Partitioning speakers (diarization)
With speaker diarization, you can distinguish between different speakers in your
transcription output. Amazon Transcribe can differentiate between a maximum of 30 unique
speakers and labels the text from each unique speaker with a unique value (spk_0
through spk_29).
In addition to the standard transcript sections
(transcripts and items), requests with speaker partitioning
enabled include a speaker_labels section. This section is grouped by speaker and
contains information on each utterance, including speaker label and timestamps.
"speaker_labels": { "channel_label": "ch_0", "speakers": 2, "segments": [ { "start_time": "4.87", "speaker_label": "spk_0", "end_time": "6.88", "items": [ { "start_time": "4.87", "speaker_label": "spk_0", "end_time": "5.02" },...{ "start_time": "8.49", "speaker_label": "spk_1", "end_time": "9.24", "items": [ { "start_time": "8.49", "speaker_label": "spk_1", "end_time": "8.88" },
To view a complete example transcript with speaker partitioning (for two speakers), see Example diarization output (batch).
Partitioning speakers in a batch transcription
To partition speakers in a batch transcription, see the following examples:
-
Sign in to the AWS Management Console
. -
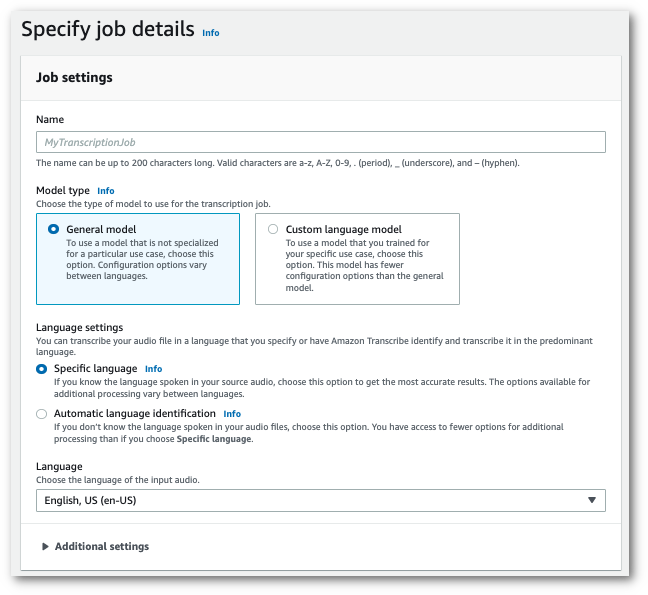
In the navigation pane, choose Transcription jobs, then select Create job (top right). This opens the Specify job details page.
-
Fill in any fields you want to include on the Specify job details page, then select Next. This takes you to the Configure job - optional page.
To enable speaker partitioning, in Audio settings, choose Audio identification. Then choose Speaker partitioning and specify the number of speakers.

-
Select Create job to run your transcription job.
This example uses the start-transcription-jobStartTranscriptionJob.
aws transcribe start-transcription-job \ --regionus-west-2\ --transcription-job-namemy-first-transcription-job\ --media MediaFileUri=s3://amzn-s3-demo-bucket/my-input-files/my-media-file.flac\ --output-bucket-nameamzn-s3-demo-bucket\ --output-keymy-output-files/ \ --language-codeen-US\ --settings ShowSpeakerLabels=true,MaxSpeakerLabels=3
Here's another example using the start-transcription-job
aws transcribe start-transcription-job \ --regionus-west-2\ --cli-input-json file://my-first-transcription-job.json
The file my-first-transcription-job.json contains the following request body.
{ "TranscriptionJobName": "my-first-transcription-job", "Media": { "MediaFileUri": "s3://amzn-s3-demo-bucket/my-input-files/my-media-file.flac" }, "OutputBucketName": "amzn-s3-demo-bucket", "OutputKey": "my-output-files/", "LanguageCode": "en-US", "ShowSpeakerLabels": 'TRUE', "MaxSpeakerLabels":3}
This example uses the AWS SDK for Python (Boto3) to identify channels using the
start_transcription_job
from __future__ import print_function import time import boto3 transcribe = boto3.client('transcribe', 'us-west-2') job_name = "my-first-transcription-job" job_uri = "s3://amzn-s3-demo-bucket/my-input-files/my-media-file.flac" transcribe.start_transcription_job( TranscriptionJobName = job_name, Media = { 'MediaFileUri': job_uri }, OutputBucketName = 'amzn-s3-demo-bucket', OutputKey = 'my-output-files/', LanguageCode = 'en-US', Settings = { 'ShowSpeakerLabels': True, 'MaxSpeakerLabels':3} ) while True: status = transcribe.get_transcription_job(TranscriptionJobName = job_name) if status['TranscriptionJob']['TranscriptionJobStatus'] in ['COMPLETED', 'FAILED']: break print("Not ready yet...") time.sleep(5) print(status)
Partitioning speakers in a streaming transcription
To partition speakers in a streaming transcription, see the following examples:
-
Sign in to the AWS Management Console
. -
In the navigation pane, choose Real-time transcription. Scroll down to Audio settings and expand this field if it is minimized.

-
Toggle on Speaker partitioning.

-
You're now ready to transcribe your stream. Select Start streaming and begin speaking. To end your dictation, select Stop streaming.
This example creates an HTTP/2 request that partitions speakers in your transcription output. For more information on using HTTP/2 streaming with Amazon Transcribe, see Setting up an HTTP/2 stream. For more detail on parameters and headers specific to Amazon Transcribe, see StartStreamTranscription.
POST /stream-transcription HTTP/2 host: transcribestreaming.us-west-2.amazonaws.com X-Amz-Target: com.amazonaws.transcribe.Transcribe.StartStreamTranscriptionContent-Type: application/vnd.amazon.eventstream X-Amz-Content-Sha256:stringX-Amz-Date:20220208T235959Z Authorization: AWS4-HMAC-SHA256 Credential=access-key/20220208/us-west-2/transcribe/aws4_request, SignedHeaders=content-type;host;x-amz-content-sha256;x-amz-date;x-amz-target;x-amz-security-token, Signature=stringx-amzn-transcribe-language-code:en-USx-amzn-transcribe-media-encoding:flacx-amzn-transcribe-sample-rate:16000x-amzn-transcribe-show-speaker-label: true transfer-encoding: chunked
Parameter definitions can be found in the API Reference; parameters common to all AWS API operations are listed in the Common Parameters section.
This example creates a presigned URL that separates speakers in your transcription output.
Line breaks have been added for readability. For more information
on using WebSocket streams with Amazon Transcribe, see
Setting up a WebSocket stream.
For more detail on parameters, see
StartStreamTranscription.
GET wss://transcribestreaming.us-west-2.amazonaws.com:8443/stream-transcription-websocket? &X-Amz-Algorithm=AWS4-HMAC-SHA256 &X-Amz-Credential=AKIAIOSFODNN7EXAMPLE%2F20220208%2Fus-west-2%2Ftranscribe%2Faws4_request &X-Amz-Date=20220208T235959Z &X-Amz-Expires=300&X-Amz-Security-Token=security-token&X-Amz-Signature=string&X-Amz-SignedHeaders=content-type%3Bhost%3Bx-amz-date &language-code=en-US &specialty=PRIMARYCARE&type=DICTATION&media-encoding=flac&sample-rate=16000&show-speaker-label=true
Parameter definitions can be found in the API Reference; parameters common to all AWS API operations are listed in the Common Parameters section.
