AWS Cloud9 is no longer available to new customers. Existing customers of
AWS Cloud9 can continue to use the service as normal.
Learn more
Working with Amazon Lightsail instances in the AWS Cloud9 IDE
You can use the AWS Cloud9 IDE to work with code on Amazon Lightsail instances that are preconfigured with popular applications and frameworks. They include WordPress, LAMP (Linux, Apache, MySQL, and PHP), Node.js, NGINX, Drupal, and Joomla. Linux distributions are included such as Amazon Linux, Ubuntu, Debian, FreeBSD, and openSUSE.
Lightsail provide a convenient, quick setup virtual private server solution. Lightsail
provides compute, storage, and networking capacity and the ability to deploy and manage
websites and web applications in the cloud. You can use Lightsail to launch your project
quicklyfor a low, predictable monthly price. For more information, see Amazon Lightsail Features
In this topic, you create and set up a Linux-based Lightsail instance that's compatible with AWS Cloud9. You then create and connect an AWS Cloud9 SSH development environment to the Lightsail instance.
Note
Completing these procedures might result in charges to your AWS account. These include
possible charges for services such as Lightsail. For more information, see Amazon Lightsail Pricing
To use the AWS Cloud9 IDE to work with an Amazon EC2 instance running Amazon Linux or Ubuntu Server that contains no sample code, see Getting started: basic tutorials.
Step 1: Create a Linux-based Lightsail instance
In this step, you use the Lightsail console to create an Amazon EC2 instance that runs an app in a Linux-based distribution. This instance automatically includes the following:
-
A public and private IP address. (You can create a static public IP later.)
-
Access to the instance using SSH over port 22, HTTP over port 80, and HTTPS over port 443. (You can change these settings.)
-
A block storage disk. (You can attach additional disks later.)
-
Built-in system reporting.
On the Lightsail console, you can back up, reboot, stop, or delete the instance later.
-
Open and then sign in to the Lightsail console, at https://lightsail.aws.amazon.com
. We recommend you sign in using credentials for an IAM administrator user in your AWS account. If you can't sign in as an IAM administrator user, check with your AWS account administrator.
-
If prompted, choose the language to use in the console, and then choose Save.
-
If prompted, choose Let's get started.
-
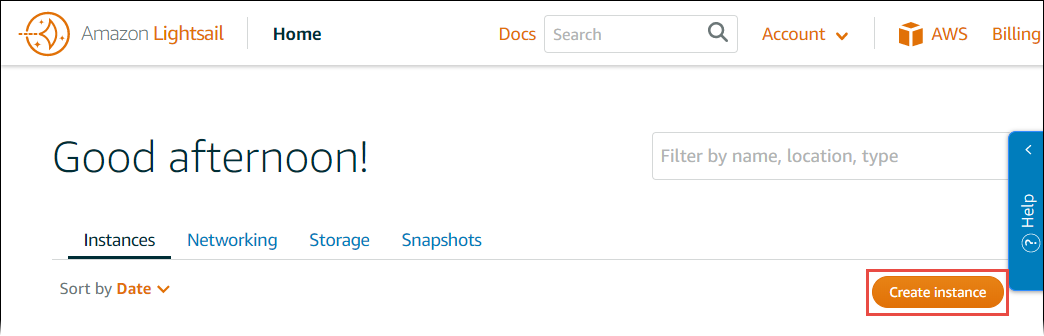
On the home page, with the Instances tab already selected, choose Create instance.
-
For Instance location, make sure that the location is an AWS Region AWS Cloud9 is available that you want to create the instance in. For more information, see AWS Cloud9 in the Amazon Web Services General Reference. To change the AWS Region, Availability Zone, or both, choose Change AWS Region and Availability Zone, and then follow the onscreen instructions.
-
For Pick your instance image, with Linux/Unix already chosen for Select a platform, and Apps + OS already chosen for Select a blueprint, choose a blueprint.

Note
If you want to create an instance with no app, choose OS Only instead of Apps + OS, and then choose a distribution.
To learn about the available choices, see Choosing an Amazon Lightsail instance image
on the Lightsail website. -
For Choose your instance plan, choose a plan, or leave the selected default plan.
-
For Name your instance, enter a name for the instance, or leave the suggested default name.
-
For the number of instances, enter the number of instances you want to create, or leave the default of a single instance (x 1).
-
Choose Create.
Step 2: Set up the instance to use it with AWS Cloud9
In this step, you connect to the running instance and then set it up so that AWS Cloud9 can use it later.
Note
The following instructions assume you chose Apps + OS in the previous step. If you chose OS Only and a distribution other than Ubuntu instead, you might need to adapt the following instructions accordingly.
-
With the Lightsail console still open from the previous step, on the Instances tab, in the card for the instance, choose the instance's name.

-
On the Connect tab, for Connect using your own SSH client, note the Public IP and User name values, as you need them later.

-
Choose Connect using SSH.
-
Make sure that the instance has the latest system updates. To do this, in the terminal session that appears, run the command
sudo apt update. -
Check to see if Python is installed, and if it is, check to be sure the version is 2.7. To check the version, run the command
python --version, and note the version number that appears. If no version number appears, or if the version isn't 2.7, install Python 2.7 on the instance by running the commandsudo apt install -y python-minimal. -
Check to see if Node.js is installed, and if it is, check that the version is 0.6.16 or later. To check the version, run the command
node --version, and note the version number that appears. If no version number appears, or the version isn't 0.6.16 or later, we recommend you use Node Version Manager (nvm) to install Node.js on the instance.To do this, run the following commands one at a time, in the following order, to update the instance, install Node Version Manager (nvm) on the instance, activate nvm on the instance, and then install the latest version of Node.js on the instance.
sudo apt update curl -o- https://raw.githubusercontent.com/creationix/nvm/v0.33.0/install.sh | bash . ~/.bashrc nvm install node -
Run the command
which node, and note the value that appears. You will need it later.Note
If the output of the command
which nodeis something like/usr/sbin/node, AWS Cloud9 can't find Node.js in that path. Instead, usenvmto install Node.js, as described in the previous step in this procedure. Then, run the commandwhich nodeagain and note the new value that appears. -
Download and run the AWS Cloud9 Installer on the instance.
Step 3: Create and connect to an AWS Cloud9 SSH Development Environment
In this step, you use the AWS Cloud9 console and the instance's terminal to create an SSH environment and then connect the environment to the running instance.
-
With the terminal session still open from the previous step, sign in to the AWS Cloud9 console, as follows:
-
If you're the only individual using your AWS account or you're an IAM user in a single AWS account, go to https://console.aws.amazon.com/cloud9/
. -
If your organization uses AWS IAM Identity Center, see your AWS account administrator for sign-in instructions.
Note
For this step, you will work with two different AWS services at the same time. Now, suppose that you signed in to the Lightsail console as an IAM administrator user, but you want a different entity to own the new SSH environment. For this case, we suggest opening a different web browser and signing in to the AWS Cloud9 console as that entity.
-
-
In the AWS Cloud9 console, choose the AWS Region that matches the one you created the instance in frameworks.

-
If a welcome page is displayed, for New AWS Cloud9 environment, choose Create environment. Otherwise, choose Create environment.

Or:

-
On the Name environment page, for Name, enter a name for your environment.
-
Add a description to your environment in the Description field.
-
For Environment type choose Existing compute. This is important as you need to select this option to display the User and Host options.
-
For User, enter the User name value that you noted earlier.
-
For Host, enter the Public IP value that you noted earlier.
-
For Port, leave the default value of 22.
-
Expand Additional details.
-
For Environment path, enter the path that AWS Cloud9 starts from after login, which is
~/. This is the root of the user's home directory. -
For Node.js binary path, enter the value of the command
which nodethat you noted earlier. -
Leave SSH jump host blank.
-
Store the public SSH key that AWS Cloud9 creates for this environment in your system clipboard. To do this, choose Copy key to clipboard.
Note
To see the public SSH key value that was copied, expand View public SSH key.
-
Save the public SSH key value you just copied to the instance. To do this, use vi, a popular text editor, which is already installed on the instance:
-
In the terminal session for the instance, run the command
vi ~/.ssh/authorized_keys. -
In the vi editor that appears, go to the end of the file, and switch to insert mode. To do this, press
I, thenA. (-- INSERT -- appears at the bottom of the vi editor.) -
Add two carriage returns to the end of the file by pressing
Entertwice. -
Paste the contents of your system clipboard, which contains the public SSH key value you just copied, to the terminal session clipboard. To do this, in the bottom corner of the terminal session window, choose the clipboard button, then paste the contents of your system clipboard into the box.

-
Paste the contents of the terminal session clipboard into the vi editor. To do this, at the insertion point in the vi editor, press
Ctrl + Shift + V. -
Save the file. To do this, press
Escto enter command mode. (-- INSERT -- disappears from the bottom of the vi editor.) Type:wq(towritethe file and thenquitthe vi editor), and then pressEnter.
-
-
Back in the AWS Cloud9 console, choose Next step.
-
On the Review choices page, choose Create environment. Wait while AWS Cloud9 creates your environment and then displays the AWS Cloud9 IDE for the environment. This can take several minutes.
After AWS Cloud9 creates your environment, it displays the AWS Cloud9 IDE for the environment.
If AWS Cloud9 doesn't display the IDE after at least five minutes, there might be a problem with your web browser, your AWS access permissions, the instance, or the associated virtual private cloud (VPC). For possible fixes, see Cannot Open an Environment in Troubleshooting.
Step 4: Use the AWS Cloud9 IDE to change the code on the instance
Now that the IDE appears for the new environment, you can use the terminal session in the IDE instead of the Lightsail terminal session. The IDE provides a rich code editing experience with support for several programming languages and runtime debuggers. The IDE also includes color themes, shortcut keybindings, programming language-specific syntax coloring and code formatting.
To learn how to use the IDE, see Tour of the AWS Cloud9 IDE.
To learn how to change the code on your instance, we recommend the following resources:
-
All Getting the application password for your 'powered by Bitnami' Lightsail image
on the Lightsail website -
Drupal: BitnamiDrupal For AWS Cloud
on the Bitnami website, and Tutorials and site recipes on the Drupal website -
GitLab CE: BitnamiGitLab CE for AWS Cloud
on the Bitnami website, and GitLab Documentation on the GitLab website -
Joomla: BitnamiJoomla! For AWS Cloud
on the Bitnami website, and Getting Started with Joomla! on the Joomla! website -
LAMP Stack: BitnamiLAMP for AWS Cloud
on the Bitnami website -
Magento: BitnamiMagento For AWS Cloud
on the Bitnami website, and the Magento User Guide on the Magento website -
MEAN: BitnamiMEAN For AWS Cloud
on the Bitnami website -
NGINX: BitnamiNGINX For AWS Cloud
on the Bitnami website, and the NGINX Wiki on the NGINX website -
Node.js: BitnamiNode.Js For AWS Cloud
on the Bitnami website, and the Getting Started Guide on the Node.js website -
Plesk Hosting Stack on Ubuntu: Set up and configure Plesk on Amazon Lightsail
. -
Redmine: Bitnami Redmine For AWS Cloud
on the Bitnami website, and Getting Started on the Redmine website -
WordPress: Getting started using WordPress from your Amazon Lightsail instance
on the Lightsail website, and Bitnami WordPress For AWS Cloud on the Bitnami website
