기계 번역으로 제공되는 번역입니다. 제공된 번역과 원본 영어의 내용이 상충하는 경우에는 영어 버전이 우선합니다.
Amazon EMR의 Zeppelin에서 Flink 작업
소개
Amazon EMR 릴리스 6.10.0 이상에서는 Apache Flink와 Apache Zeppelin의 통합을 지원합니다. Zeppelin 노트북을 통해 대화형 방식으로 Flink 작업을 제출할 수 있습니다. Flink 인터프리터를 사용하면 Flink 쿼리를 실행하고, Flink 스트리밍 및 배치 작업을 정의하며, Zeppelin 노트북 내에서 출력을 시각화할 수 있습니다. Flink 인터프리터는 Flink REST API를 기반으로 빌드됩니다. 이를 통해 Zeppelin 환경 내에서 Flink 작업에 액세스하고 해당 작업을 조작하여 실시간 데이터 처리 및 분석을 수행할 수 있습니다.
Flink 인터프리터에는 4개의 하위 인터프리터가 있습니다. 용도는 다양하지만 모두 JVM에 속하며 Flink에 사전 구성된 동일한 진입점(ExecutionEnviroment, StreamExecutionEnvironment, BatchTableEnvironment, StreamTableEnvironment)을 공유합니다. 인터프리터는 다음과 같습니다.
-
%flink-ExecutionEnvironment,StreamExecutionEnvironment,BatchTableEnvironment,StreamTableEnvironment를 생성하고 Scala 환경 제공 -
%flink.pyflink- Python 환경 제공 -
%flink.ssql- 스트리밍 SQL 환경 제공 -
%flink.bsql- 배치 SQL 환경 제공
사전 조건
-
Amazon EMR 6.10.0 이상에서 생성된 클러스터에 대해 Flink와 Zeppelin의 통합이 지원됩니다.
-
이러한 단계에 필요한 EMR 클러스터에 호스팅되는 웹 인터페이스를 보려면 인바운드 액세스를 허용하도록 SSH 터널을 구성해야 합니다. 자세한 내용은 프라이머리 노드에서 호스팅되는 웹 사이트를 표시하도록 프록시 설정 구성을 참조하세요.
EMR 클러스터에서 Zeppelin-Flink 구성
다음 단계를 사용하여 Apache Zeppelin 기반 Apache Flink가 EMR 클러스터에서 실행되도록 구성합니다.
-
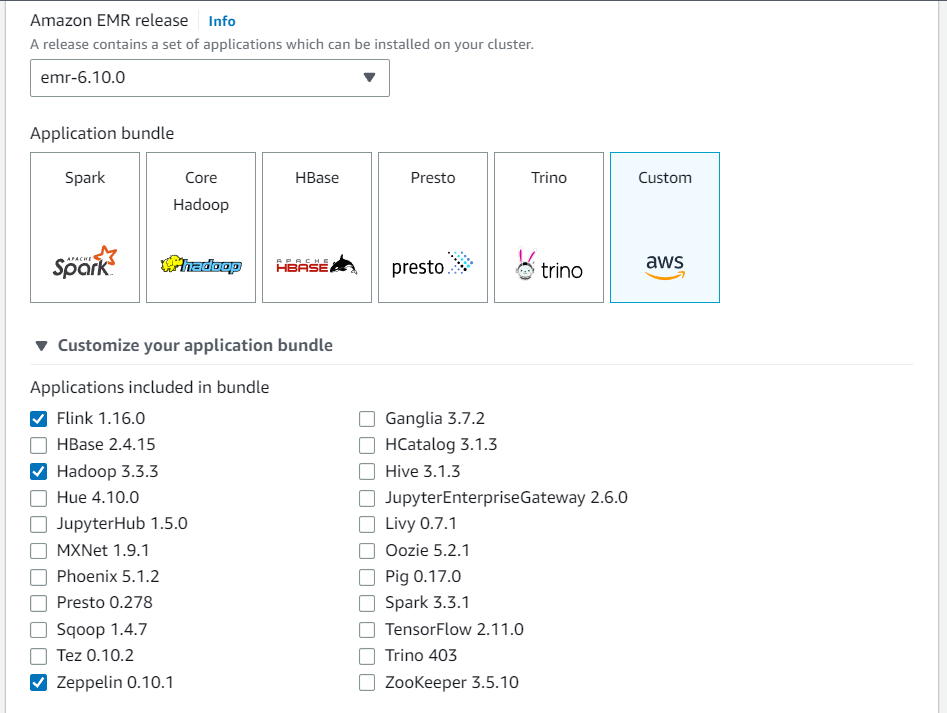
Amazon EMR 콘솔에서 새 클러스터를 생성합니다. Amazon EMR 릴리스의 경우 emr-6.10.0 이상을 선택합니다. 그런 다음 사용자 지정 옵션을 사용하여 애플리케이션 번들을 사용자 지정하도록 선택합니다. 번들에 최소한 Flink, Hadoop, Zeppelin을 포함합니다.
-
원하는 설정으로 나머지 클러스터를 생성합니다.
-
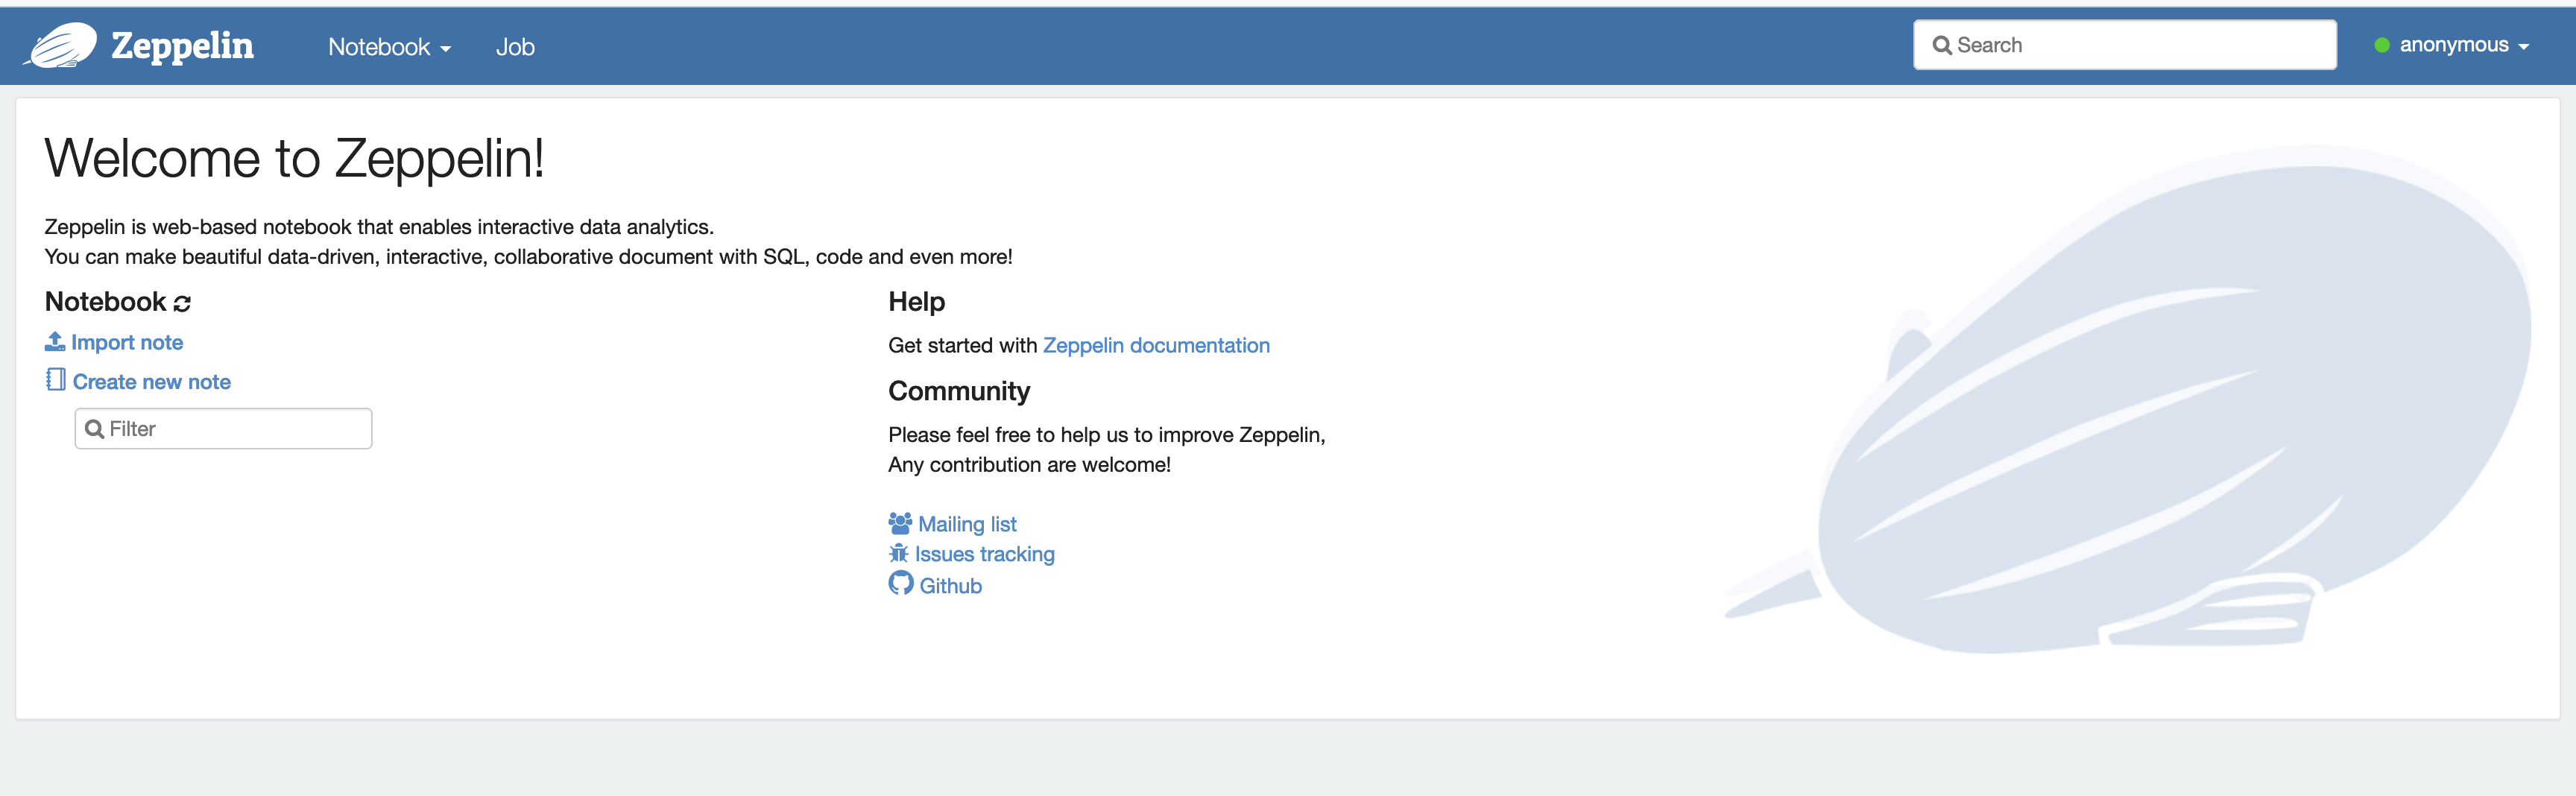
클러스터가 실행되면 콘솔에서 클러스터를 선택하여 세부 정보를 확인하고 애플리케이션 탭을 엽니다. 애플리케이션 사용자 인터페이스 섹션에서 Zeppelin을 선택하여 Zeppelin 웹 인터페이스를 엽니다. 사전 조건에 설명된 대로 프라이머리 노드에 대한 SSH 터널과 프록시 연결을 사용하여 Zeppelin 웹 인터페이스에 대한 액세스를 설정했는지 확인합니다.
-
이제 Flink를 기본 인터프리터로 사용하여 Zeppelin 노트북에서 새 노트를 생성할 수 있습니다.

-
Zeppelin 노트북에서 Flink 작업을 실행하는 방법을 보여주는 다음 코드 예제를 참조하세요.
EMR 클러스터에서 Zeppelin-Flink를 사용하여 Flink 작업 실행
-
예제 1, Flink Scala
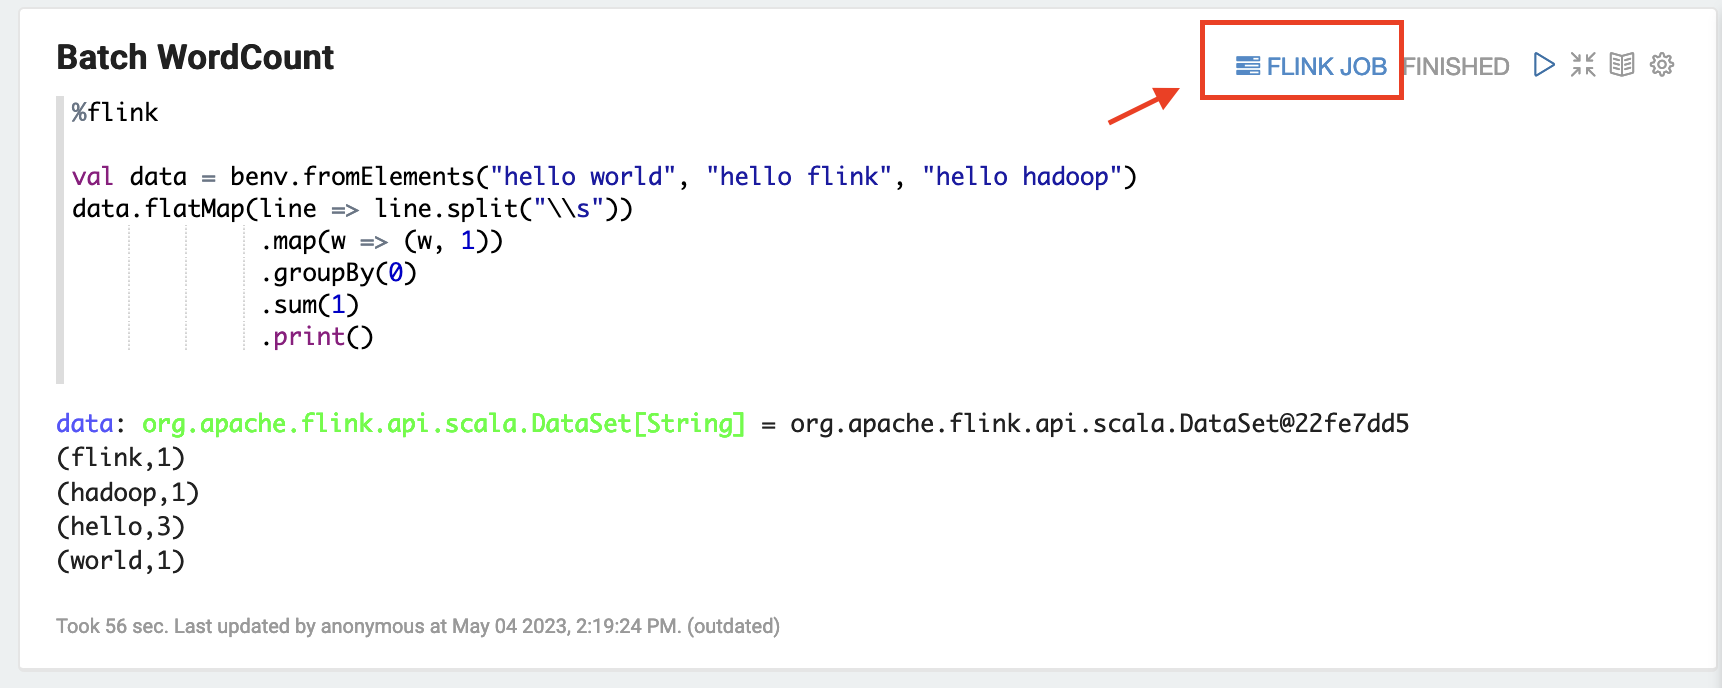
a) 배치 WordCount 예제(SCALA)
%flink

val data = benv.fromElements("hello world", "hello flink", "hello hadoop")
data.flatMap(line => line.split("\\s"))
             .map(w => (w, 1))
             .groupBy(0)
             .sum(1)
             .print()
b) WordCount 스트리밍 예제(SCALA)
%flink

val data = senv.fromElements("hello world", "hello flink", "hello hadoop")
data.flatMap(line => line.split("\\s"))
  .map(w => (w, 1))
  .keyBy(0)
  .sum(1)
  .print

senv.execute()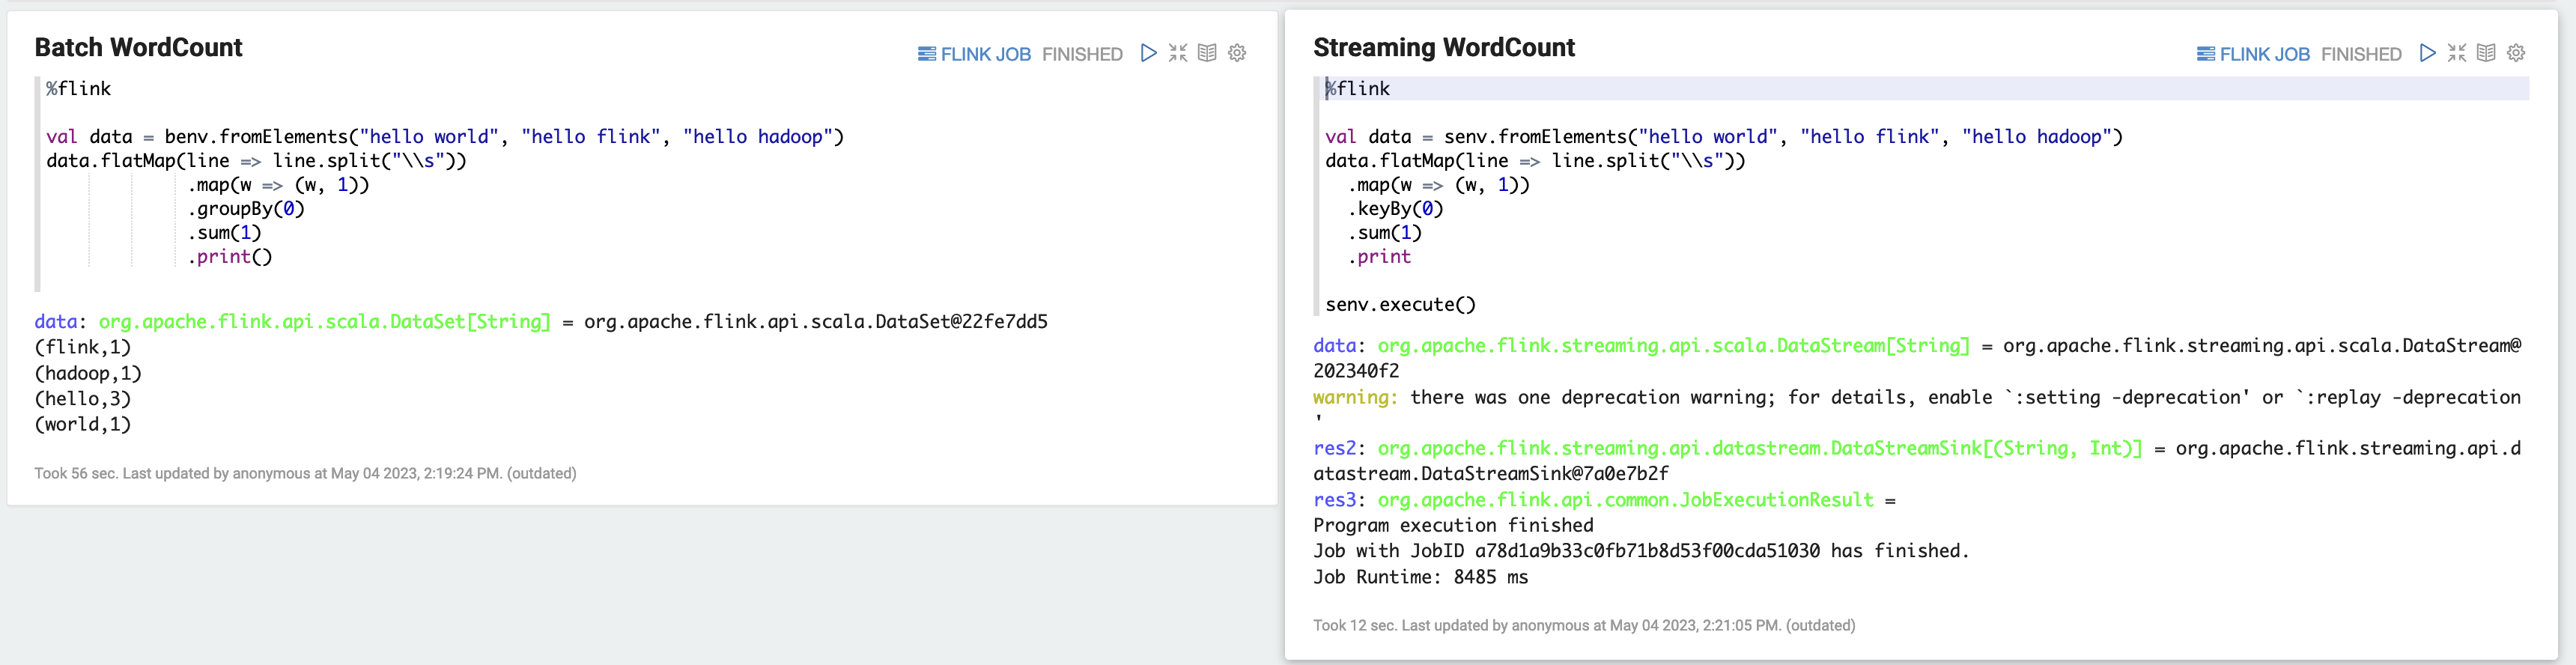
-
예제 2, Flink 스트리밍 SQL
%flink.ssql
SET 'sql-client.execution.result-mode' = 'tableau';
SET 'table.dml-sync' = 'true';
SET 'execution.runtime-mode' = 'streaming';

create table dummy_table (
  id int,
  data string
) with (
  'connector' = 'filesystem',
  'path' = 's3://s3-bucket/dummy_table',
  'format' = 'csv'
);

INSERT INTO dummy_table SELECT * FROM (VALUES (1, 'Hello World'), (2, 'Hi'), (2, 'Hi'), (3, 'Hello'), (3, 'World'), (4, 'ADD'), (5, 'LINE'));

SELECT * FROM dummy_table;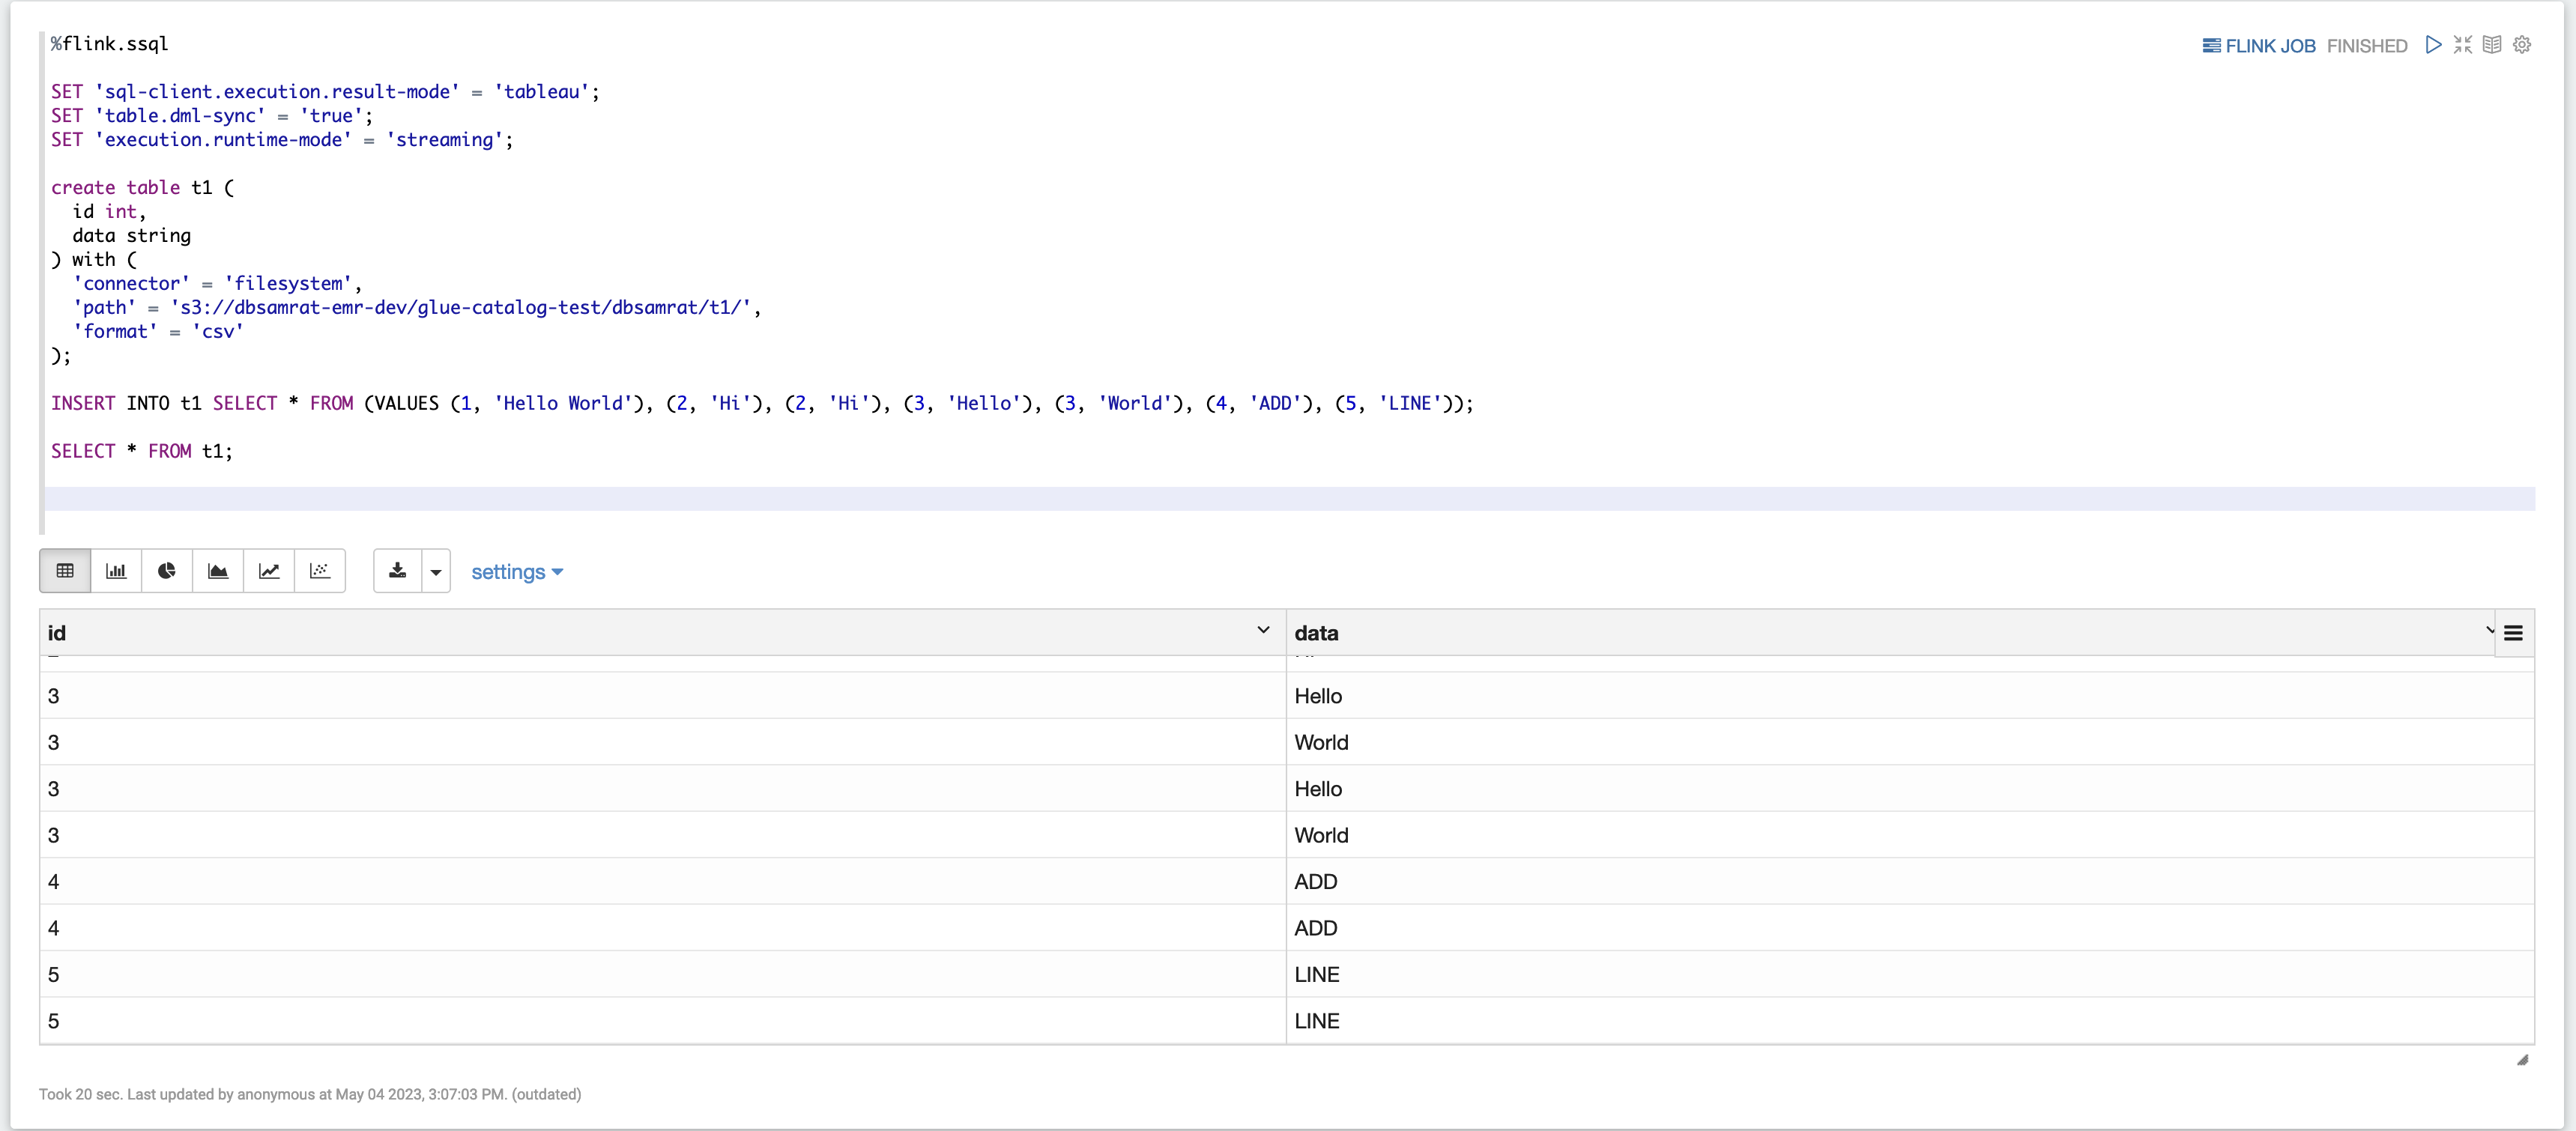
-
예제 3, Pyflink. 샘플 텍스트 파일
word.txt를 S3 버킷에 업로드해야 합니다.%flink.pyflink import argparse import logging import sys from pyflink.common import Row from pyflink.table import (EnvironmentSettings, TableEnvironment, TableDescriptor, Schema, DataTypes, FormatDescriptor) from pyflink.table.expressions import lit, col from pyflink.table.udf import udtf def word_count(input_path, output_path): t_env = TableEnvironment.create(EnvironmentSettings.in_streaming_mode()) # write all the data to one file t_env.get_config().set("parallelism.default", "1") # define the source if input_path is not None: t_env.create_temporary_table( 'source', TableDescriptor.for_connector('filesystem') .schema(Schema.new_builder() .column('word', DataTypes.STRING()) .build()) .option('path', input_path) .format('csv') .build()) tab = t_env.from_path('source') else: print("Executing word_count example with default input data set.") print("Use --input to specify file input.") tab = t_env.from_elements(map(lambda i: (i,), word_count_data), DataTypes.ROW([DataTypes.FIELD('line', DataTypes.STRING())])) # define the sink if output_path is not None: t_env.create_temporary_table( 'sink', TableDescriptor.for_connector('filesystem') .schema(Schema.new_builder() .column('word', DataTypes.STRING()) .column('count', DataTypes.BIGINT()) .build()) .option('path', output_path) .format(FormatDescriptor.for_format('canal-json') .build()) .build()) else: print("Printing result to stdout. Use --output to specify output path.") t_env.create_temporary_table( 'sink', TableDescriptor.for_connector('print') .schema(Schema.new_builder() .column('word', DataTypes.STRING()) .column('count', DataTypes.BIGINT()) .build()) .build()) @udtf(result_types=[DataTypes.STRING()]) def split(line: Row): for s in line[0].split(): yield Row(s) # compute word count tab.flat_map(split).alias('word') \ .group_by(col('word')) \ .select(col('word'), lit(1).count) \ .execute_insert('sink') \ .wait() logging.basicConfig(stream=sys.stdout, level=logging.INFO, format="%(message)s") word_count("s3://s3_bucket/word.txt", "s3://s3_bucket/demo_output.txt")
-
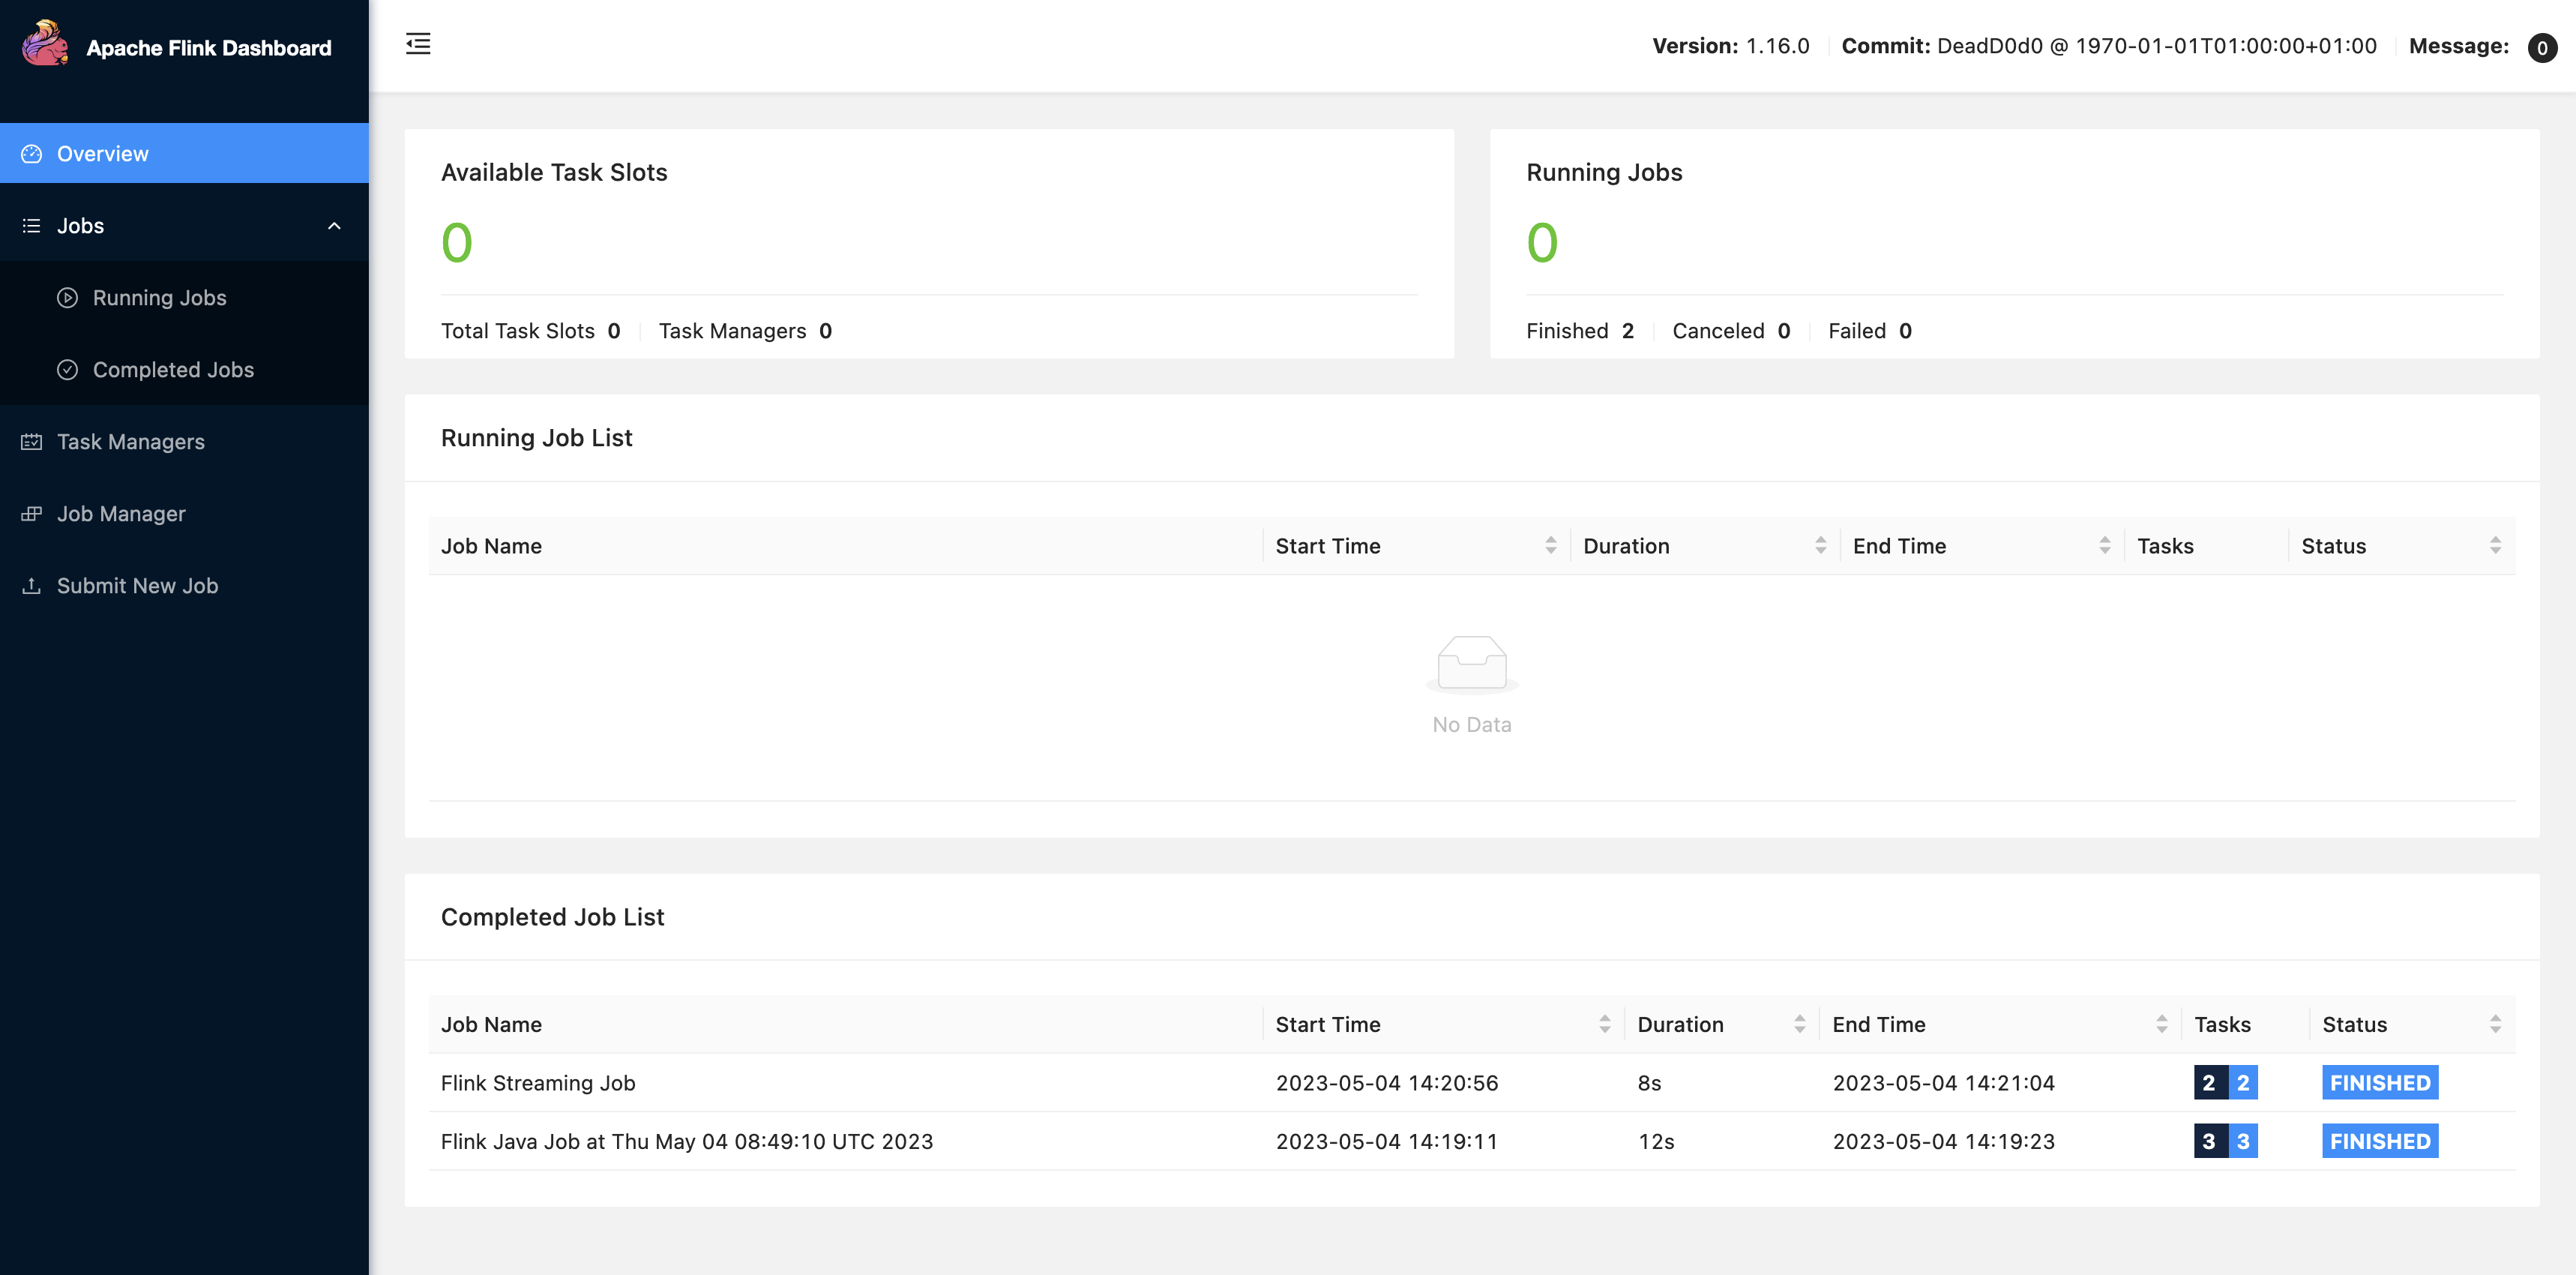
Zeppelin UI에서 FLINK JOB을 선택하여 Flink 웹 UI에 액세스하고 이를 확인합니다.
-
FLINK JOB 경로를 선택하여 브라우저의 다른 탭에서 Flink 웹 콘솔로 이동합니다.